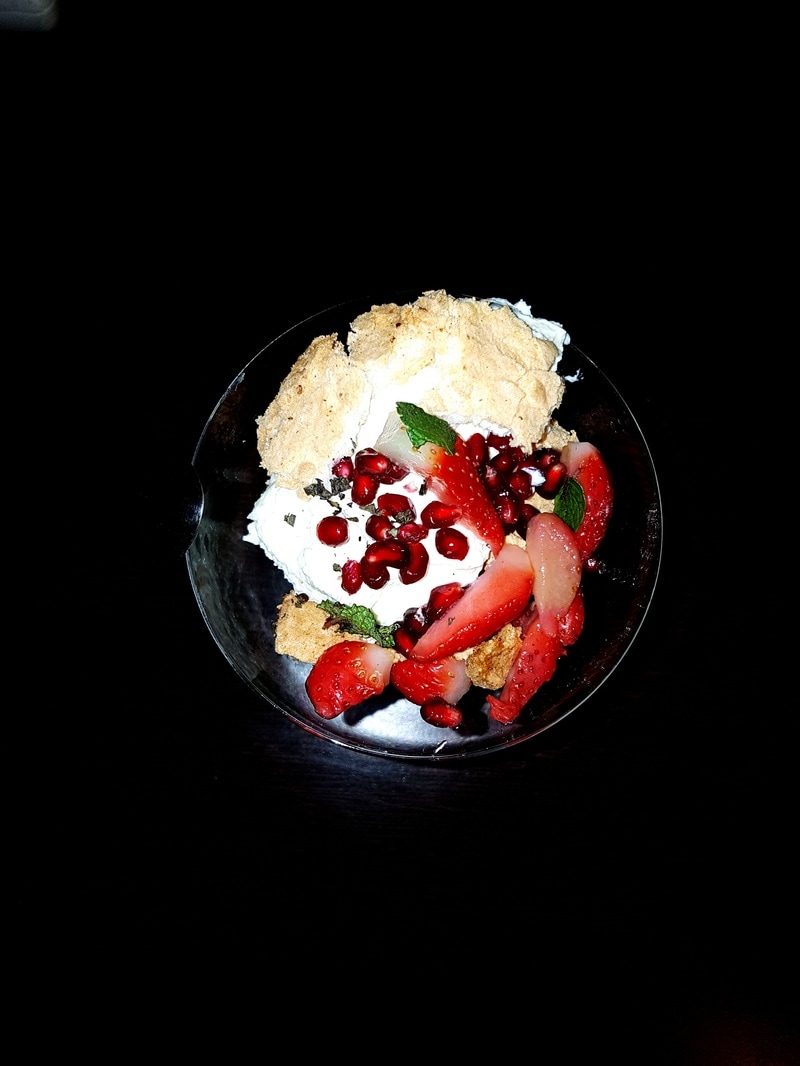
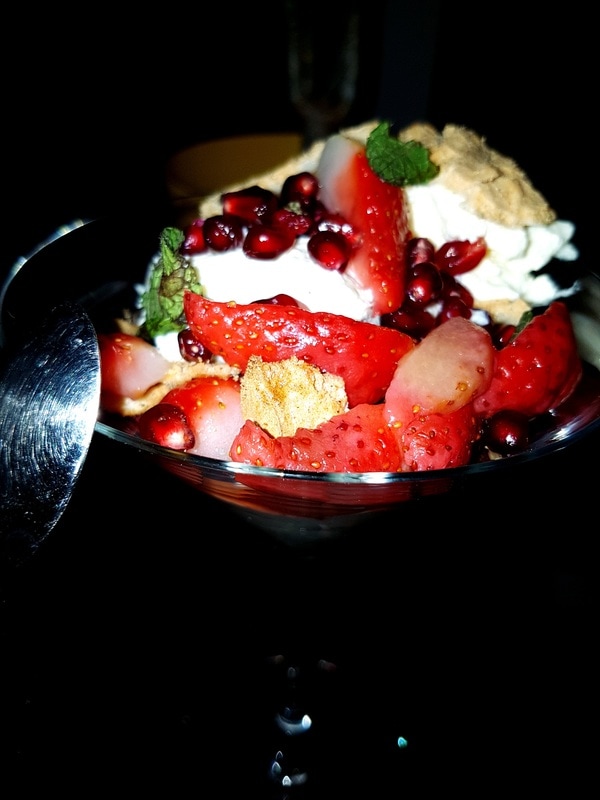
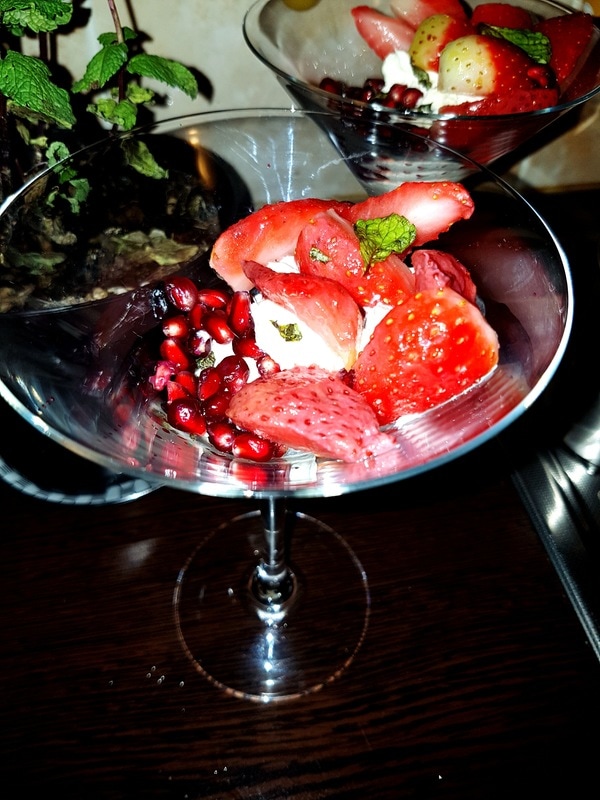
 Poate cel mai fotogenic desert pe care am avut ocazia sa il savurez in ultima vreme. Desi simplu, este spectaculos si adecvat daca aveti oaspeti sau pur si simplu daca aveti pofta de un desert fabulos. ----------------------------------------------------------------------------- Perhaps the most photogenic dessert I had the chance to enjoy in quite some time. Rather simple in fact, this baby is a real show-stopper whenever you have guests over or are simply in a mood for a stylish treat.
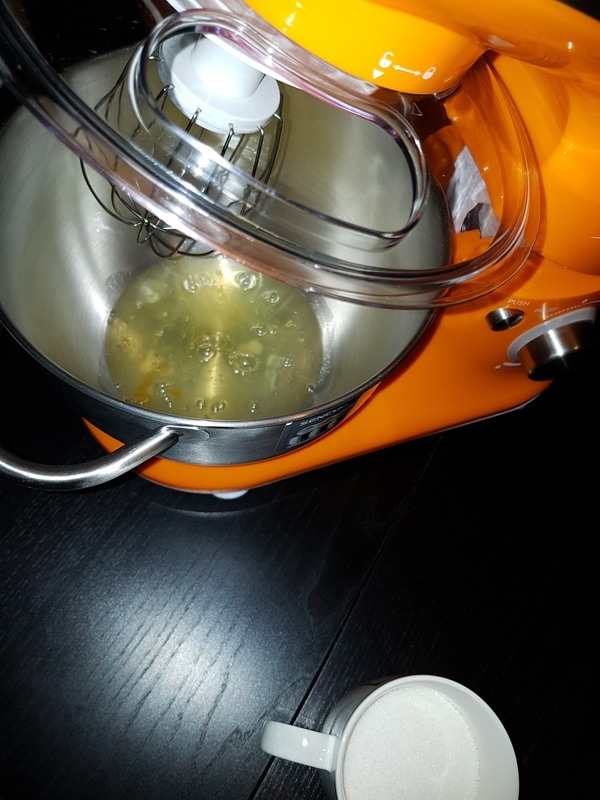
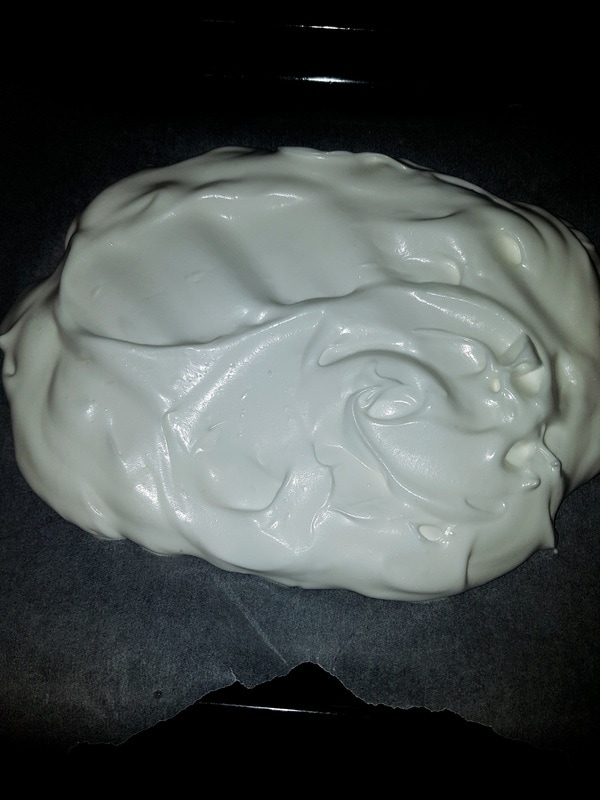
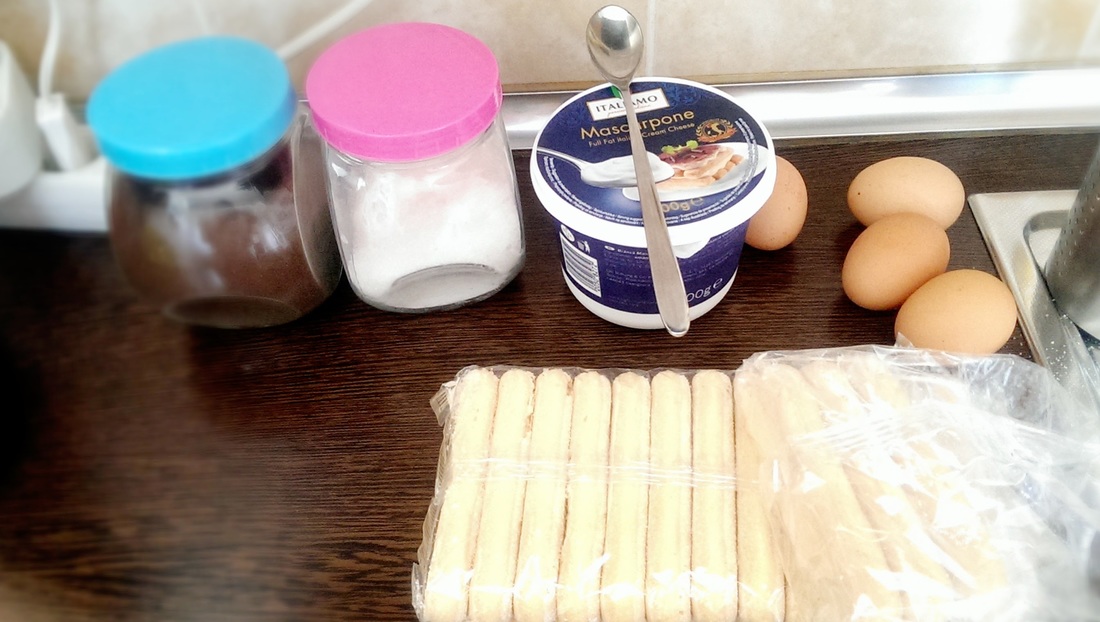
SUMAR: Ce am folosit pentru 4 portii: Pentru bezea: 6 albusuri 2 lingurita de zeama de lamaie 200g zahar Pentru crema: 200g mascarpone 200ml smantana pentru frisca neindulcita 100g zahar 30ml rom Ce-am gresit: Bezeaua mea la un cuptor cu gaz se face la treapta cea mai mica in cca. 40 minute. Indicatiile din reteta promit ca ar fi gata in 3 ore (!), e drept - la un cuptor cu ventilatie. La mine a iesit putin bronzata, caci am lasat-o o ora in pofida feeling-ului care ma sfatuia contrariul. Ce fac mai bun sau mai bine data viitoare: Am grija la timpul de coacere. De unde am reteta: De aici. ----------------------------------------------------------------------------------------------------- SUMMARY What I used for 4 servings: For the marshmallow layering: 6 egg whites 200g plain white sugar 2 tbsp. lemon juice For the filling: 200g mascarpone 200ml whipped cream, unsweetened 100g plain white sugar 30ml rum What I did wrong: My classic (gas) oven bakes a regular marshmallow in about 40 minutes; however the recipe refers to 3 hours (!) of baking, sure, in a ventilation oven. Mine got a little bit too tanned, as I tried leaving it for 1 hour against my better judgement. What I need to do better or tastier the next time: I will take more care of the baking time. How I came across this recipe: Here.
Pentru ca imi luasem jucarie noua, reteta asta s-a potrivit manusa. Am lasat in mixer albusurile si, cand spuma incepea sa se contureze, am pus zeama de lamaie si cate o lingura de zahar; nu ama adaugat alt zahar decat atunci cand primul s-a topit si tot asa. In mod clasic, bezeaua e gata de coacere cand nu cade din bolul rasturnat. ----------------------------------------------------------------------------- Since I just purchased some new grown-up toys, this recipe was ideal. I basically abandoned the eggwhites in the mixer and did anything else. When mid-mixed, I added my lemon juice and started adding the sugar, one tablespoon at a time. Once the first tablespoon of sugar seemed melted, I only then added the next one and so on until all sugar was 'swalloed'. Mixture is ready when firm (you can test by flipping the mixer bowl - if ready, it will not fall; be careful, though).
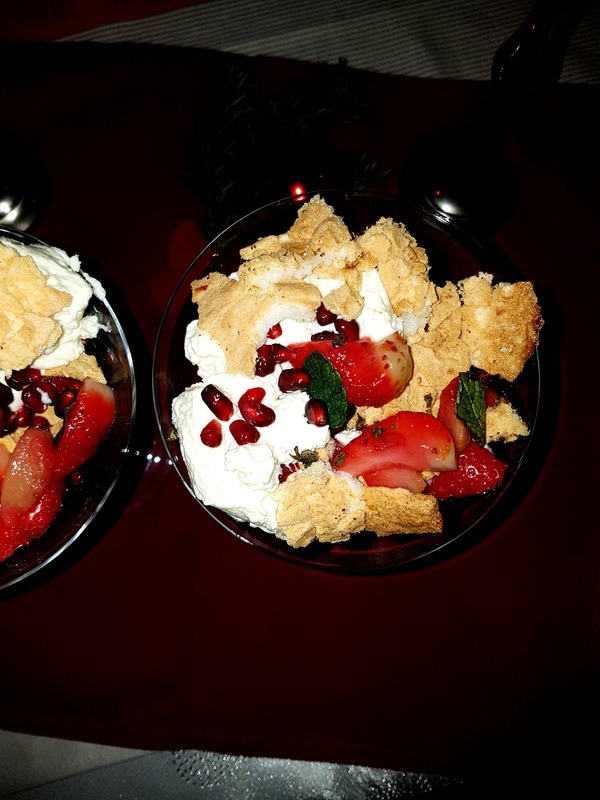
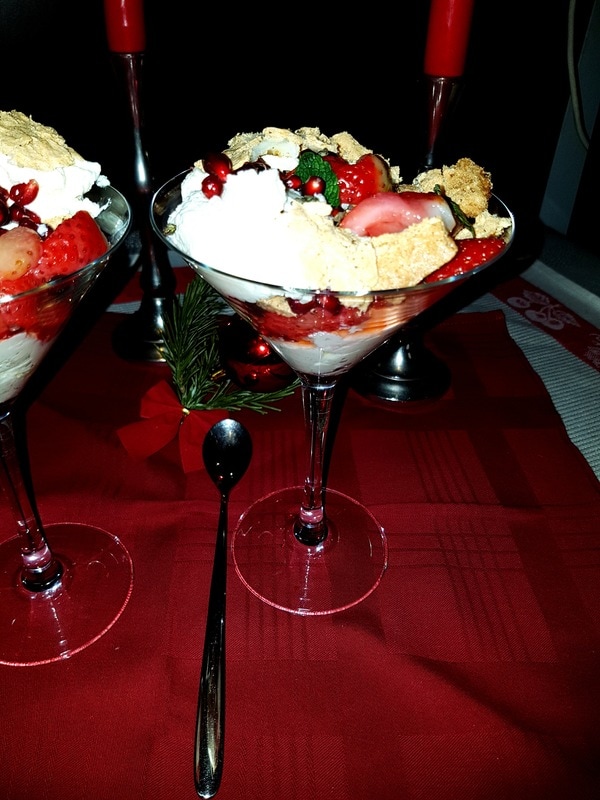
Frisca cu zaharul adaugat, batuta cu mixerul, amestecata cu mascarpone si shot-ul de rom fac toata crema. Cantitatea de zahar se poate adapta, evident, dupa preferinte. O data gata, bezeaua se sfarama in bucati grosolane si se aseaza alternativ cu crema si fructele. Eu am folosit capsune si rodie. Cateva frunzulite de menta proaspata aduc o prospetime binevenita oricand, dar cu aer realmente exotic in timpul iernii. ----------------------------------------------------------------------------- The cream and sugar get whipped and then mixed with the mascarpone and rum shot. This is all the effort you put in making the cream. Yes, you are welcome :). Once ready baked, the marshmallow needs to be teared apart into gross pieces and set in a serving bowl; I used cocktail glasses, as these show-off the layers of meringue, white cream and red fruits really nice. Strawberries and pomegranate, accompanied by some fresh mint leaves turn this into one stylish dessert, even quite exotic during winter time. 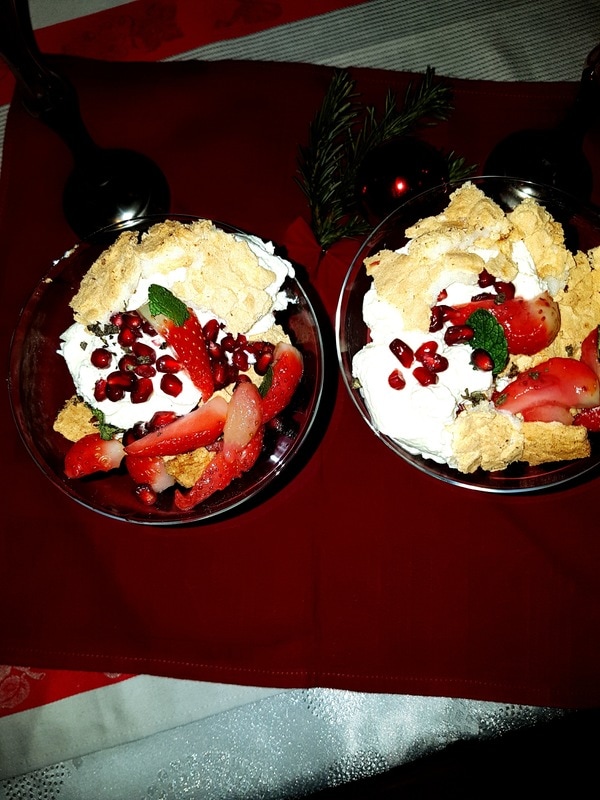 Bucurati-va. Noi ne-am fericit. ----------------------------------------------------------------------------- Enjoy. We sure as hell did. ----------------------------------------------------------------------------- TRY SEXUAL I'LL TRY ANY RECIPE (AT LEAST) ONCE.
0 Comments
Sa fim intelesi de la bun inceput: placinta dobrogeana are cateva caracteristici esentiale, legate de foile facute de la zero, umplutura cu branza sarata si - desigur - gustul delicios. Pentru ca nu toata lumea poate intelege sau fi de acord cu asta, cineva o fi inventat si placinta cu mere. Ca sa fim agreati, o facem si pe asta cu mere sau pe cea cu branza dulce, dar rogu-va nu le mai numiti placinte dobrogene. Ca ni se cam strepezesc dintii, celor care am crescut cu adevarata placinta dobrogeana. ----------------------------------------------------------------------------- This is a recipe for a Romanian traditional pie, which is usually made with sour cheese, pastry sheets made from scratch and gets along with the reputation of being excellent in terms of taste. People these days make it with apples or sweet cheese stuffing, but this is by no means the traditional way of making it. Here's what we need to do.
SUMAR: Ce am folosit pentru o tava de placinta (eu am facut doua, una cu mere si una cu branza): Pentru foi: 500g faina alba (eu folosesc Arpis si de regula sunt multumita) 150-200ml apa calduta 2 linguri de otet de mere 2 linguri de ulei un praf de sare ulei+faina din belsug pentru intins foile Pentru umplutura de branza: 500g branza proaspata sau urda 250-300g branza telemea, eu am pus de oaie 3-4 oua 1 lingura de smantana putina sare putin susan Pentru umplutura de mere: cam 1kg mere rosii bine coapte 250-300g zahar cca. 50g unt un baton de scortisoara 1 ou+1 lingura de smantana putin zahar brun Ce-am gresit: Pai sunt semi-experta la placinte. Ce fac mai bun sau mai bine data viitoare: Nu stiu daca o reteta clasica precum aceasta mai poate fi imbunatatita in vreun fel. As zice ca nu. De unde am reteta: Reteta in sine e un clasic in viata, insa reteta de foi este de aici, si e corecta (da, nu se foloseste agent de crestere, ci otetul actioneaza pentru fragezire iar foaia e atat de intinsa incat se fragezeste imediat). ----------------------------------------------------------------------------------------------------- SUMMARY What I used for 1 pie (i bakes 2, one with cheese and one with apples): For the pastry sheets 500g plain white flour 150-200ml warm water 2 tbsp. apples vinegar 2 tbsp. sunflower oil some salt For the cheese stuffing 500g cottage cheese 250-300 regular cheese 3-4 eggs 1 tbsp. sour cream some salt&sesame For the apple stuffing about 1kg apples 250-300g sugar about 50g butter 1 cinnamon bar 1 egg+1 tbsp. sour cream some brown butter to be sprinkled on top What I did wrong: Not much, since this recipe comes in really easy to me. What I need to do better or tastier the next time: I believe this is so tasty there is not much room for improvement. How I came across this recipe: This recipe is in fact a classic; the recipe I used for the pastry sheets however is from here and it is correct (yes, there is no leaven used and this is because the vinegar will act as a moisturer and will work fine considering the pastry sheets are very thin).
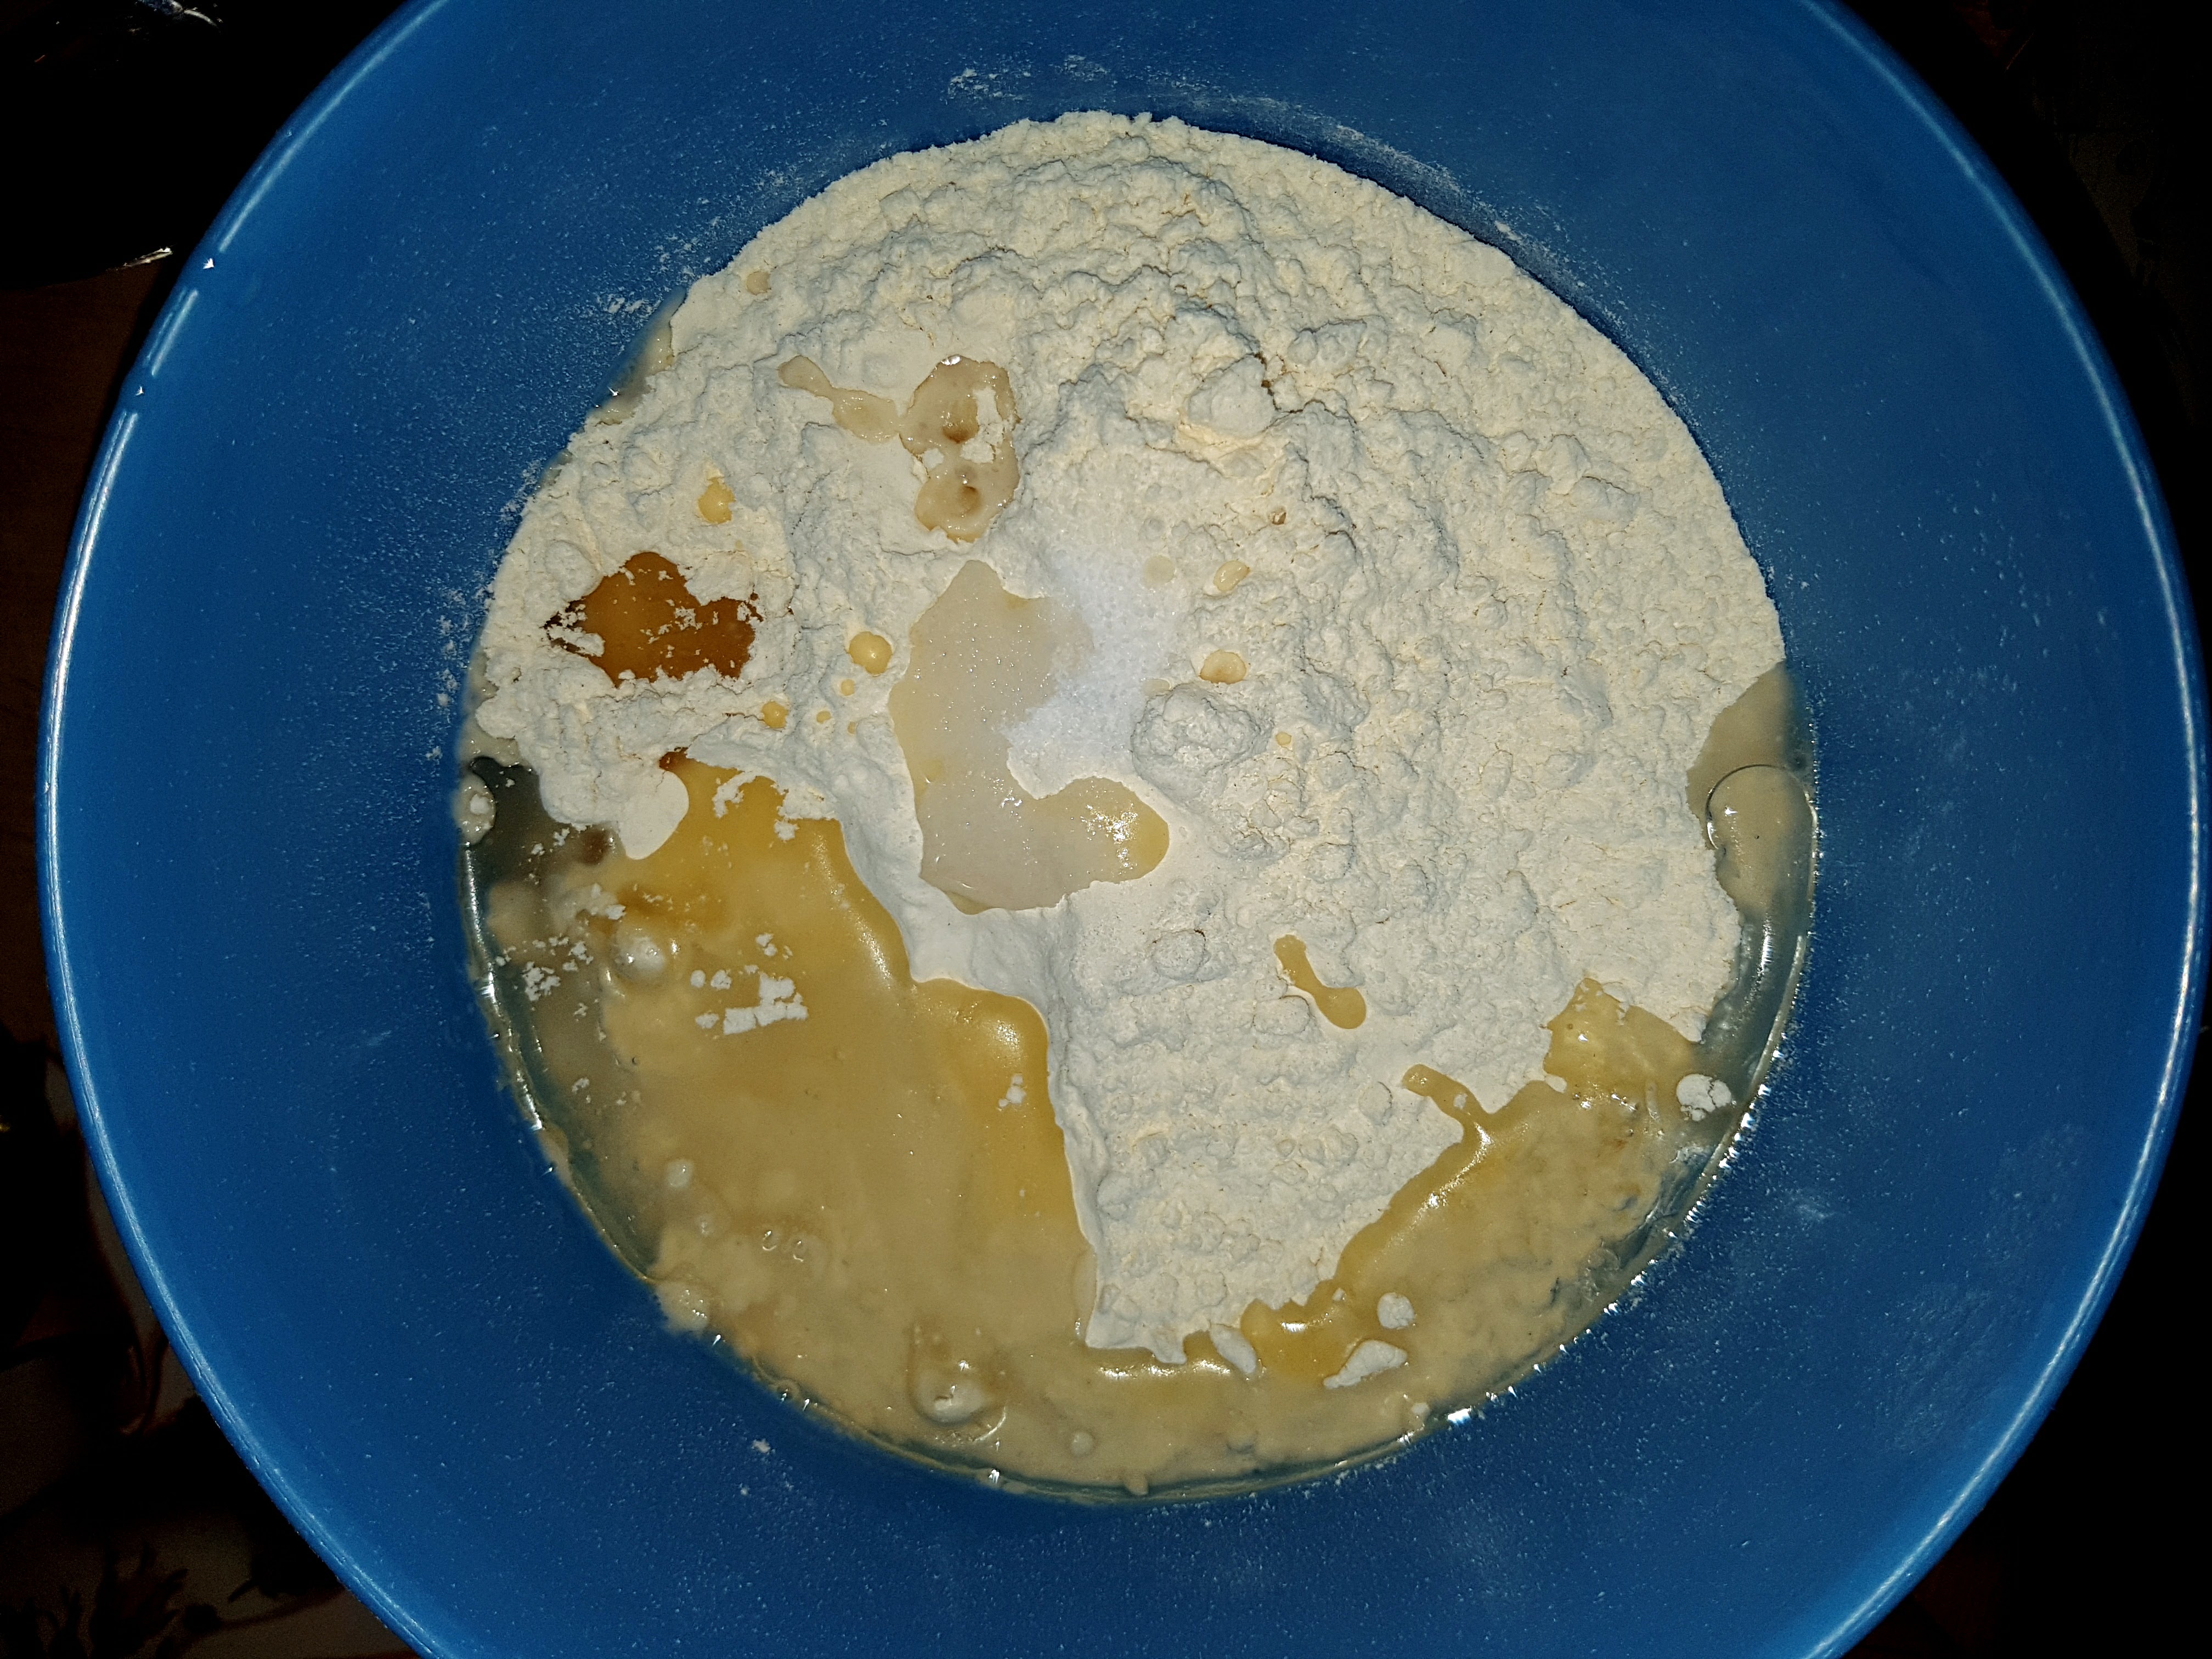
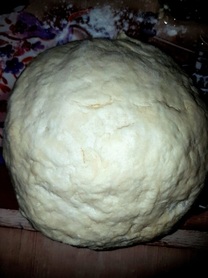
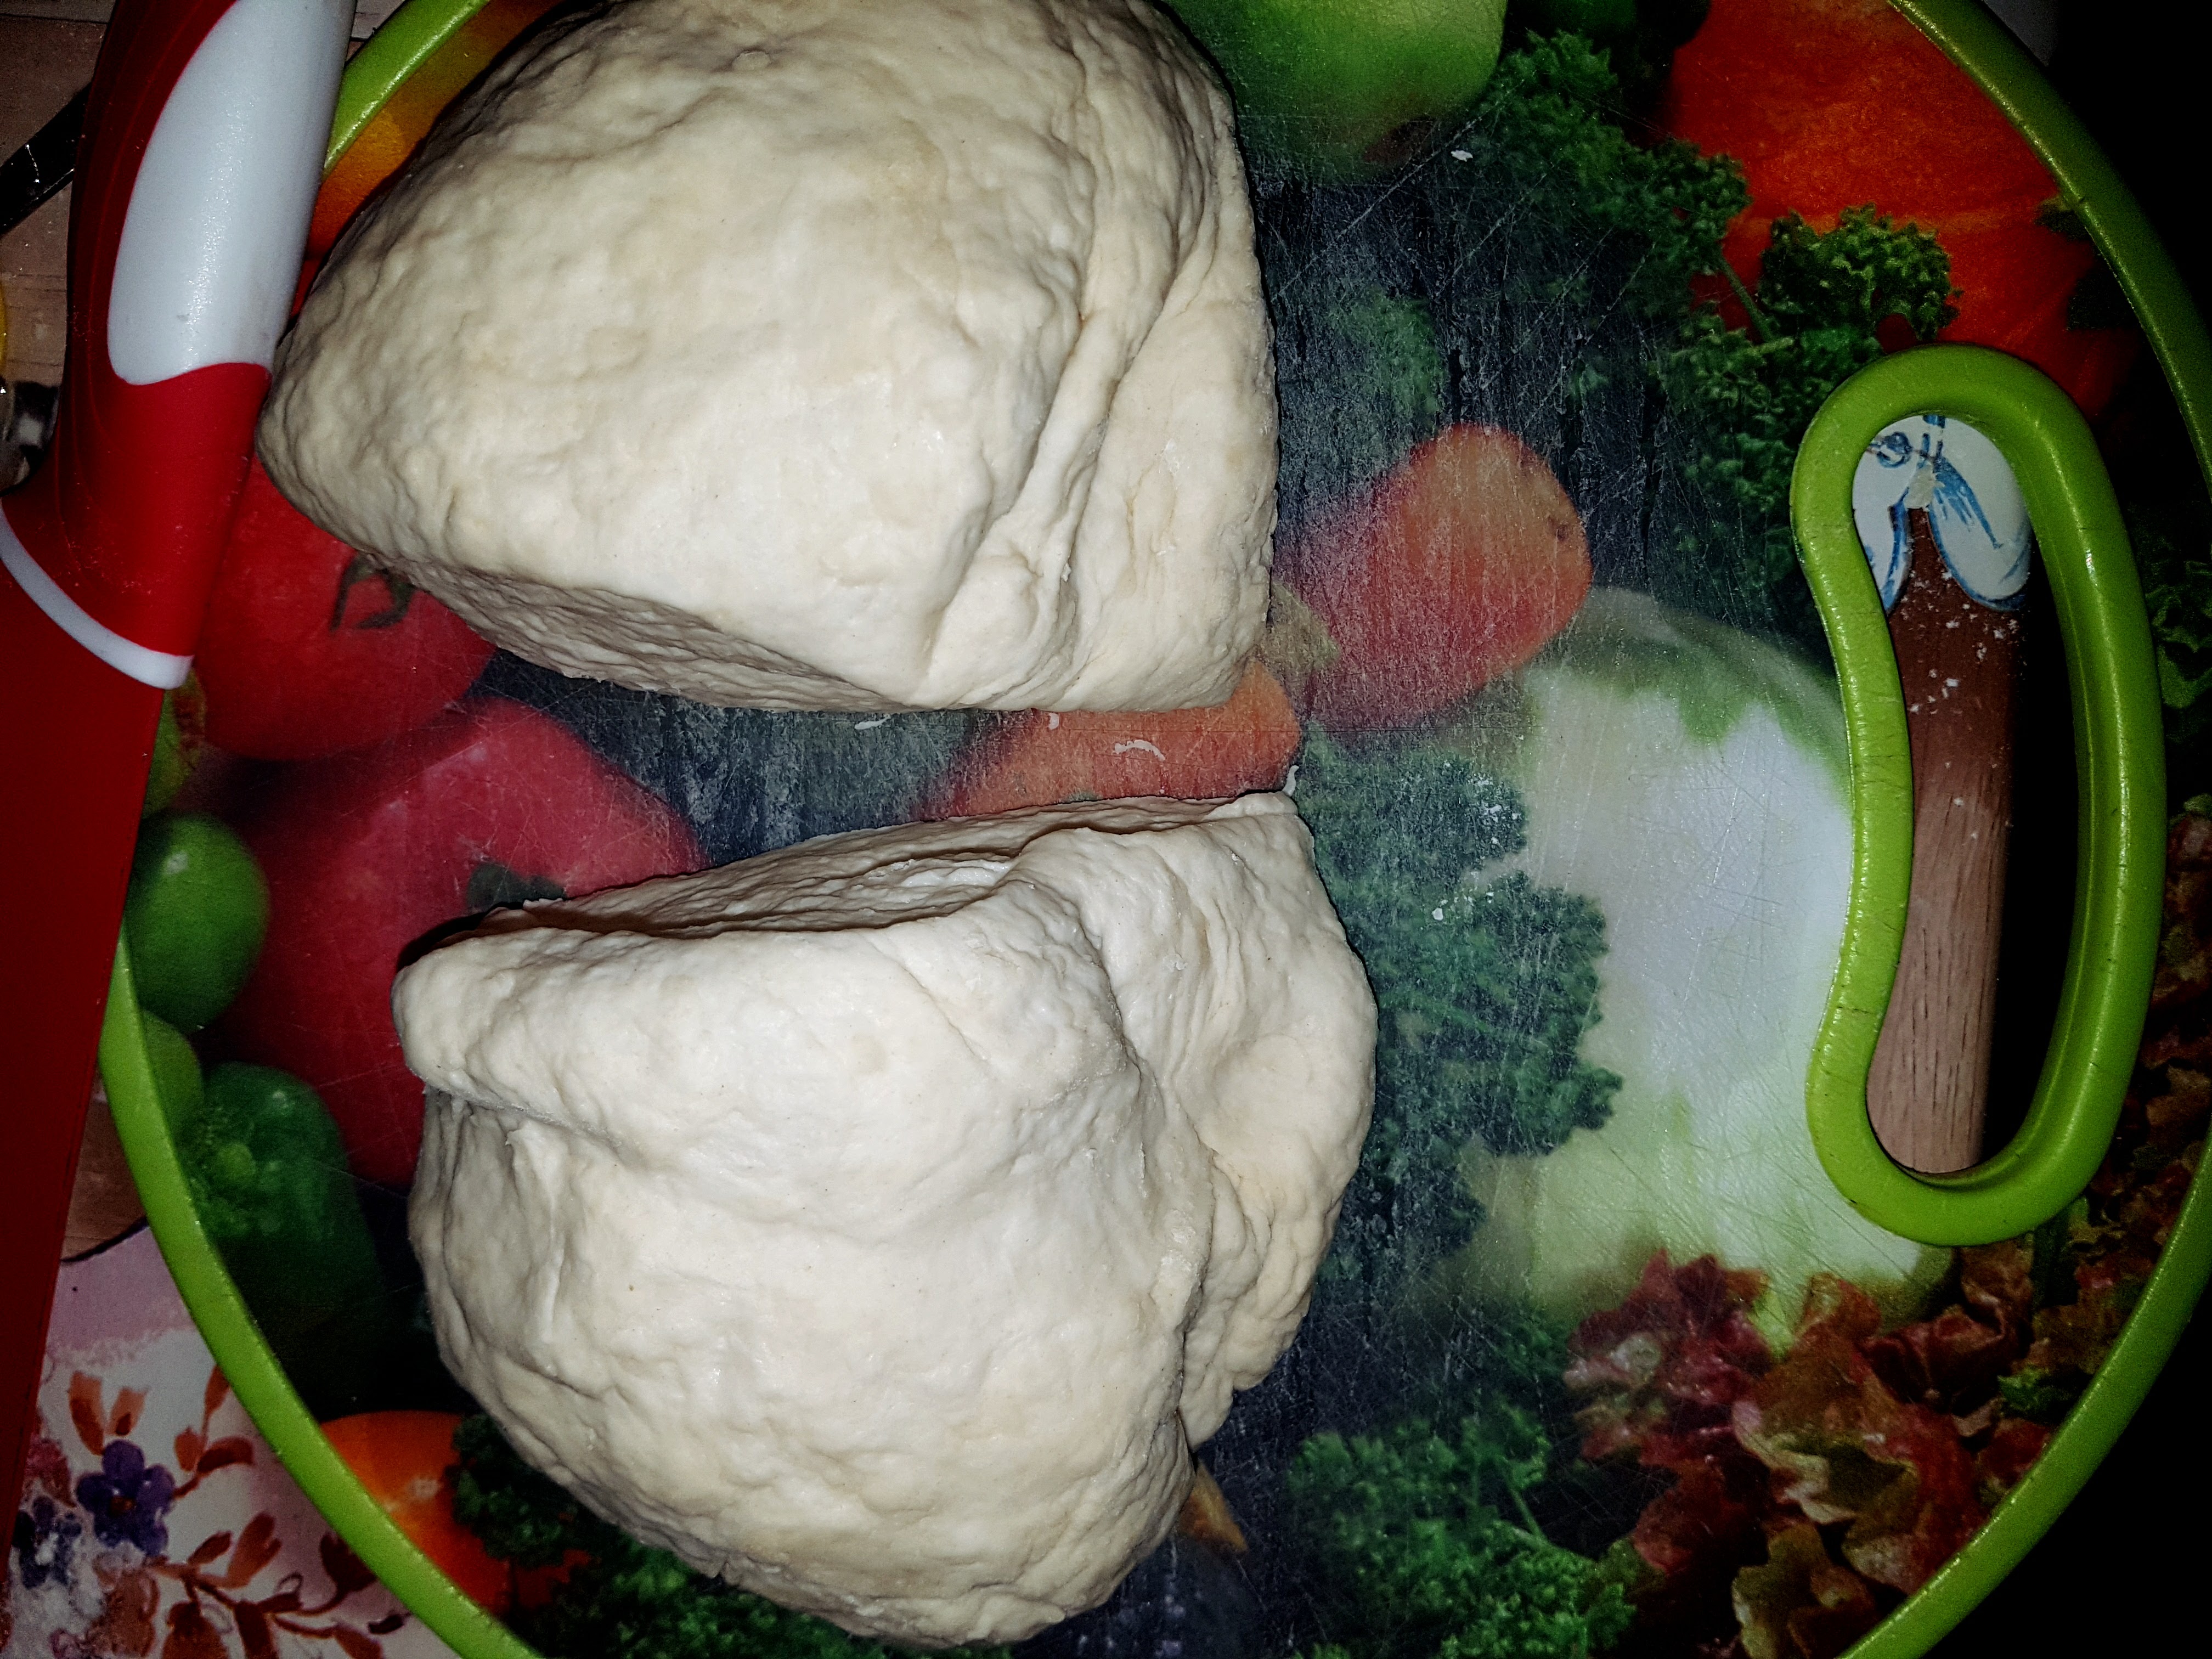
Totul a inceput in mod corespunzator, cu foile de placinta. Am facut coca pentru prima placinta si apoi coca pentru cea de a doua; motivul 1 e ca,coca trebuie sa se odihneasca putin pana cand se poate lucra si al doilea este acela ca pot respecta cantitatile si amesteca mai usor. Cand coca e omogena, se tranteste de masa de 20 de ori; asta ajuta la fragezirea ei, pe langa faptul ca e distractiv si detentioneaza muschii corpului. :) Dupa ce coca e gata, se taie in doua, se unge cu ulei si se lasa sa stea cca. 20min. acoperita cu un servet. ----------------------------------------------------------------------------- Everything started with the pastry sheets; i mixed all ingredients manually until everything was homogene. After that, it needs to get slammed 20 times on the table; this actually helps the dough to get moist. Then, we cut the dough in two and use sunflower oil to grease it; then, it needs to stay covered for 20 minutes or so.
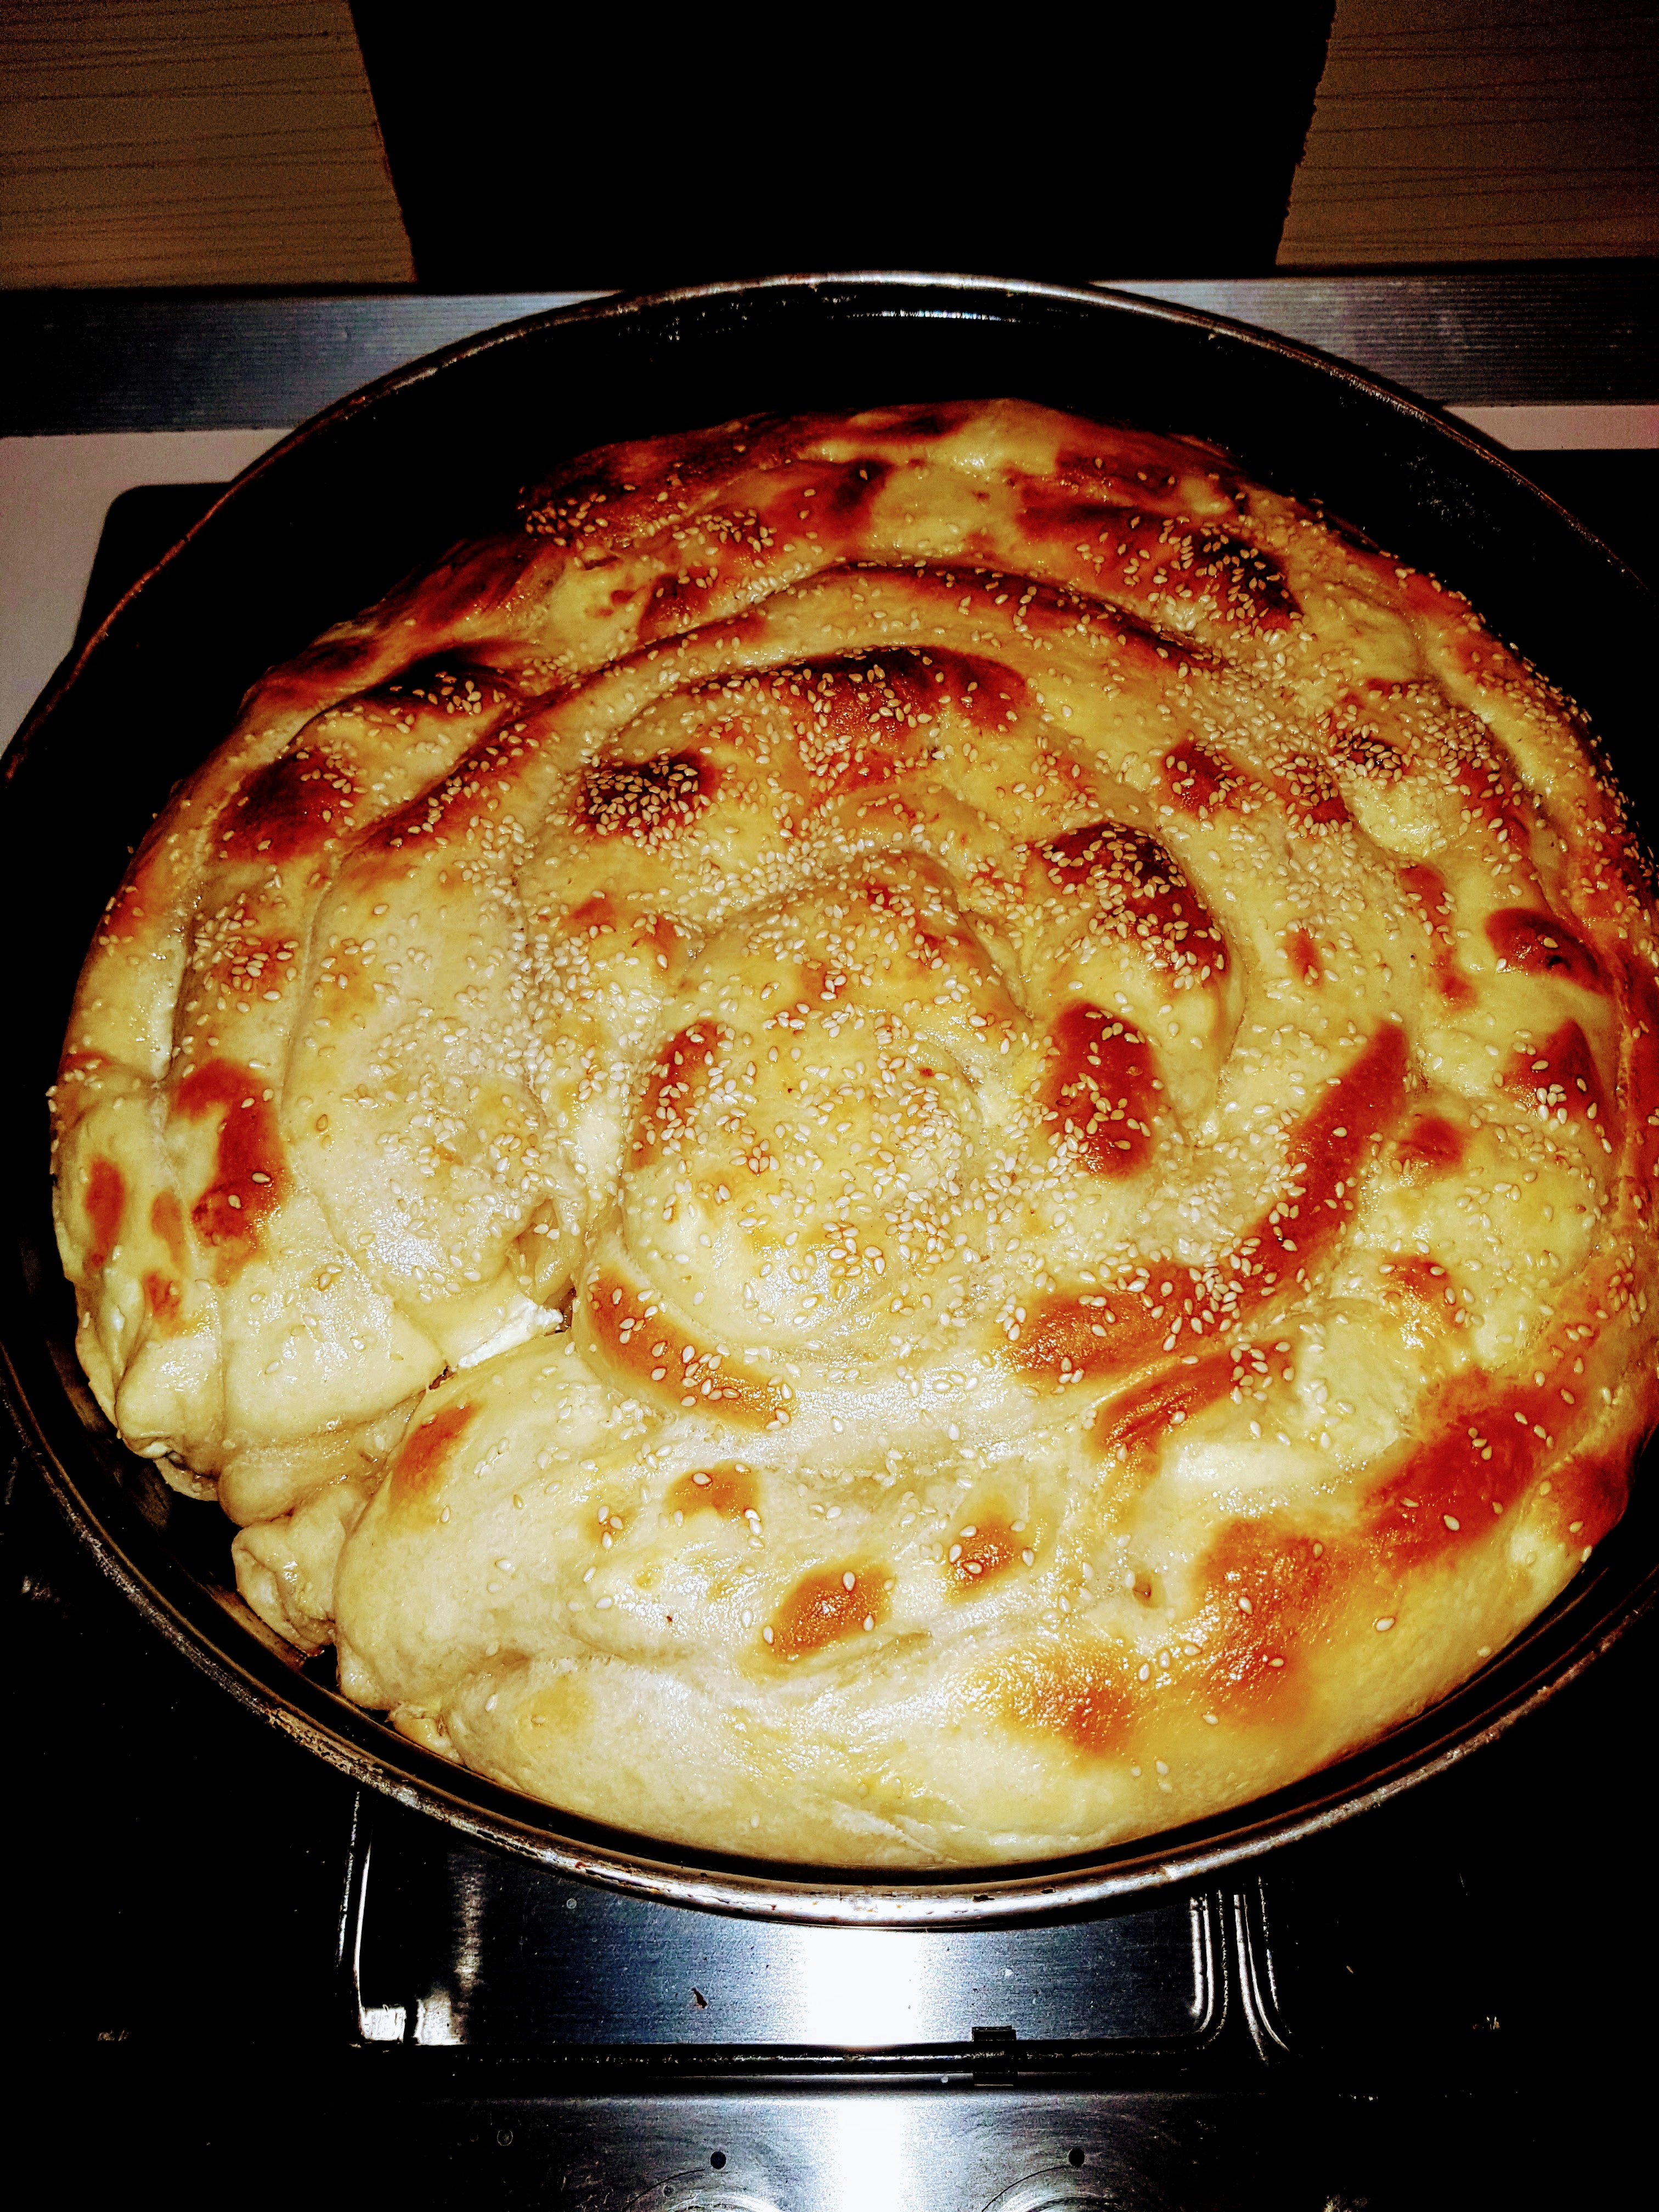
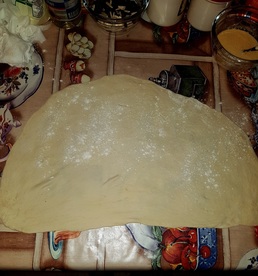
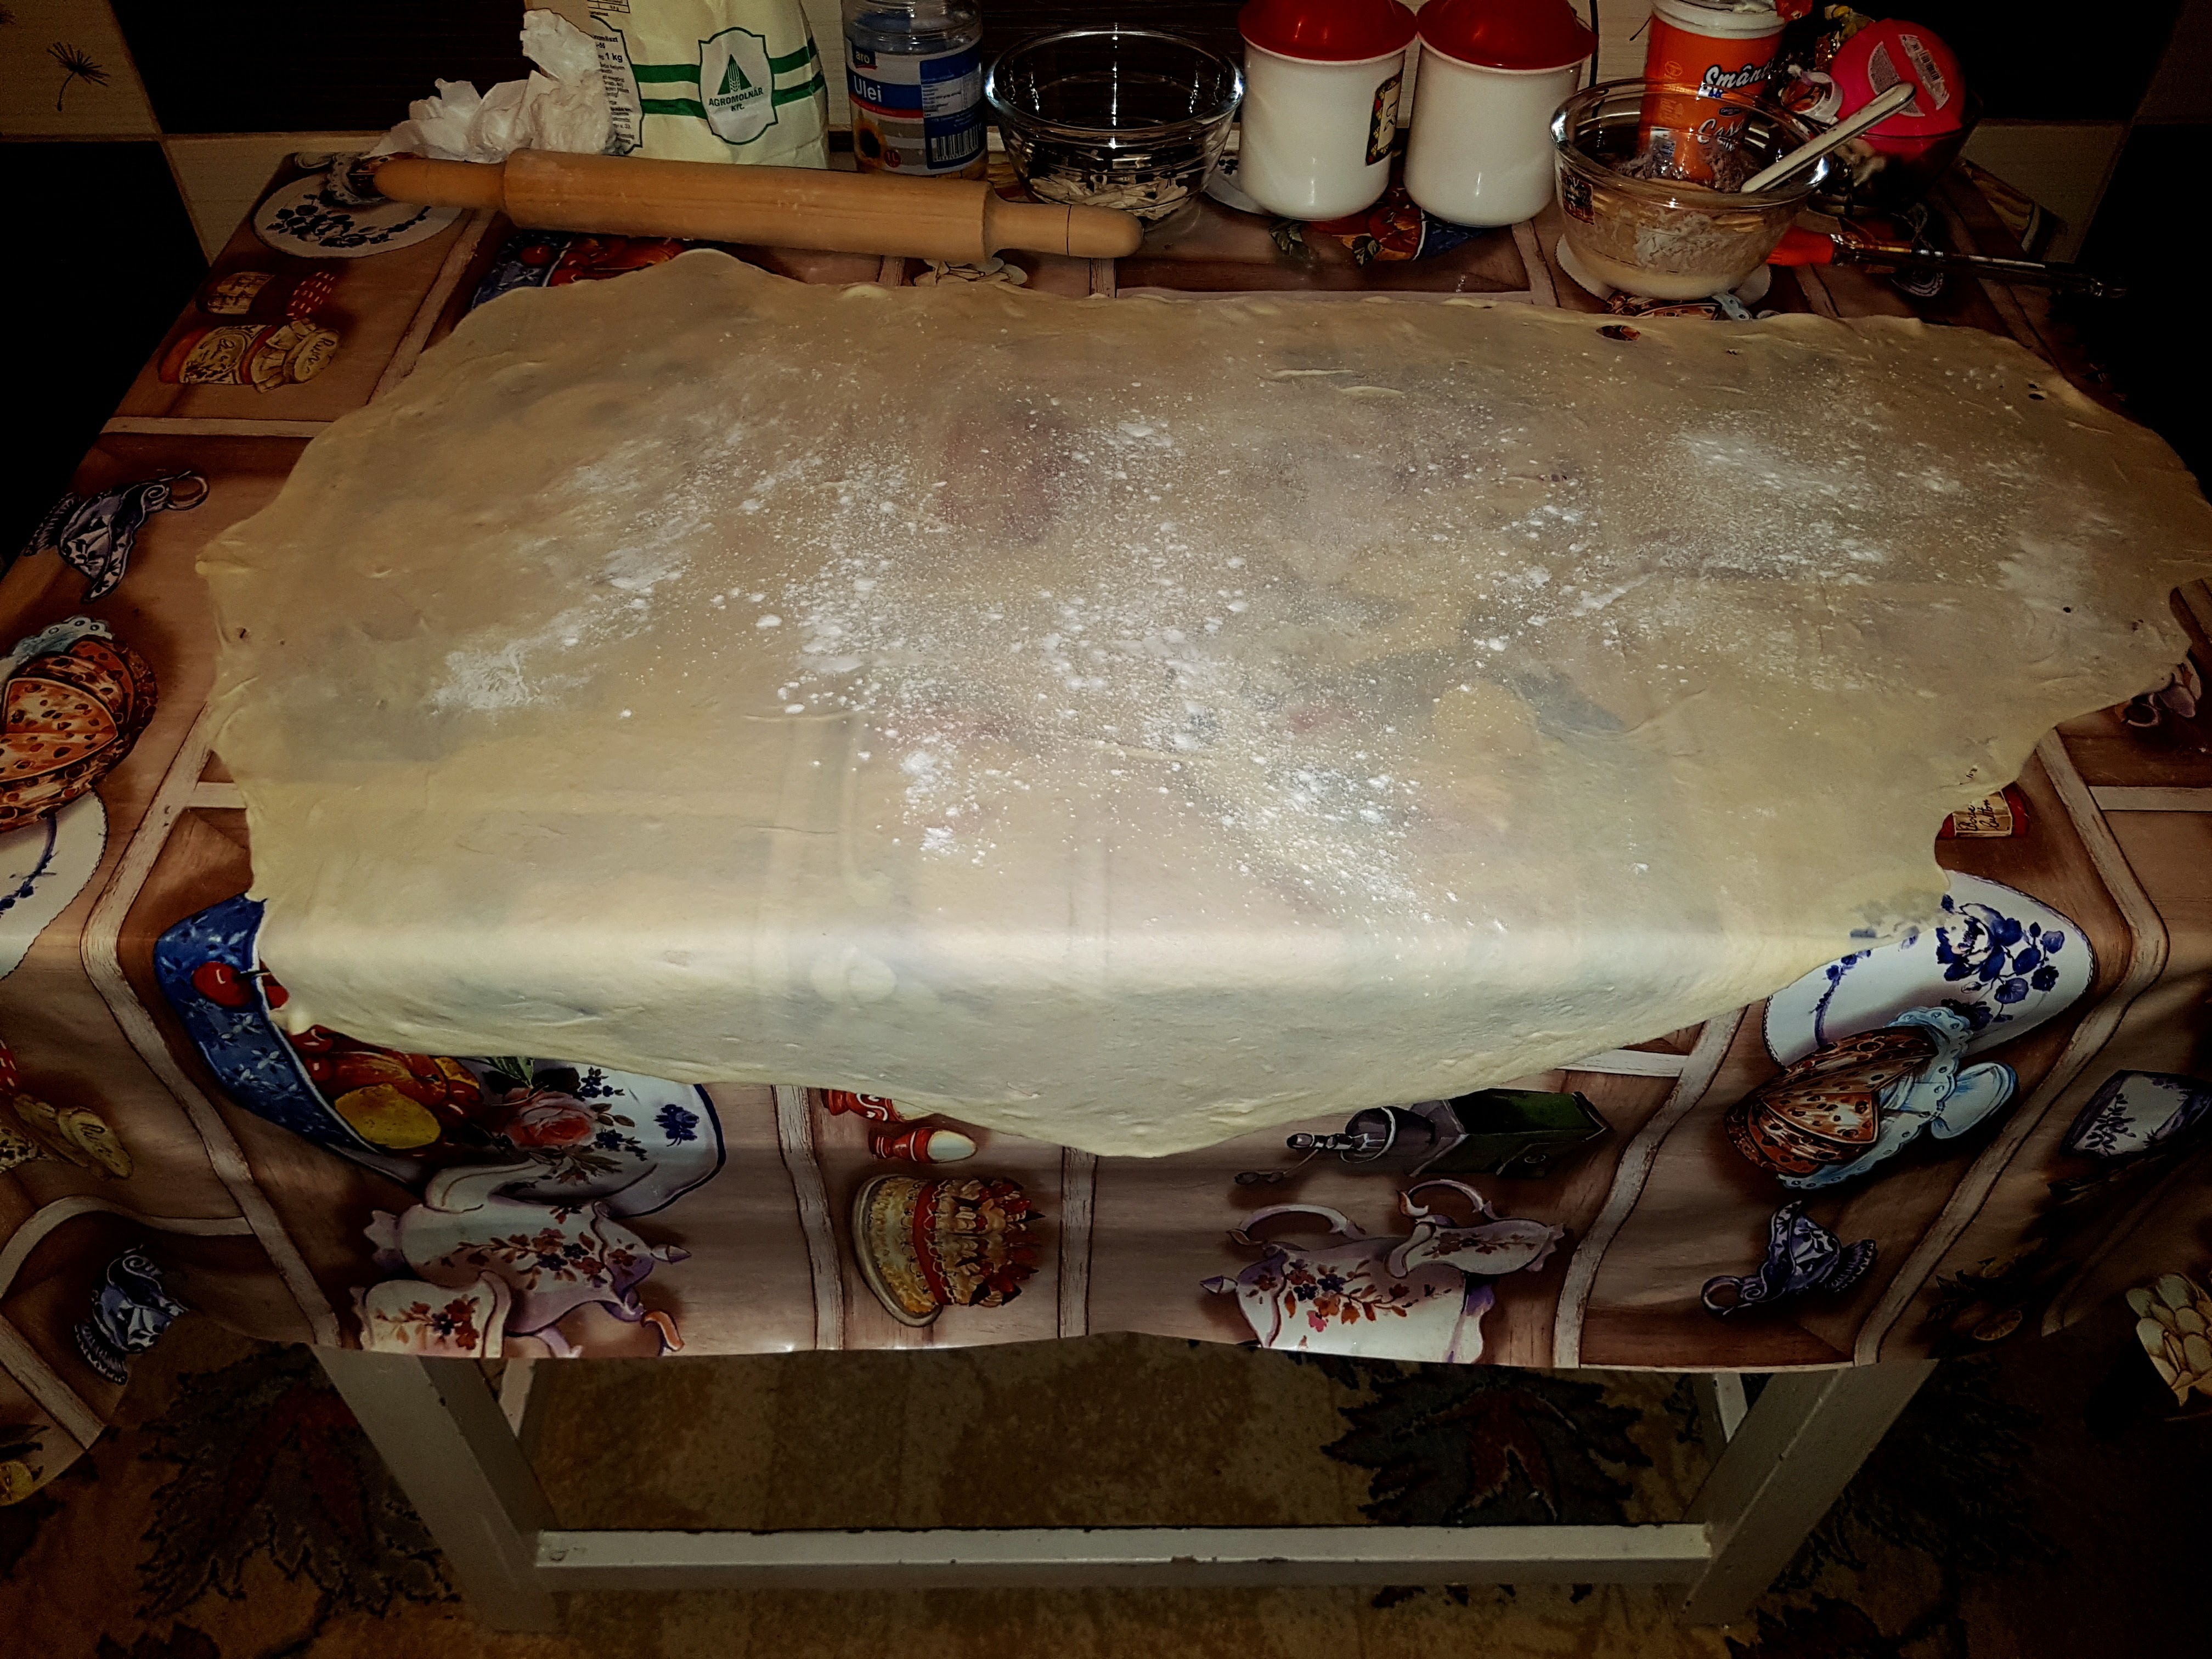
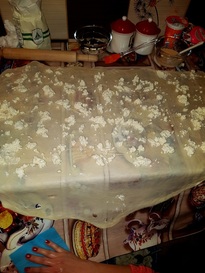
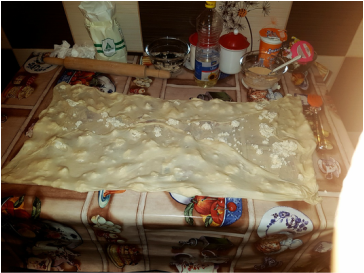
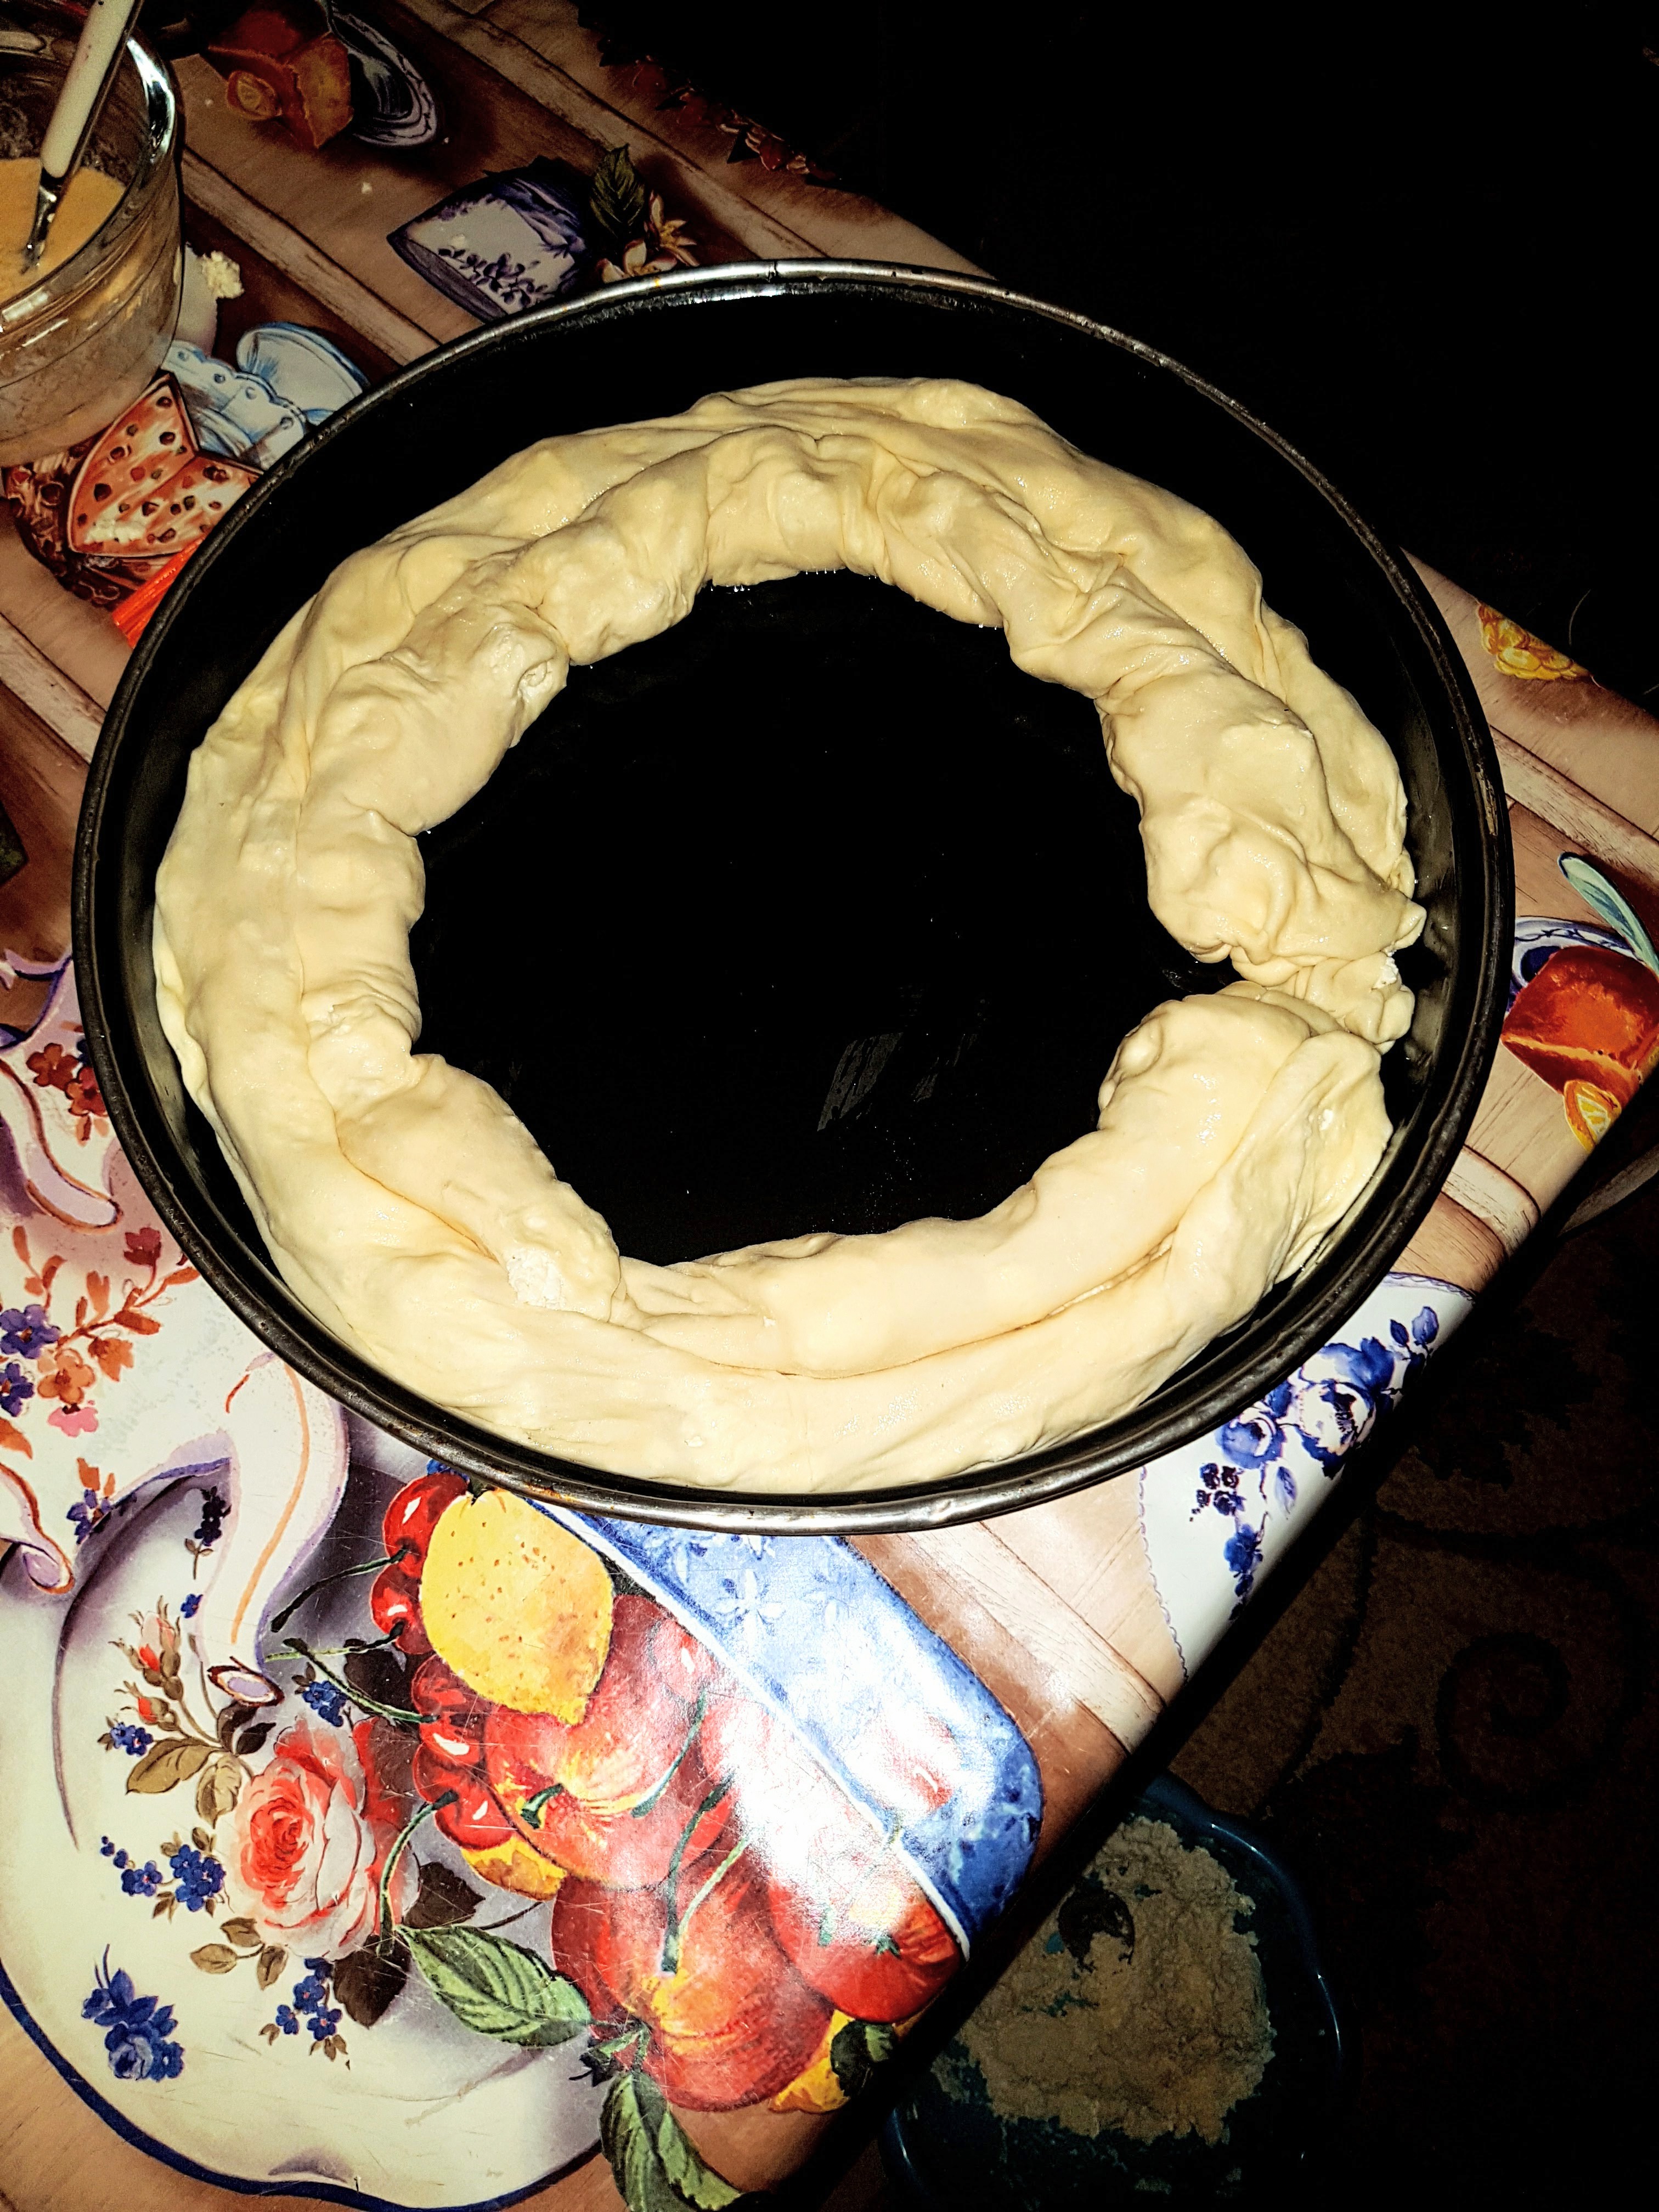
Dupa cele 20 de minute, ne inarmam cu un sucitor si intiiiiindem cocca pana cand ajunge sa fie atat de subtire incat sa se vada masa prin ea. Pentru asta, trebuie sa adaugam faina pe masa si pe foaie de fiecare data cand coca devine lipicioasa. Cand coca este destul de intinsa, o ungem bine cu ulei si incepem sa punem umplutura; foaia ar trebui adunata de pe margini asa incat sa formeze un dreptunghi si ar fi bine sa avem ulei si umplutura in fiecare 'cuta' pe care foaia o face. Rasucim nazdravania asta din ambele margini exterioare catre interior, pe latura lunga, ca in imagine. ----------------------------------------------------------------------------- After the 20 minutes have passed, we reach a dough rolling pin and work our way until we get to a very thin sheet, so thin we can see the table right through it. In this respect, we need to make sure the sheet and table are well saturated with flour and the sheet is not sticky. When the sheet is thin enough, we grease it with sunflower oil and start adding the filling; the sheet should be gathered from the exterior longer both sides to the interior, like shown in the picture. We should make sure we have filling and oil grease in every fold of the sheet.
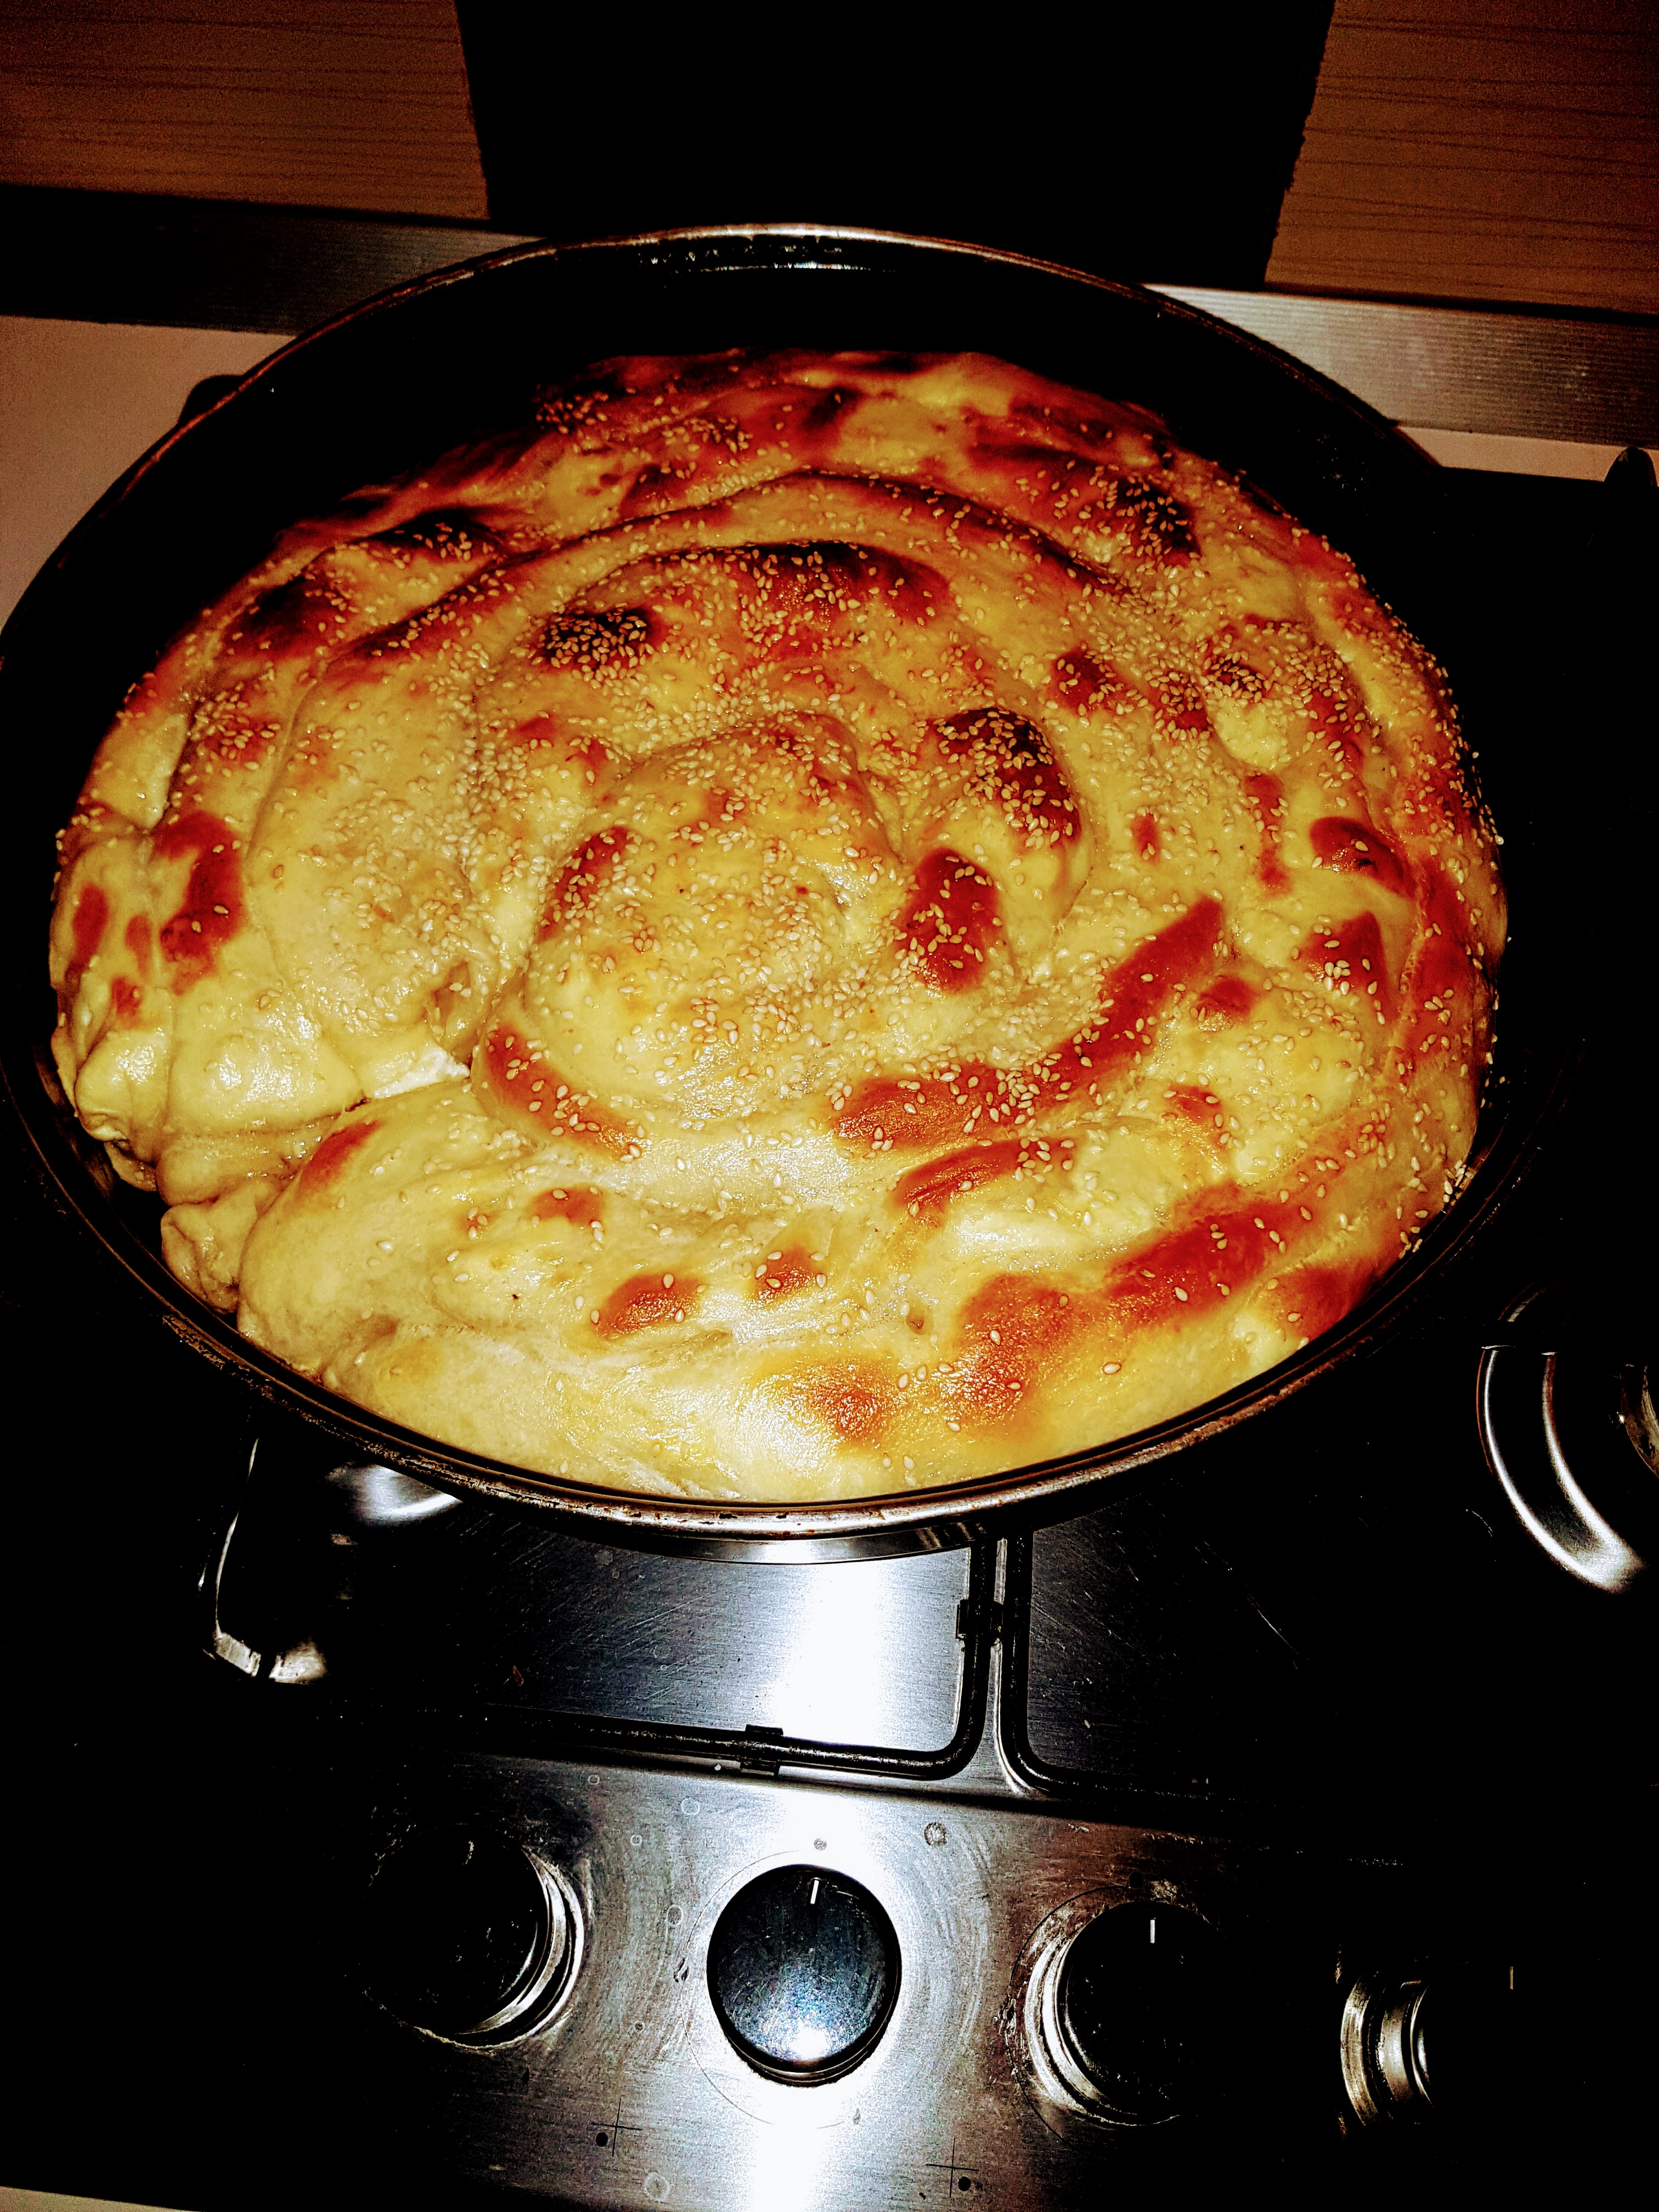
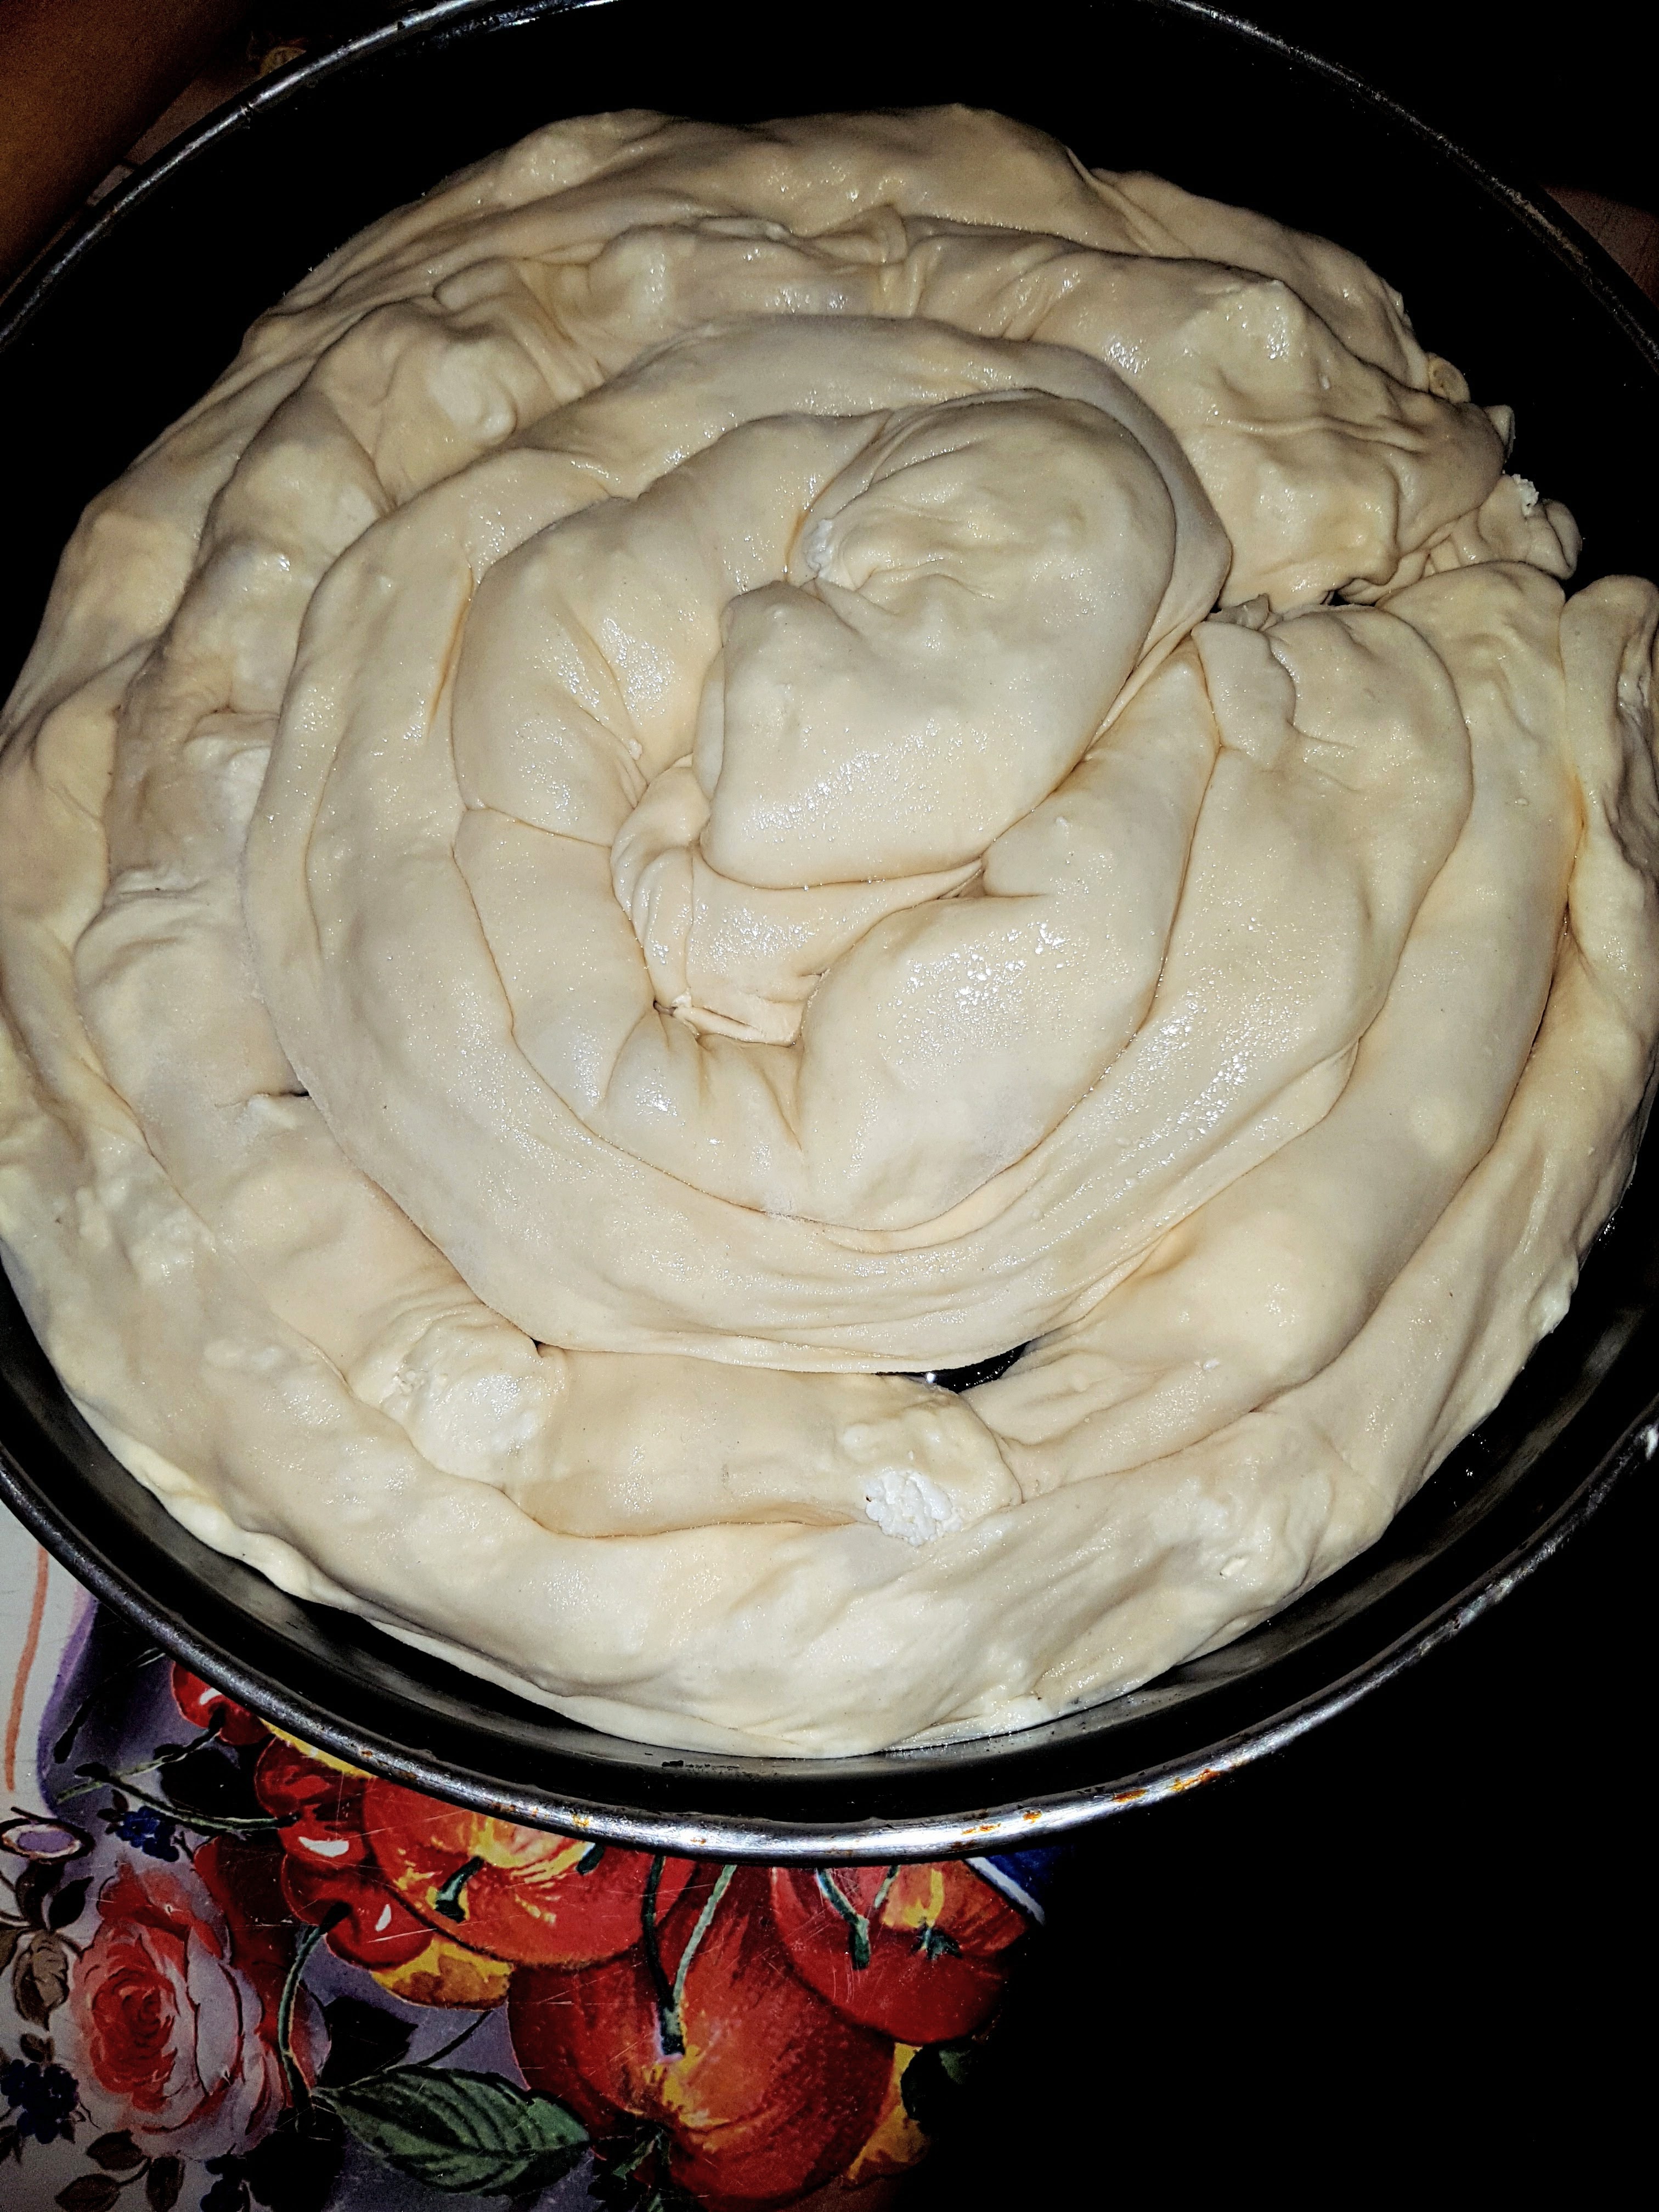
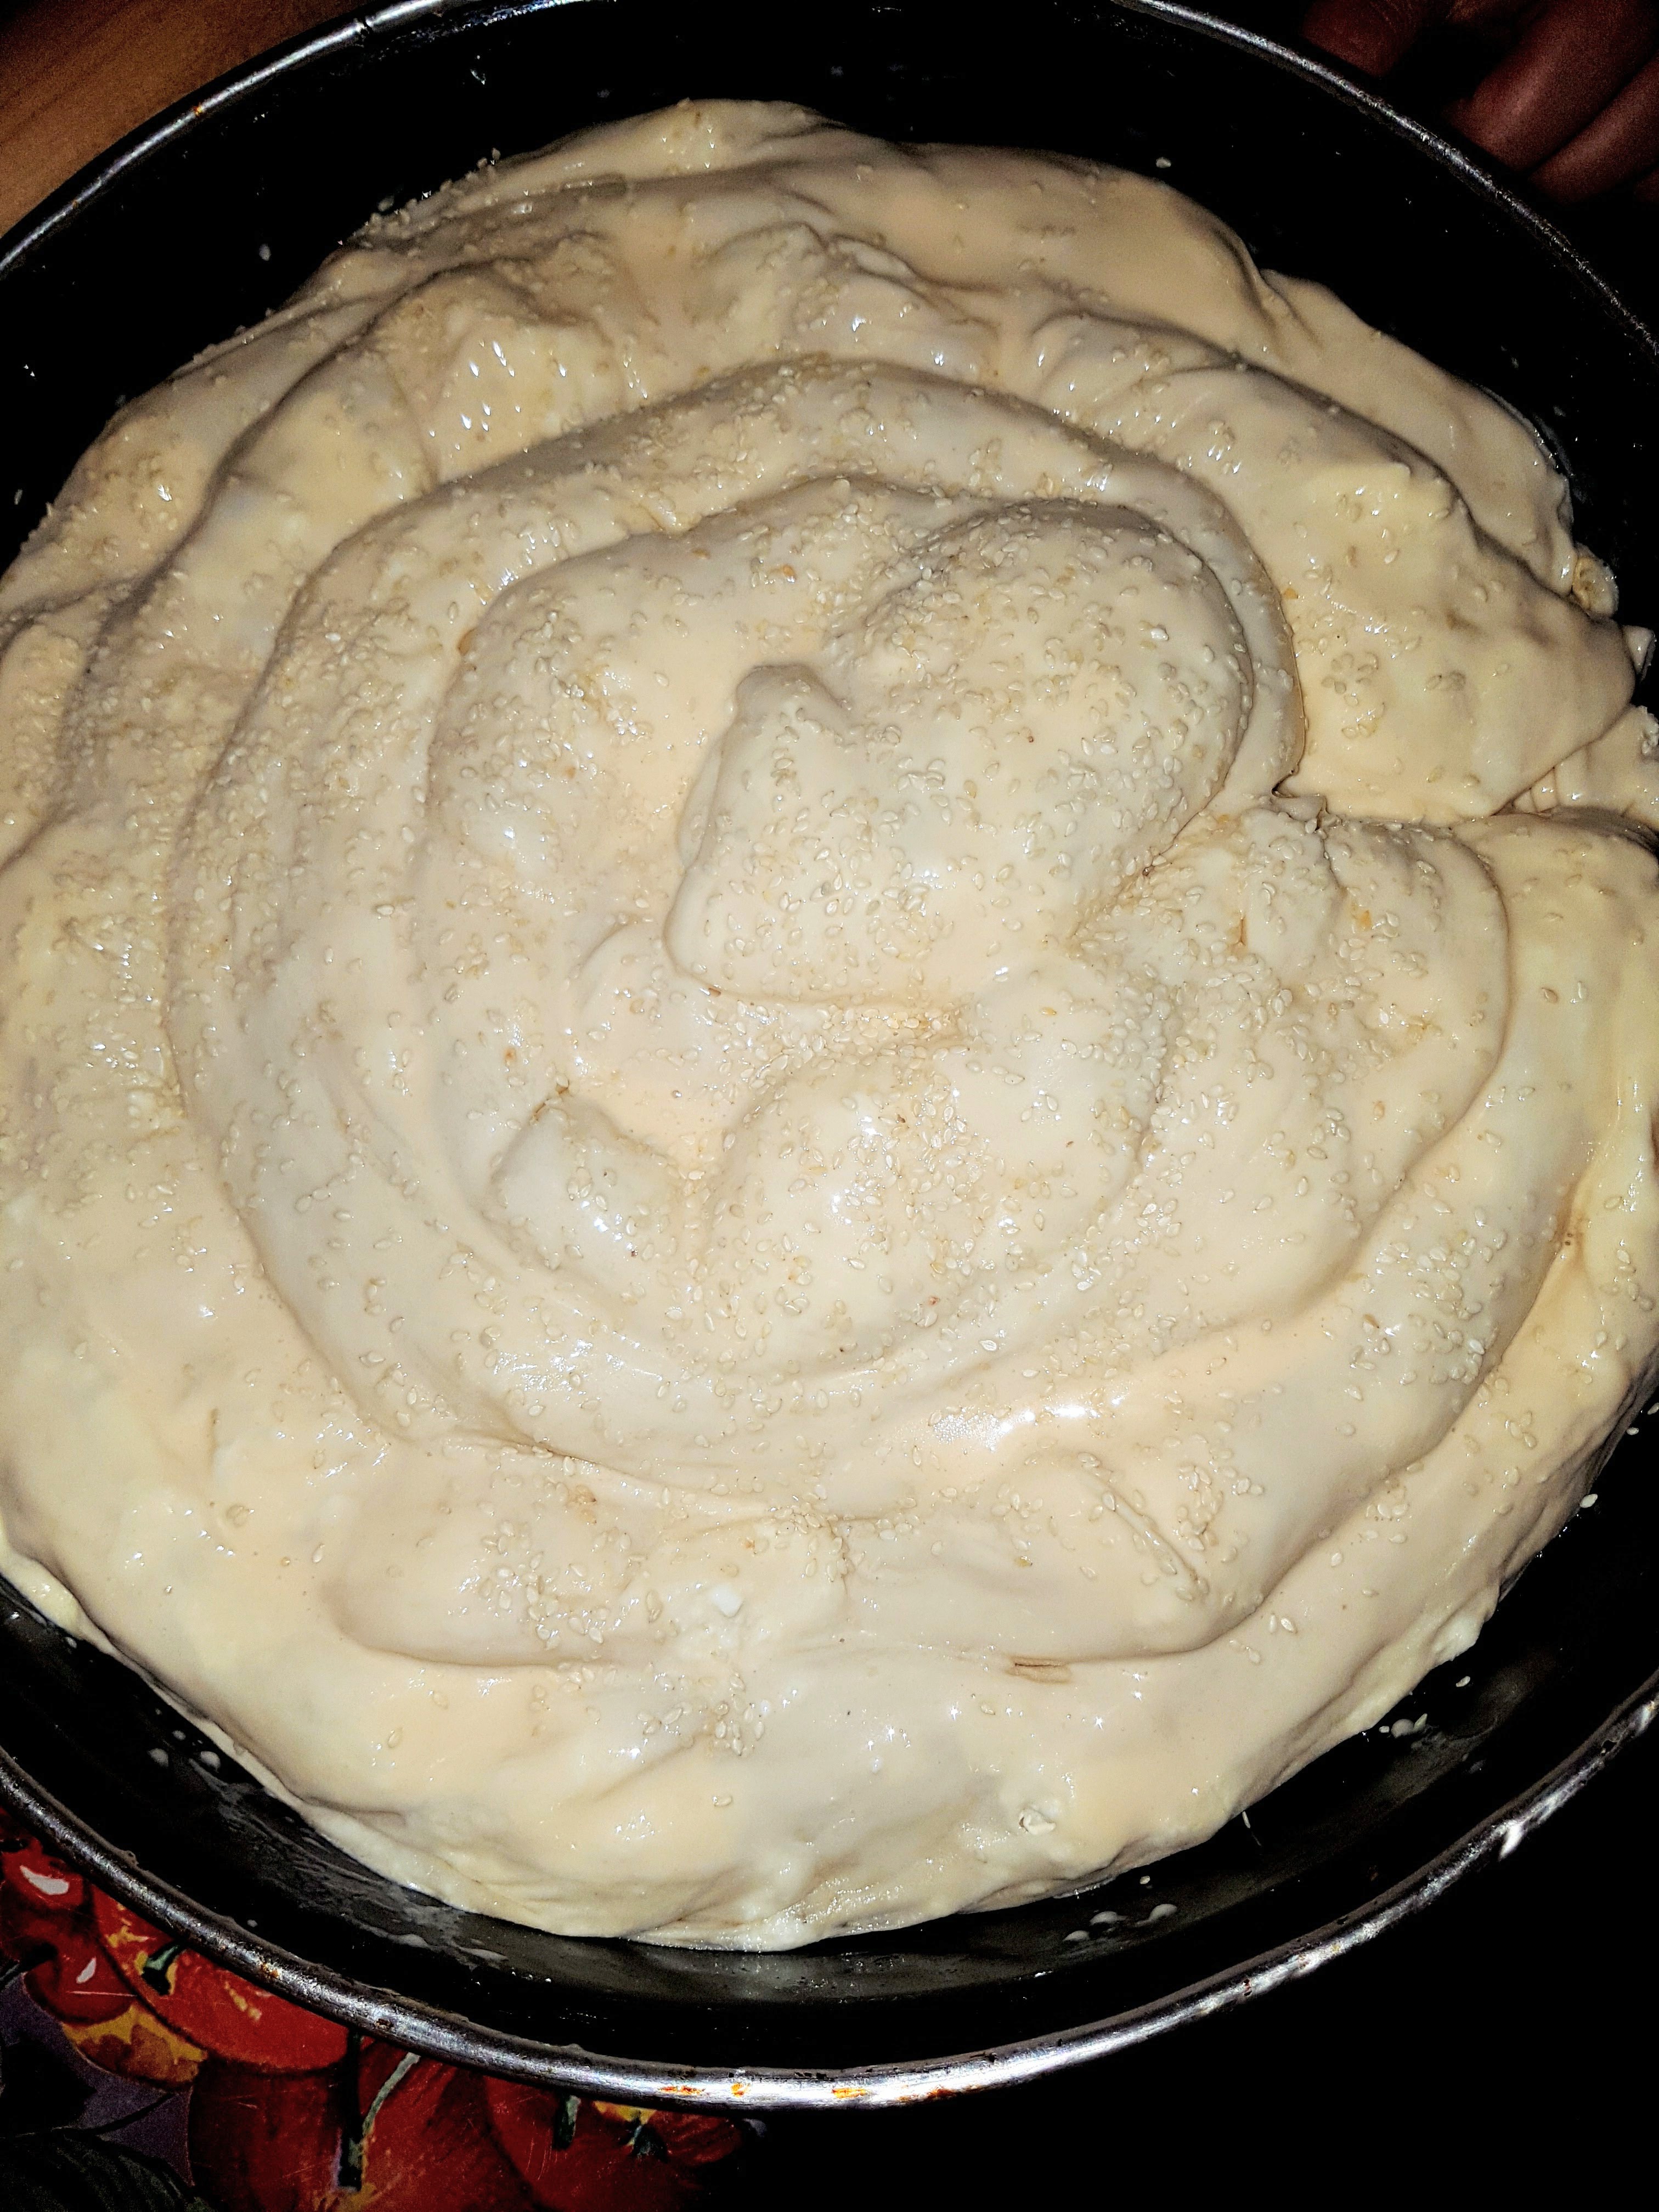
Apoi merge in tava, cu cat mai rotunda cu atat mai spectaculoasa. Un ou batut cu smantana si putin susan merg bine deasupra; mixul de smantana+ou ajuta la rumenire si fragezirea crustei. ----------------------------------------------------------------------------- Then, this goes in a baking tray and if the latter is round shaped, then the result will be spectacular. An egg beated with one tablespoon of sour cream will help make the pie crust moist but still appealing and the sesami seeds work fine with the cheese.
Am procedat la fel si cu a doua foaie, care incape perfect langa cealalta, tot circular. ----------------------------------------------------------------------------- I did the same for the other piece of dough, which I placed in the same tray circularily.
Umplutura de branza e cat se poate de simpla: branza telemea razuita si branza proaspata se amesteca impreuna cu 2-3 oua; compozitia rezultata ar trebui sa fie relativ umeda si destul de sarata la gust; puteti adauga sare, daca e necesar. ----------------------------------------------------------------------------- The cheese filling is as simple as it gets: the cottage cheese and grated cheese mix together with 2-3 eggs until we get a filling that is pretty salty and rather moist but not pouring.
Compozitia de mere porneste de la merele razuite, calite intr-o tigaie cu putin unt, zaharul si batonul de scortisoara. Sunt gata atunci cand sucul din mere s-a evaporat, deci ar fi bine sa le scurgeti inainte sa fie adaugate in tigaie. Ideea e sa nu emane lichid in timpul coacerii. ----------------------------------------------------------------------------- The apple filling starts with grated apples, sauteed in a frying pan with some butter, sugar and cinnamon bar. The apples are ready when the apple juice is all evaporated; the point here is not to have any apple juice pouring around in the baking tray.
Am procedat identic si pentru placinta de branza, ca si pentru cea de mere; doar ca, in loc de susanul de deasupra, am pus putin zahar brun, care se caramelizeaza frumos. ----------------------------------------------------------------------------- I did the same for both pies, only instead of sesami on top I added brown sugar for the apple pie; it helps caramelise much better.
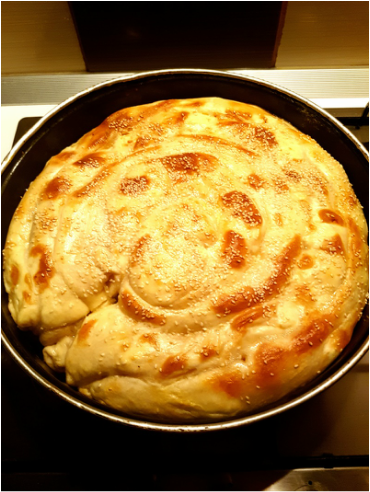
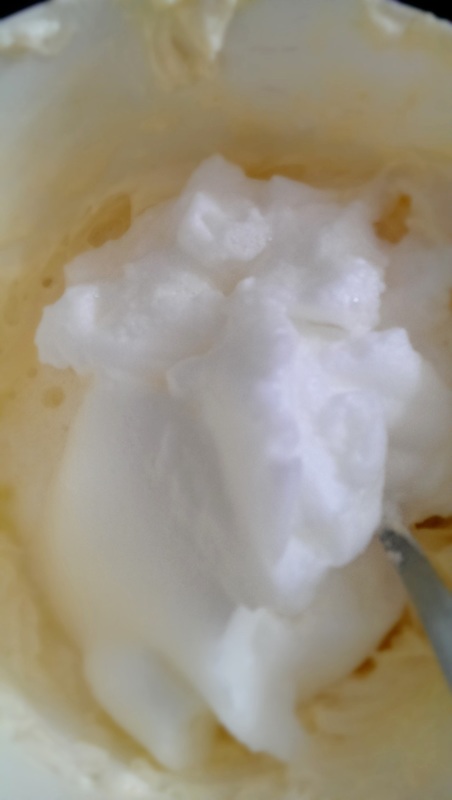
Tot ce pot sa (mai) spun este ca a fost absolut delicios. ----------------------------------------------------------------------------- All I can (further) add is that this was absolutely delish. ----------------------------------------------------------------------------- TRY SEXUAL I'LL TRY ANY RECIPE (AT LEAST) ONCE.  SUMAR: Ce am folosit pentru aprox. 10 portii: 500 g mascarpone doua pachete de piscoturi tip Savoiardi (aprox. 200g fiecare) 200ml cafea preparata forte si neindulcita 100g zahar 4 oua 1 pliculet zahar vanilinat (asta din urma nu era in reteta, dar eu pun by default, ca sa nu am (ne)placerea sa simt vreun iz de ou in prajitura) Ce-am gresit: Cred ca mai nimic. If eating sugar is wrong, I don't wanna be right. Ce fac mai bun sau mai bine data viitoare: Aici nu prea se aplica povestea asta. E reteta clasica, dar pot sa incerc data viitoare o varianta reinterpretata, cu fructe de padure. De unde am reteta: De aici. Un blog de bun-simt care respecta reteta clasica a desertului italian. ----------------------------------------------------------------------------------------------------- SUMMARY What I used for about 10 servings: 500g mascarpone 2x200g ready made Savoiardi biscuits 200ml strong coffee with no sugar added 100g sugar 4 eggs 1 Vanilla sugar (the latter was not asked for in the recipe, however I pretty much add it by default whenever baking cakes so that I don't end up with the egg flavour) What I did wrong: I suppose close to nothing. If eating sugar is wrong, I don't wanna be right. What I need to do better or tastier the next time: This section doesn't really fit in this time. This is a classic, so there's not much room for any improvement, however I can try the reinterpreted berries Tiramisu next time. How I came across this recipe: This is from here. A decent blog, really.
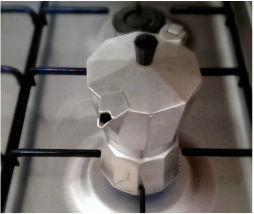
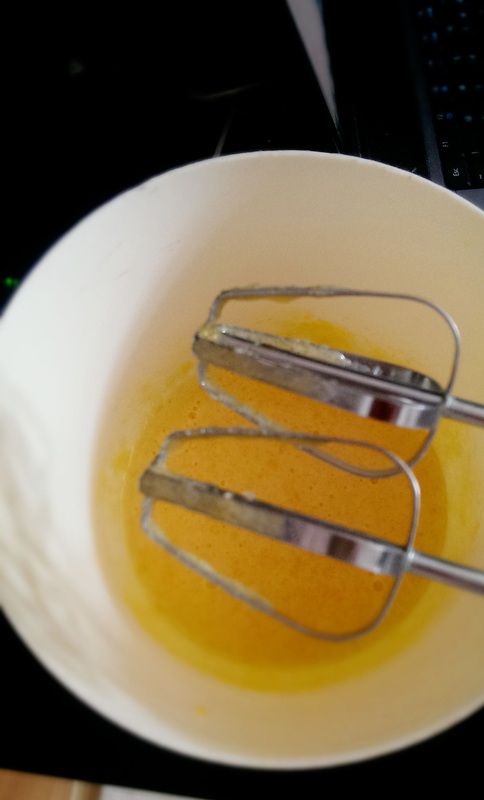
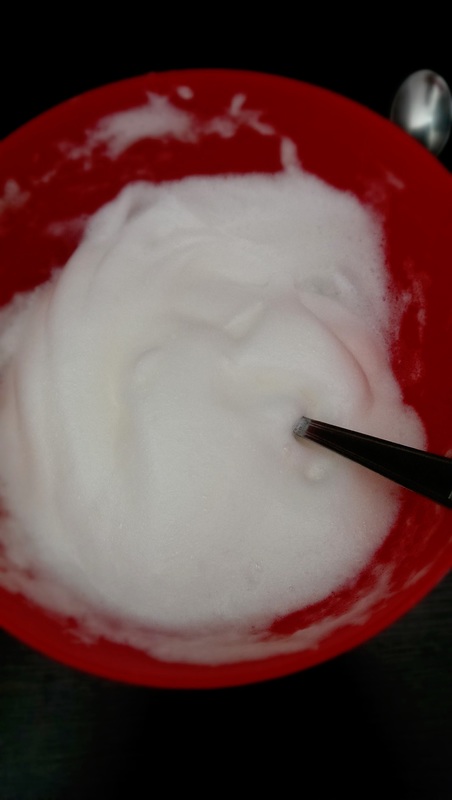
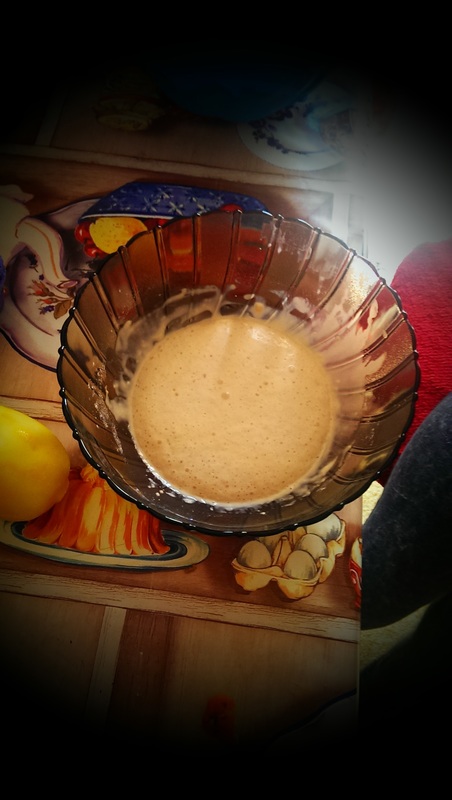
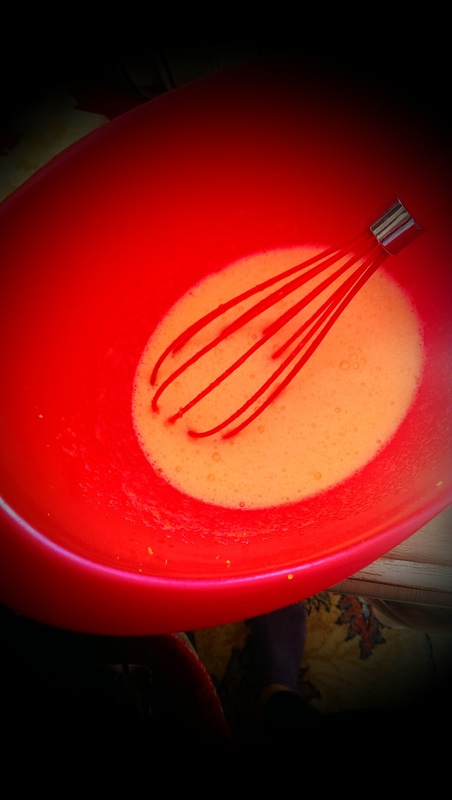
Totul incepe cu doua runde de cafea preparata la ingineria asta italieneasca. Povestea asta prepara o cafea tare ca piatra; sa tot fie un soi de predecesor al espressorului cu 15 bari presiune. Se gasesc in toate hypermarketurile si cu siguranta si in afara lor, de dimensiuni si chiar culori variate. Eu am una inox care se infierbanta mai ceva ca iadul si tre sa am grija cand prepar a doua runda de cafea. Pentru ca, desigur, nu are capacitate mai mare de 100ml. Deci trebuie sa dansez acest tango de 2 ori. Inventia asta se desface de la mijloc, apa se pune in partea de jos iar deasupra ei se aseaza un suport cu mici orificii; in acesta din urma se pune cafeaua, iar apoi se monteaza partea de sus. Se lasa la fiert, pret de cateva minute, iar cafeaua e gata atunci cand a 'urcat' in partea de sus a recipientului. O lasam la racit intr-o farfurie pe cat posibil intinsa. Cata vreme se raceste cafeaua, am avut timp sa ma preocup de oua. Separat galbenusul de albus, batut albusurile spuma cu nitica sare si galbenusurile cu cele 100g zahar+pliculetul de zahar vanilinat. Pozele de mai jos sunt stil 'before&after', cu galbenusurile. ----------------------------------------------------------------------------- Everything starts with two batches of freshly made coffee, using this Italian thing. This is used for making a strong coffee, like the ancester of the 15 bar pressure espresso machines these days. You can find it in almost all hypermarkets and not onlu there, in a variety of colours and sizes. I have one in stainless steel and it gets hot as hell whenever I use it, so I have to pay attention when doing the 2nd batch of coffee. And I have to do 2 batches, since mine has a 100ml capacity only. So I have to do the tango twice. This thing unfolds at the middle, you add the water in the part below and on top of such you add the coffee in the relevant device with wholes. You then put it back together and leave it to boil under a light flame for about 5 minutes or so, during which time the water climbs up to the upper part of the device. Then it has to be left to cool, preferably into a more flat plate. In the mean time, we need to prepare the eggs mix, and to this end I separated the eggwhites from the eggyolks, and beaten the first ones with a sprinkle of salt and the latter ones with the entire sugar amount. The below pic shows the eggyolks, before and after being beaten to a creamy consistency.
Before&after si cu albusurile. ----------------------------------------------------------------------------- Before& after for the eggwhites.
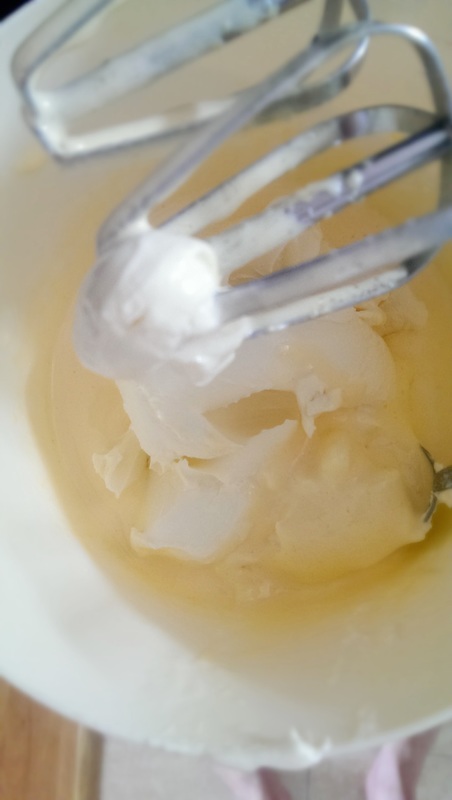
Dupa asta, nu-mi mai ramasese decat sa le impreunez. Asa ca am adaugat mascarpone peste galbenusuri, am omogenizat putin cu mizerul si am adaugat apoi si albusurile. In cazul celor din urma, fara mixer, pentru a nu 'distruge' bulele de aer. ----------------------------------------------------------------------------- After such was done, I only had to put everything together. So I added the mascarpone to the eggyolks mixture and gave it another mix with the help of my mixer. I then added the eggwhites mixture, but I no longer used the mixer for them, since it would have destroyed the flufflyiness.
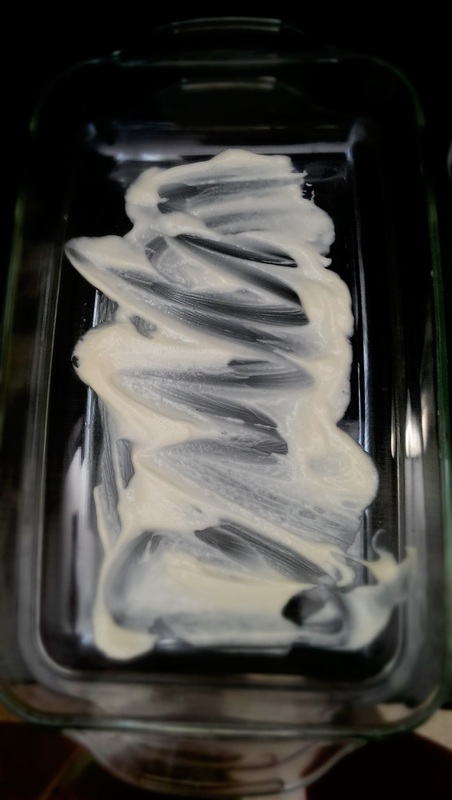
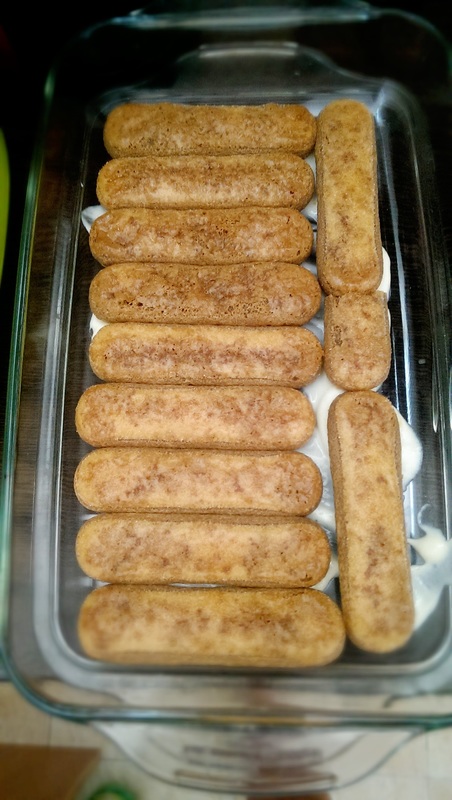
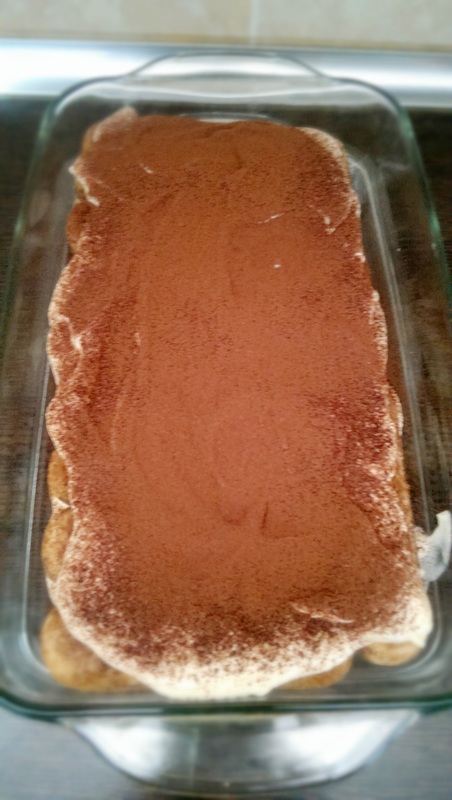
Apoi am lasat crema la rece nitel, cata vreme m-am apucat de montaj. Am ales o tava jena cu capac, pentru ca aroma sa se mentina in frigider. Am pus putina crema pe fundul vasului, pentru ca piscoturile sa nu se lipeasca de fundul vasului atunci cand va fi cazul sa servesc o portie. Am pus rapid piscoturile, unul cate unul, in cafeaua deja racita, o fractiune de secunda pe fiecare parte. Secretul ar fi sa ne miscam rapid, pentru ca piscoturile care au atras prea multa cafea vor transforma prajitura intr-un... lac. Daca vi se par prea 'tari', promit ca se insiropeaza cata vreme vor sta in frigider, acoperite de crema. ----------------------------------------------------------------------------- I then left the cream to cool for a bit, while I had to set up the Tiramisu. I chose a Jena dish with a lid, since I wanted all flavours to be kept inside. I added a sprinkle of cream on the bottom of the dish so that the Savoiardi would not clinch to the bottom of the tray making in impossible to get out a serving without ruining the looks of it. I quickly dipped the Savoiardi in the cooled coffee, one by one and for about a milisecond on each side. The secret with this operation is to be as quickly as possible so that the Savoiardi don't get too much coffee, because in this case you will most likely end up with a lake-looking Tiramisu, Don't worry if you feel the Savoiardis are too hard; I promise you this: they will get much softer while staying in the fridge, covered with cream.
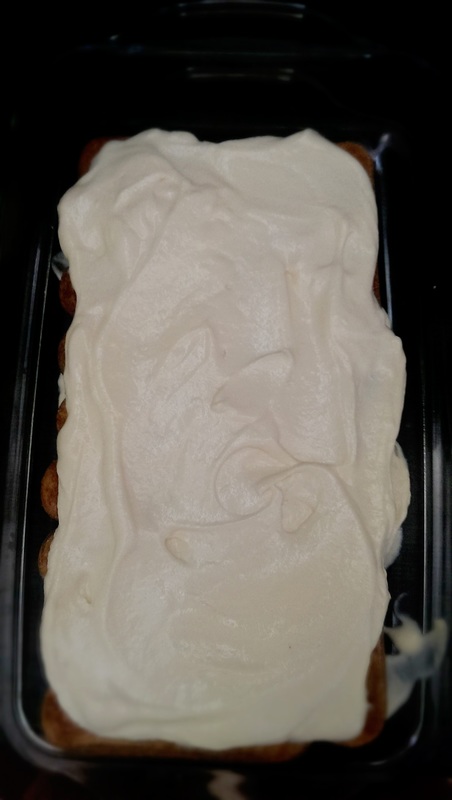
Sigur, am continuat succesiunea de piscoturi pana cand 'armata' a acoperit fundul vasului. Apoi am turnat jumatate din cantitatea de crema peste ele. Acelasi lucru cu a doua generatie de piscoturi, si gata. ----------------------------------------------------------------------------- Sure, I carried on with the Savoiardis on an on until the bottom of the dish was covered fully. I then added half of the cream and another layer of Savoiardis on top of it, then the other part of cream and done.
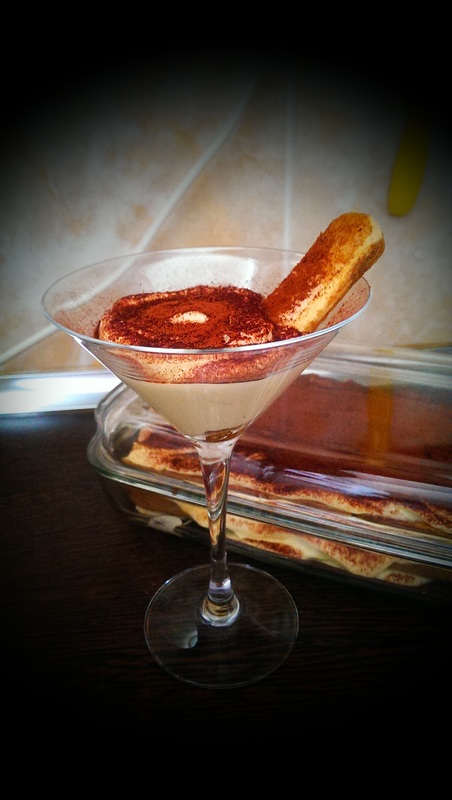
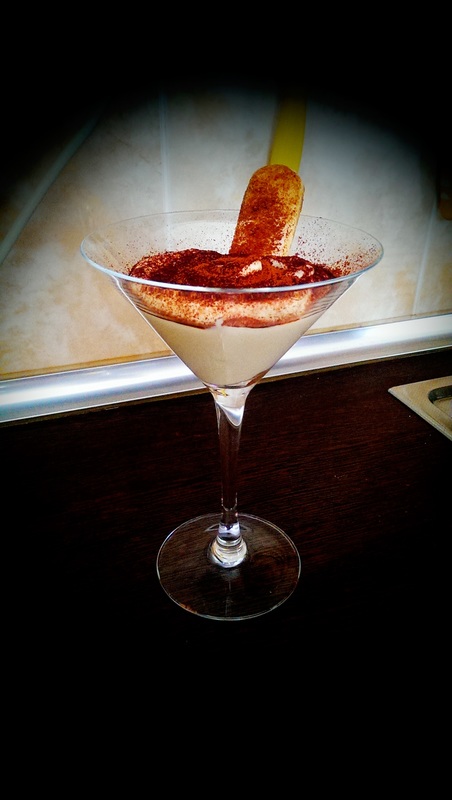
Nu era tiramisu daca nu adaugam o ploaie de cacao buna deasupra, asa ca am facut apel la o strecuratoare fina si am facut sa ploua cu cacao in strat generos. Bine, eu am un blog, se pare, asa ca am salvat ceva ramasite pentru un display mai ... stylish. ----------------------------------------------------------------------------- It wouldn't have been a Tiramisu if I wouldn't added a sprinkle of cocoa powder on top, so I used a fine strainer so that the cocoa would 'rain' in a generous and fine layer.
Si acum vine partea cea mai grea din aceasta reteta. Recomandarea sa o lasi la rece peste noapte si sa o consumi a doua zi. Rezultatul se promite a fi unul fenomenal, insa personal nu cunosc pe nimeni care sa fi asteptat atat pentru Marele Clasic italienesc. :)
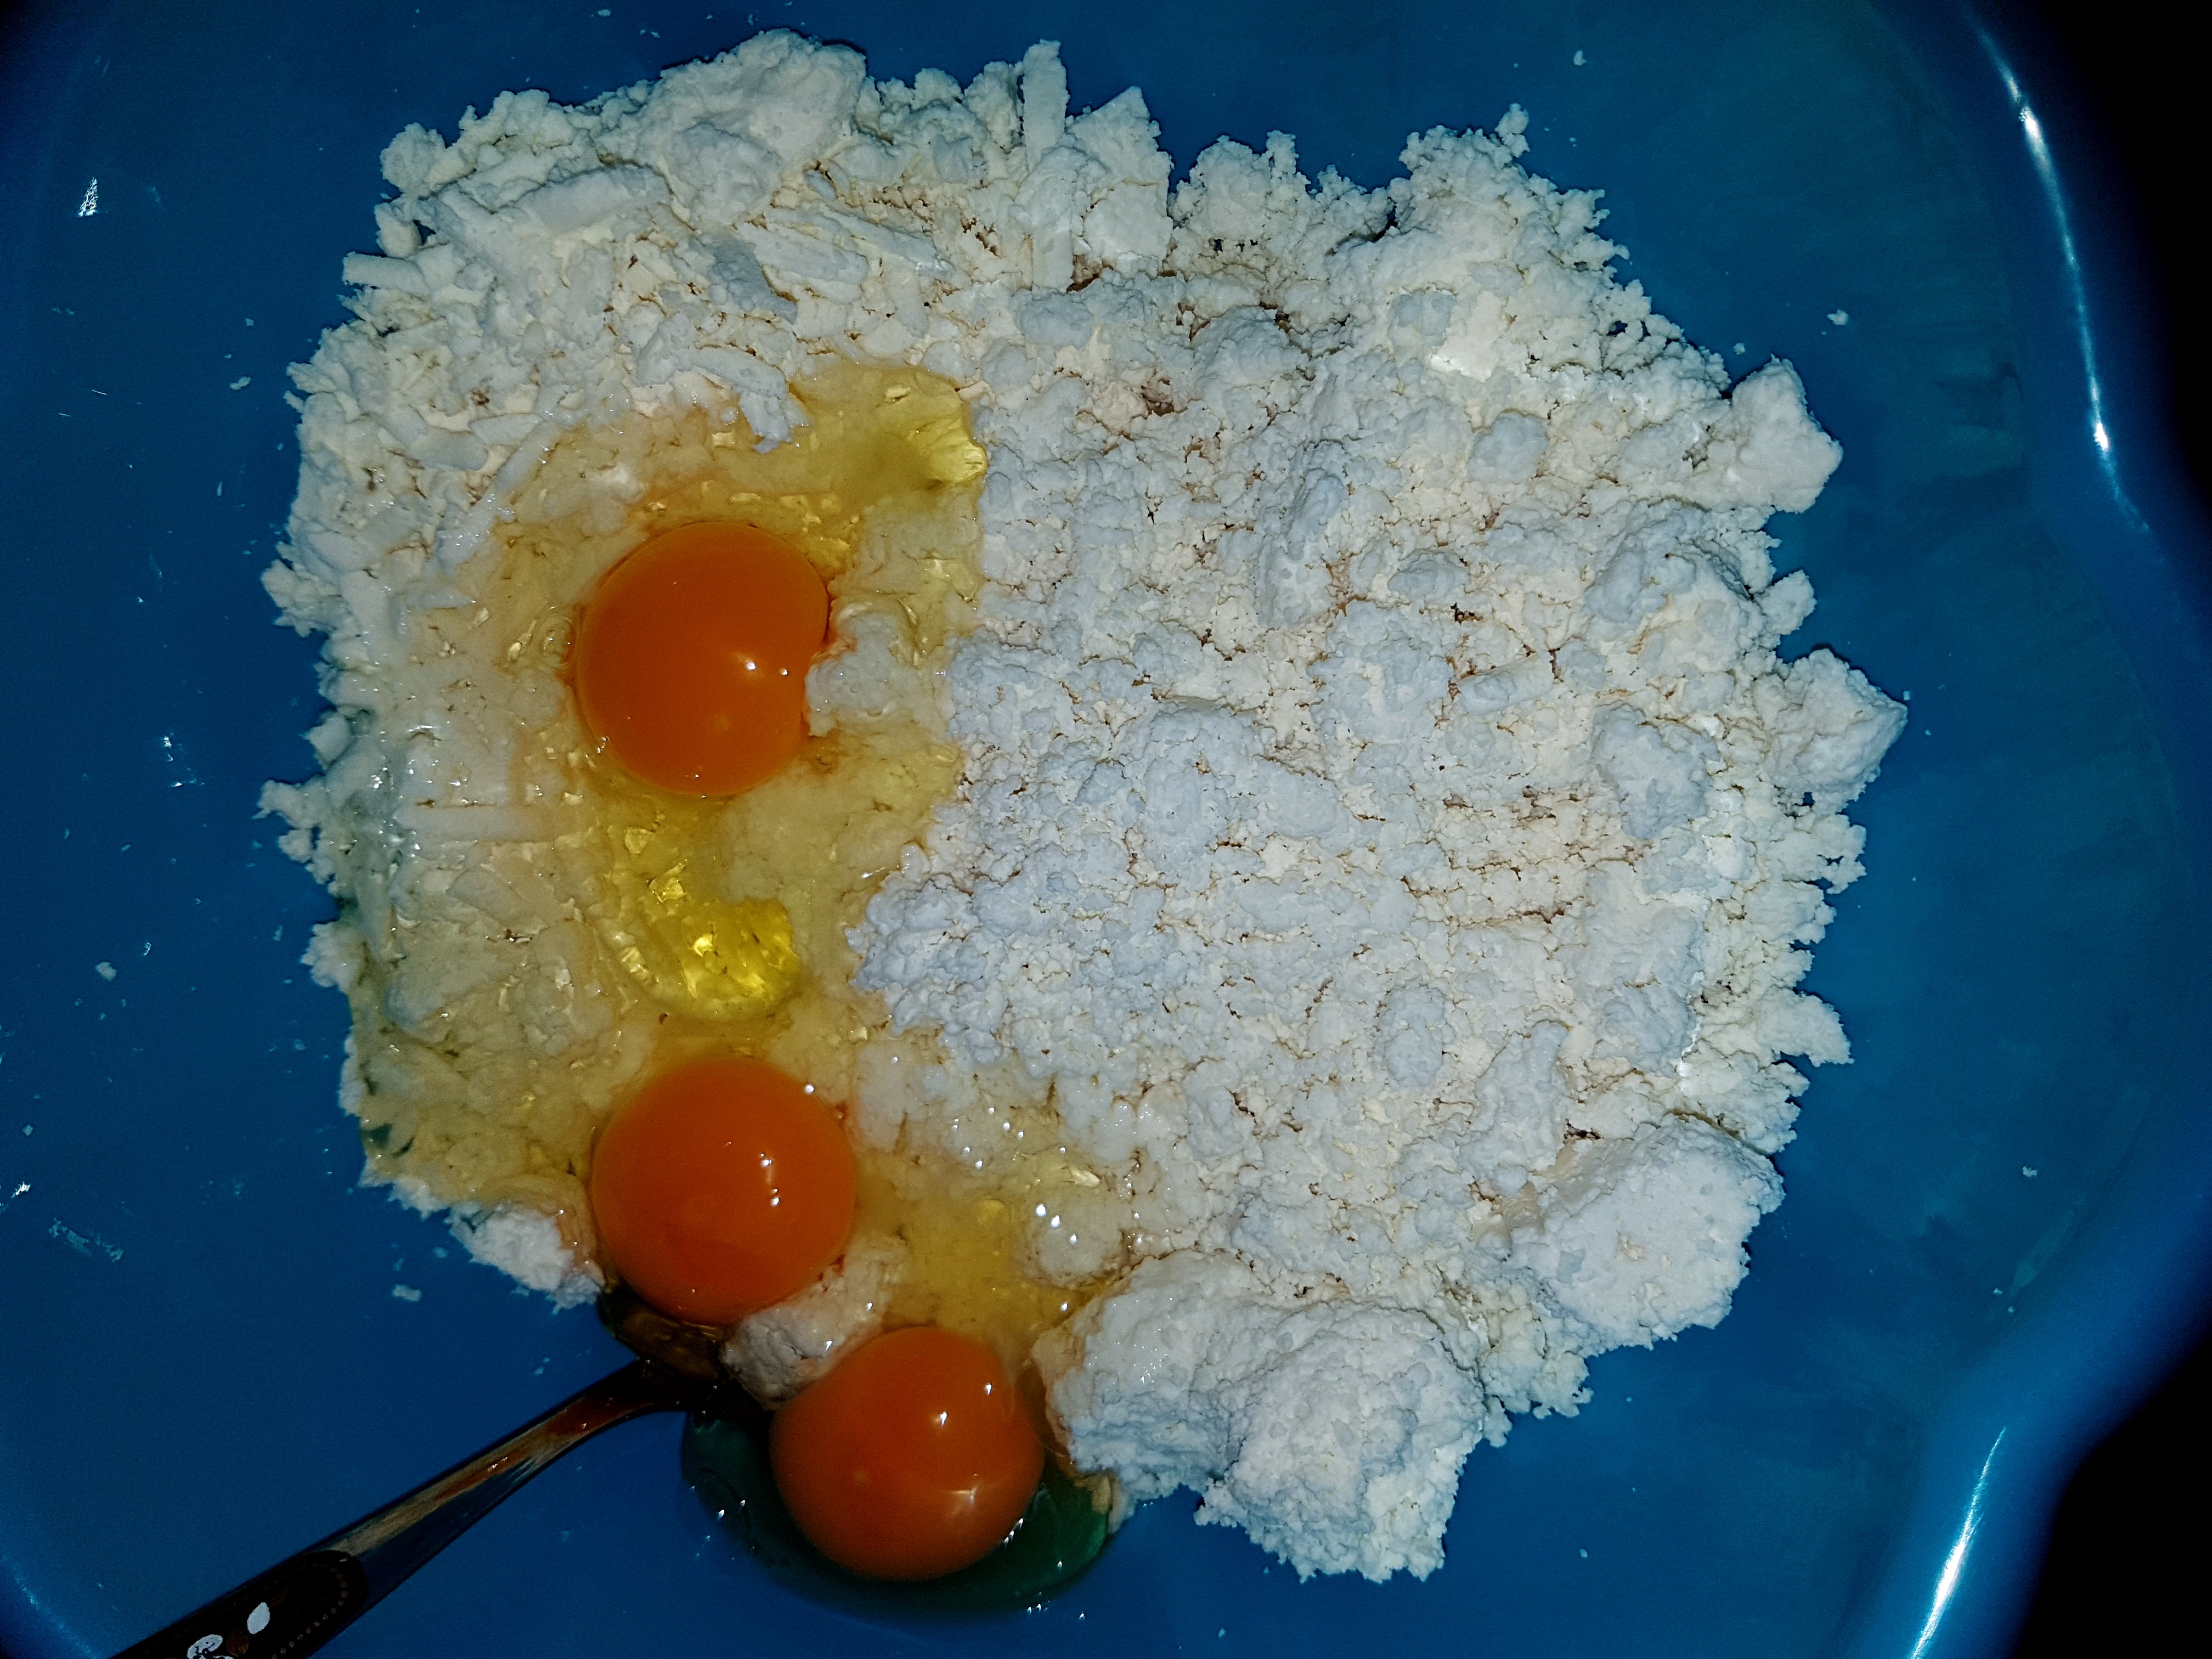
----------------------------------------------------------------------------- And now comes the harder part of this recipe. The recommendation to leave it to rest over night and eat it the next day. They promise the result should be amazing, however I don't personally know one who actually waited this long for this true-to-soul Italian Classic dessert. :) ----------------------------------------------------------------------------- TRY SEXUAL I'LL TRY ANY RECIPE (AT LEAST) ONCE. SUMAR: Ce am folosit pentru 2 cozonaci grasuti: 25 g drojdie proaspata (Budafok) 500 g faina alba + alte 30 g pentru maia (eu folosesc Arpis) 60 ml lapte caldut (28 grade celsius) + alte 60 ml lapte rece de la frigider 150 g unt + putin unt pentru uns formele de cozonac 8 oua (2 oua medii si 3 galbenusuri pentru aluat + alte 3 oua medii pentru umplutura) 80 g zahar alb fin + alte 600 g zahar alb normal pentru sirop + alte 200 g zahar pudra coaja rasa de la o lamaie si o portocala mari 30 g Rom 10 g extract de vanilie 400 g nuca macinata 50 g cacao pudra 50 ml vinars+ alte 200 ml pentru sirop 200 ml apa 1 baton de vanilie un praf de sare pt aluat + altul pentru umplutura 2 forme de cozonac 20x10x10 cm. hartie de copt si folie alimentara putin ulei vegetal pentru uns formele Ce-am gresit: Am scapat 100g cacao in loc de 50 :) Nu s-a simtit diferenta prea tare, insa a avut un guist intens de ciocolata amaruie Ce fac mai bun sau mai bine data viitoare: Evident, am grija la cantitatea de cacao. De unde am reteta: De pe blogul lui Adi Hadean, un guest post genial by Mircea Banu, pe care il gasiti aici. ----------------------------------------------------------------------------------------------------- SUMMARY What I used for 2 sponge cakes: 25 g fresh east (Budafok) 500 g white flour + another 30 g for the leaven 60 ml warm fat milk (about 28 Celsius degrees) + another 60 ml cold milk, straight out of the fridge 150 g butter + some extra for greasing the baking trays 8 eggs (2 medium eggs and 3 egg yolks for the dough + another 3 medium eggs for the filling) 80 g fine white sugar for the dough + an extra 600 g plain white sugar for the syrup + another 200 g icing sugar the grated peel from one orange and one lemon 30 g Rum 10 g Vanilla extract 400 g grinded walnut 50 g Cocoa powder 50 ml Cognac+ another 200 ml for the syrup 200 ml water 1 Vanilla pod a dash of salt 2 special baking trays (20x10x10 cm) baking paper and food foil some vegetable oil for greasing What I did wrong: I dropped 100g cocoa powder instead of 50 g. Didn't make a whole lot of a difference, but it did gave a dark chocolate flavour What I need to do better or tastier the next time: I really need to watch out the quantities I add How I came across this recipe: This is a guest post from Mircea Banu on chef Adi Hadean's cooking blog.  Pasul 1. Maiaua Am inceput, potrivit instructiunilor, cu un castron in care am asezat meticulos drojdia, cele 30 g faina si 60 ml lapte caldut. Ratiunea din spatele ideii de 'caldut' este aceea ca un mediu cald este propice pentru ca drojdia sa se activeze si aluatul sa inceapa sa creasca, in timp ce un mediu fierbinte 'ucide' enzimele din drojdie, facand-o inactiva. Am batut cu telul pana ce s-a omogenizat povestea si am abandonat deoparte pret de vreo 15 minute, intr-un loc caldut din camera. In imaginile de mai jos se vede maiaua mea inainte si dupa ce a crescut. ----------------------------------------------------------------------------------------------------- Step 1. The Leaven As instructed, I got a bowl and placed the east, the 30 g flour and 60 ml warm milk. The thing is you have to make sure your milk is warm and not hot because the warm liquid helps the east activate and so the dough rises, whilst hot liquid will boil the east and make it inactive. I gave this mix a whisk until it was even and leave it in a warm part of the room for about 15 minutes. The below pics show you how my leaven looked prior to and before its rise.
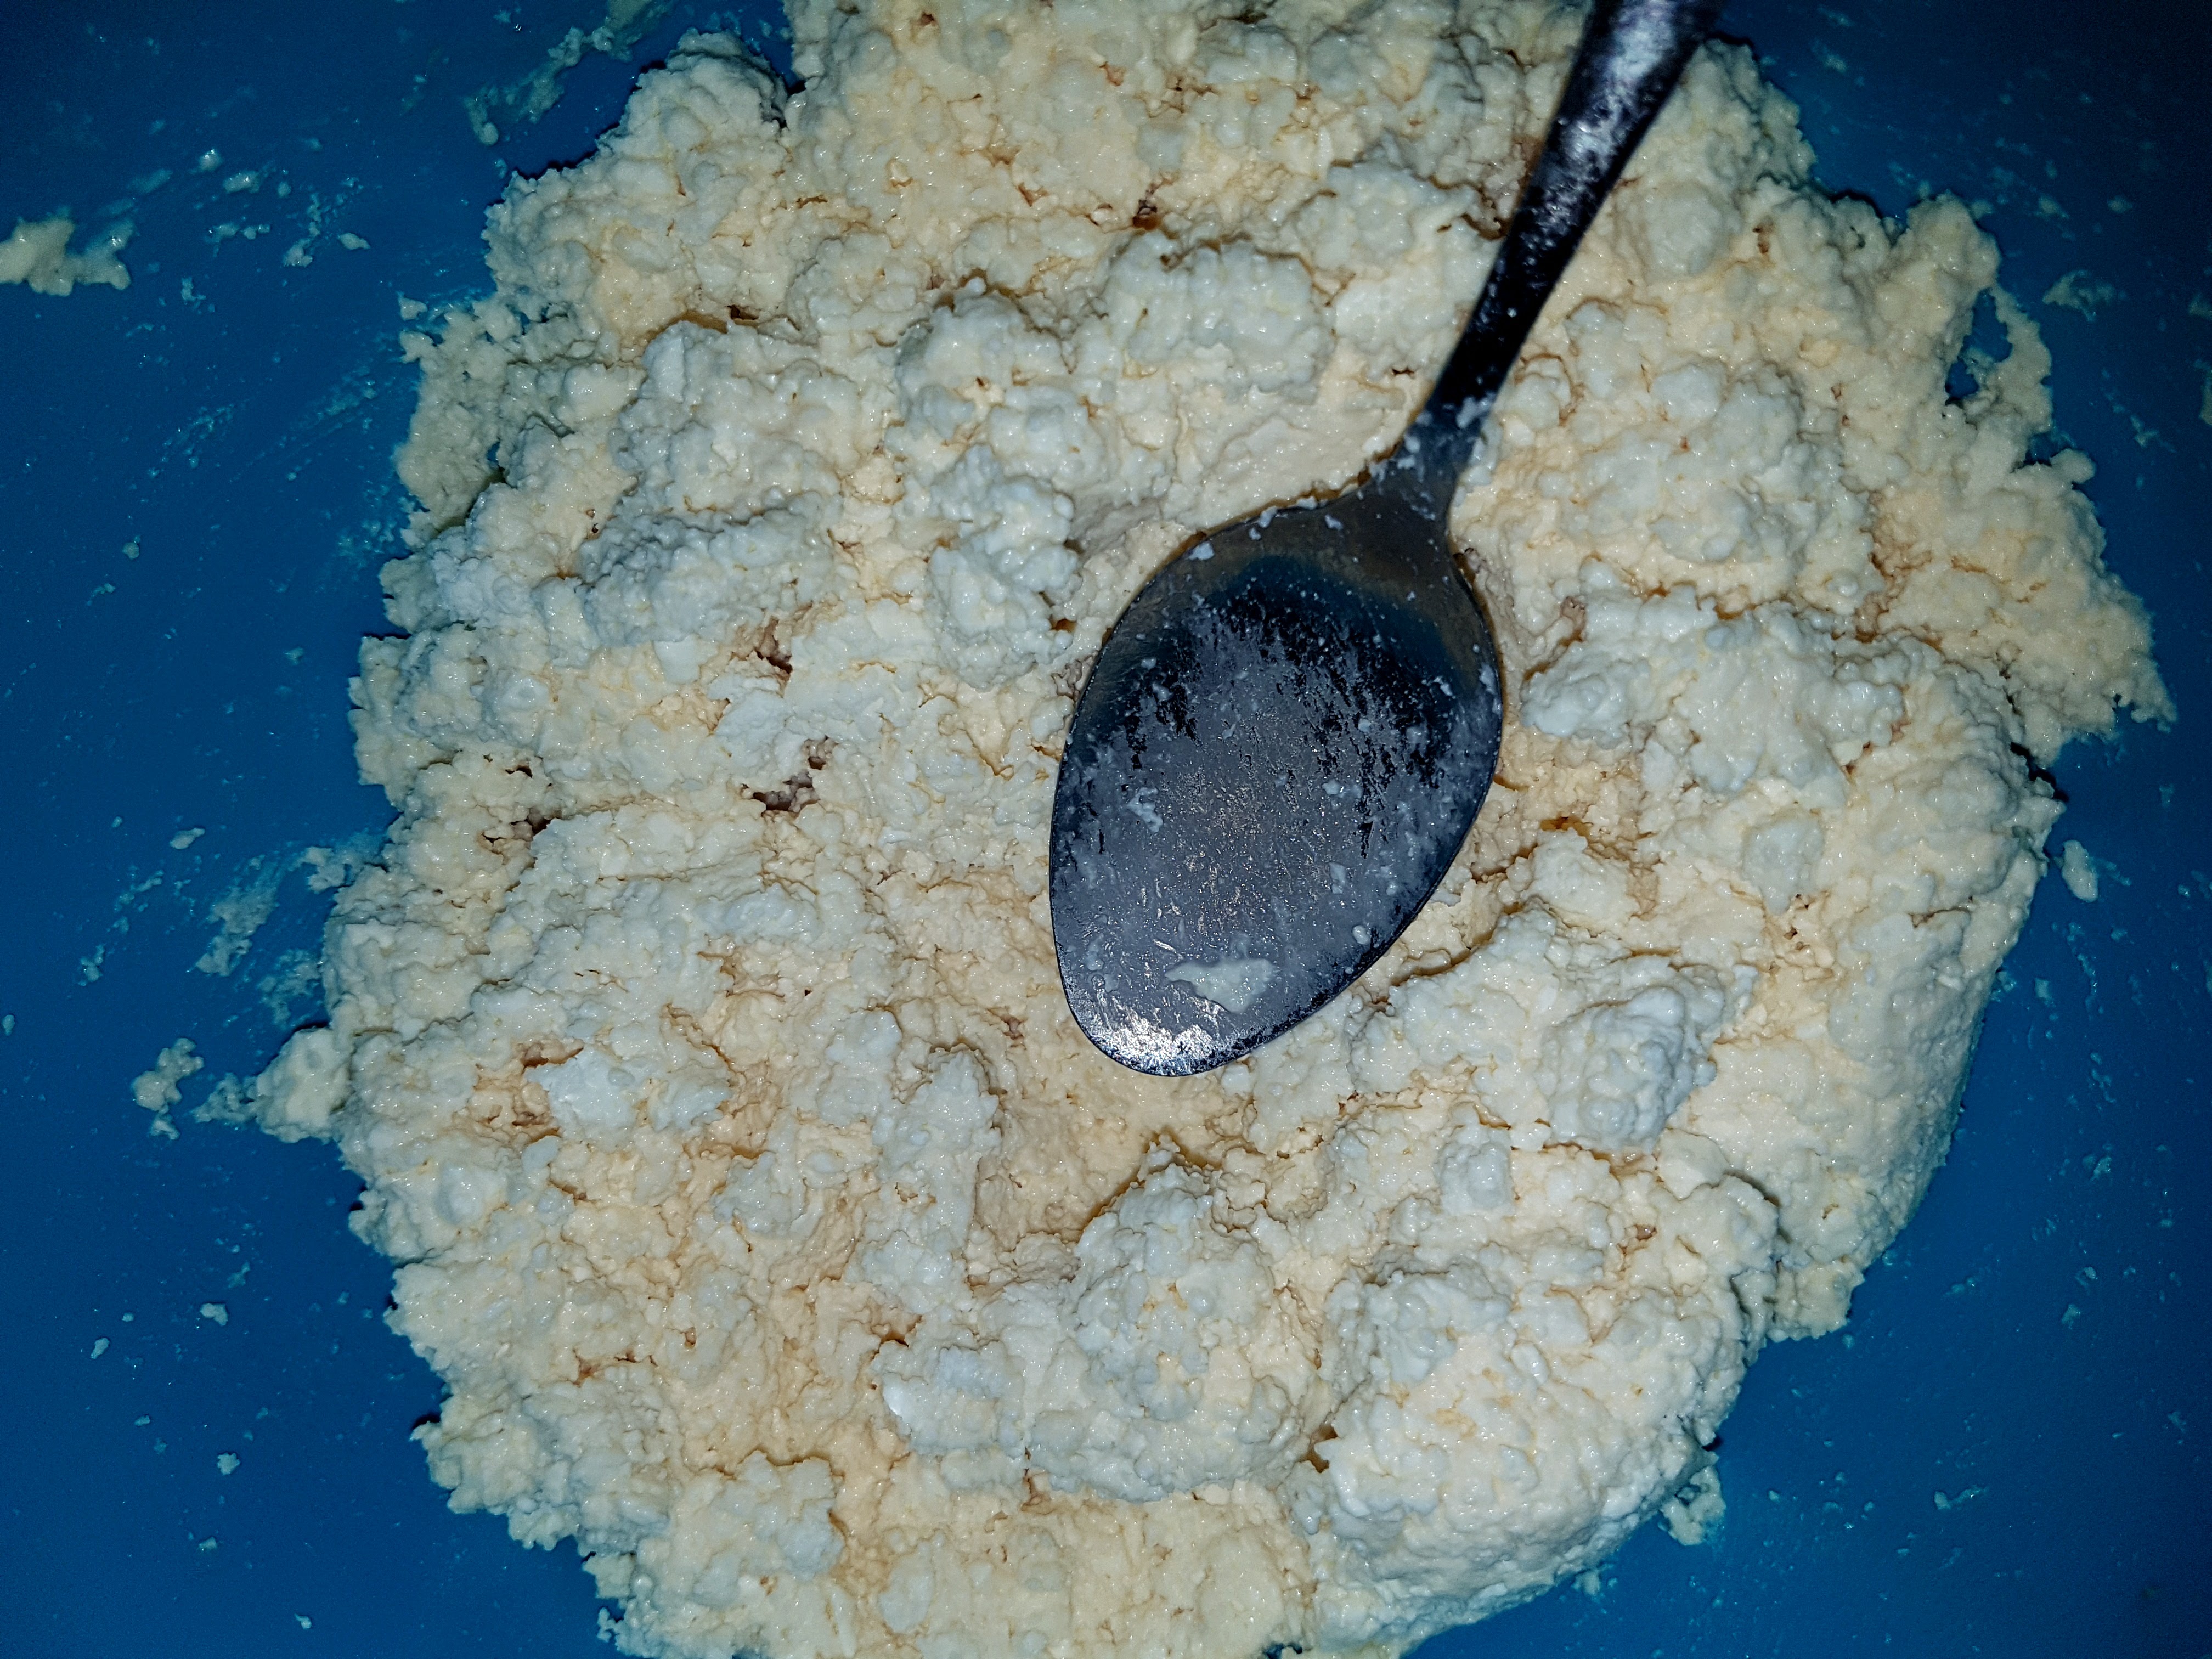
Pasul 2. Coca Am portionat cele 150 g de unt in bucati mai mici, de cca. 50 g, cam ca marimea unui cub de gheata. Intr-un alt bol (poate fi cel al mixerului planetar, eu am continuat manual) am pus 2 oua medii si 3 galbenusuri, 80 g zahar fin, un praf de sare, coaja rasa de lamaie si portocala, cele 30 g rom si extractul de vanilie. Am batut cu telul pana s-a topit tot zaharul. Am adaugat maiaua, cele 500 g faina si 60 ml lapte rece de la frigider. In aceasta faza, aluatul este foarte lipicios; am framantat pana cand s-a putut desprinde de pe peretii vasului, ceea ce s-a intamplat in cca. 15 min. Dupa aceea, am adaugat untul portionat putin cate putin si am framantat numai pana cand s-a incorporat. A iesit o coca pe care am transferat-o intr-un alt bol uns in prealabil cu ulei. Am acoperit cu folie de plastic si am abandonat-o in frigider 2 ore, timp in care si-a dublat volumul. Dupa ce timpul s-a scurs si volumul s-a dublat, am scos coca de la frigider, am taiat-o in 2 bucati egale; le-am dat o forma sferica, le-am pus pe fiecare in boluri unse cu ulei si am acoperit cu folie alimentara. Le-am returnat in frigider pentru alte 3 ore. ----------------------------------------------------------------------------------------------------- Step 2. The dough I portioned the 150 g butter into smaller pieces, of about 50 g each, which is kind of the size of an ice cube. In another bowl (it can be your mixer's bowl, but I did it all by hand) I placed 2 medium eggs and 3 egg yolks together with 80g fine sugar, one dash of salt, the grated peel of the orange and lemon, the 30g Rum and the vanilla extract. I whisk it all until all sugar was melted. I then added the leaven, the 500g flour and 60ml cold milk. At this stage, the dough will be really sticky; I firmly mixed until the dough got less sticky and could come off the bowl' edges easily, which took about 15 min. Then, I added the butter one piece at a time and mixed until it was all incorporated in the dough. What came out was a firm dough which I placed into another bowl greased with oil; I covered it with foil and placed it in the fridge for about 2 hours, during which time it volume doubled. After the 2 hours passed and the dough doubled its volume, I removed it from the fridge and cut it in 2 equal pieces; I gave the pieces a rather sphere shape and placed them in 2 bowls which I previously greased with oil and covered them with foil. then, I returned them back into the fridge for another 3 hours.
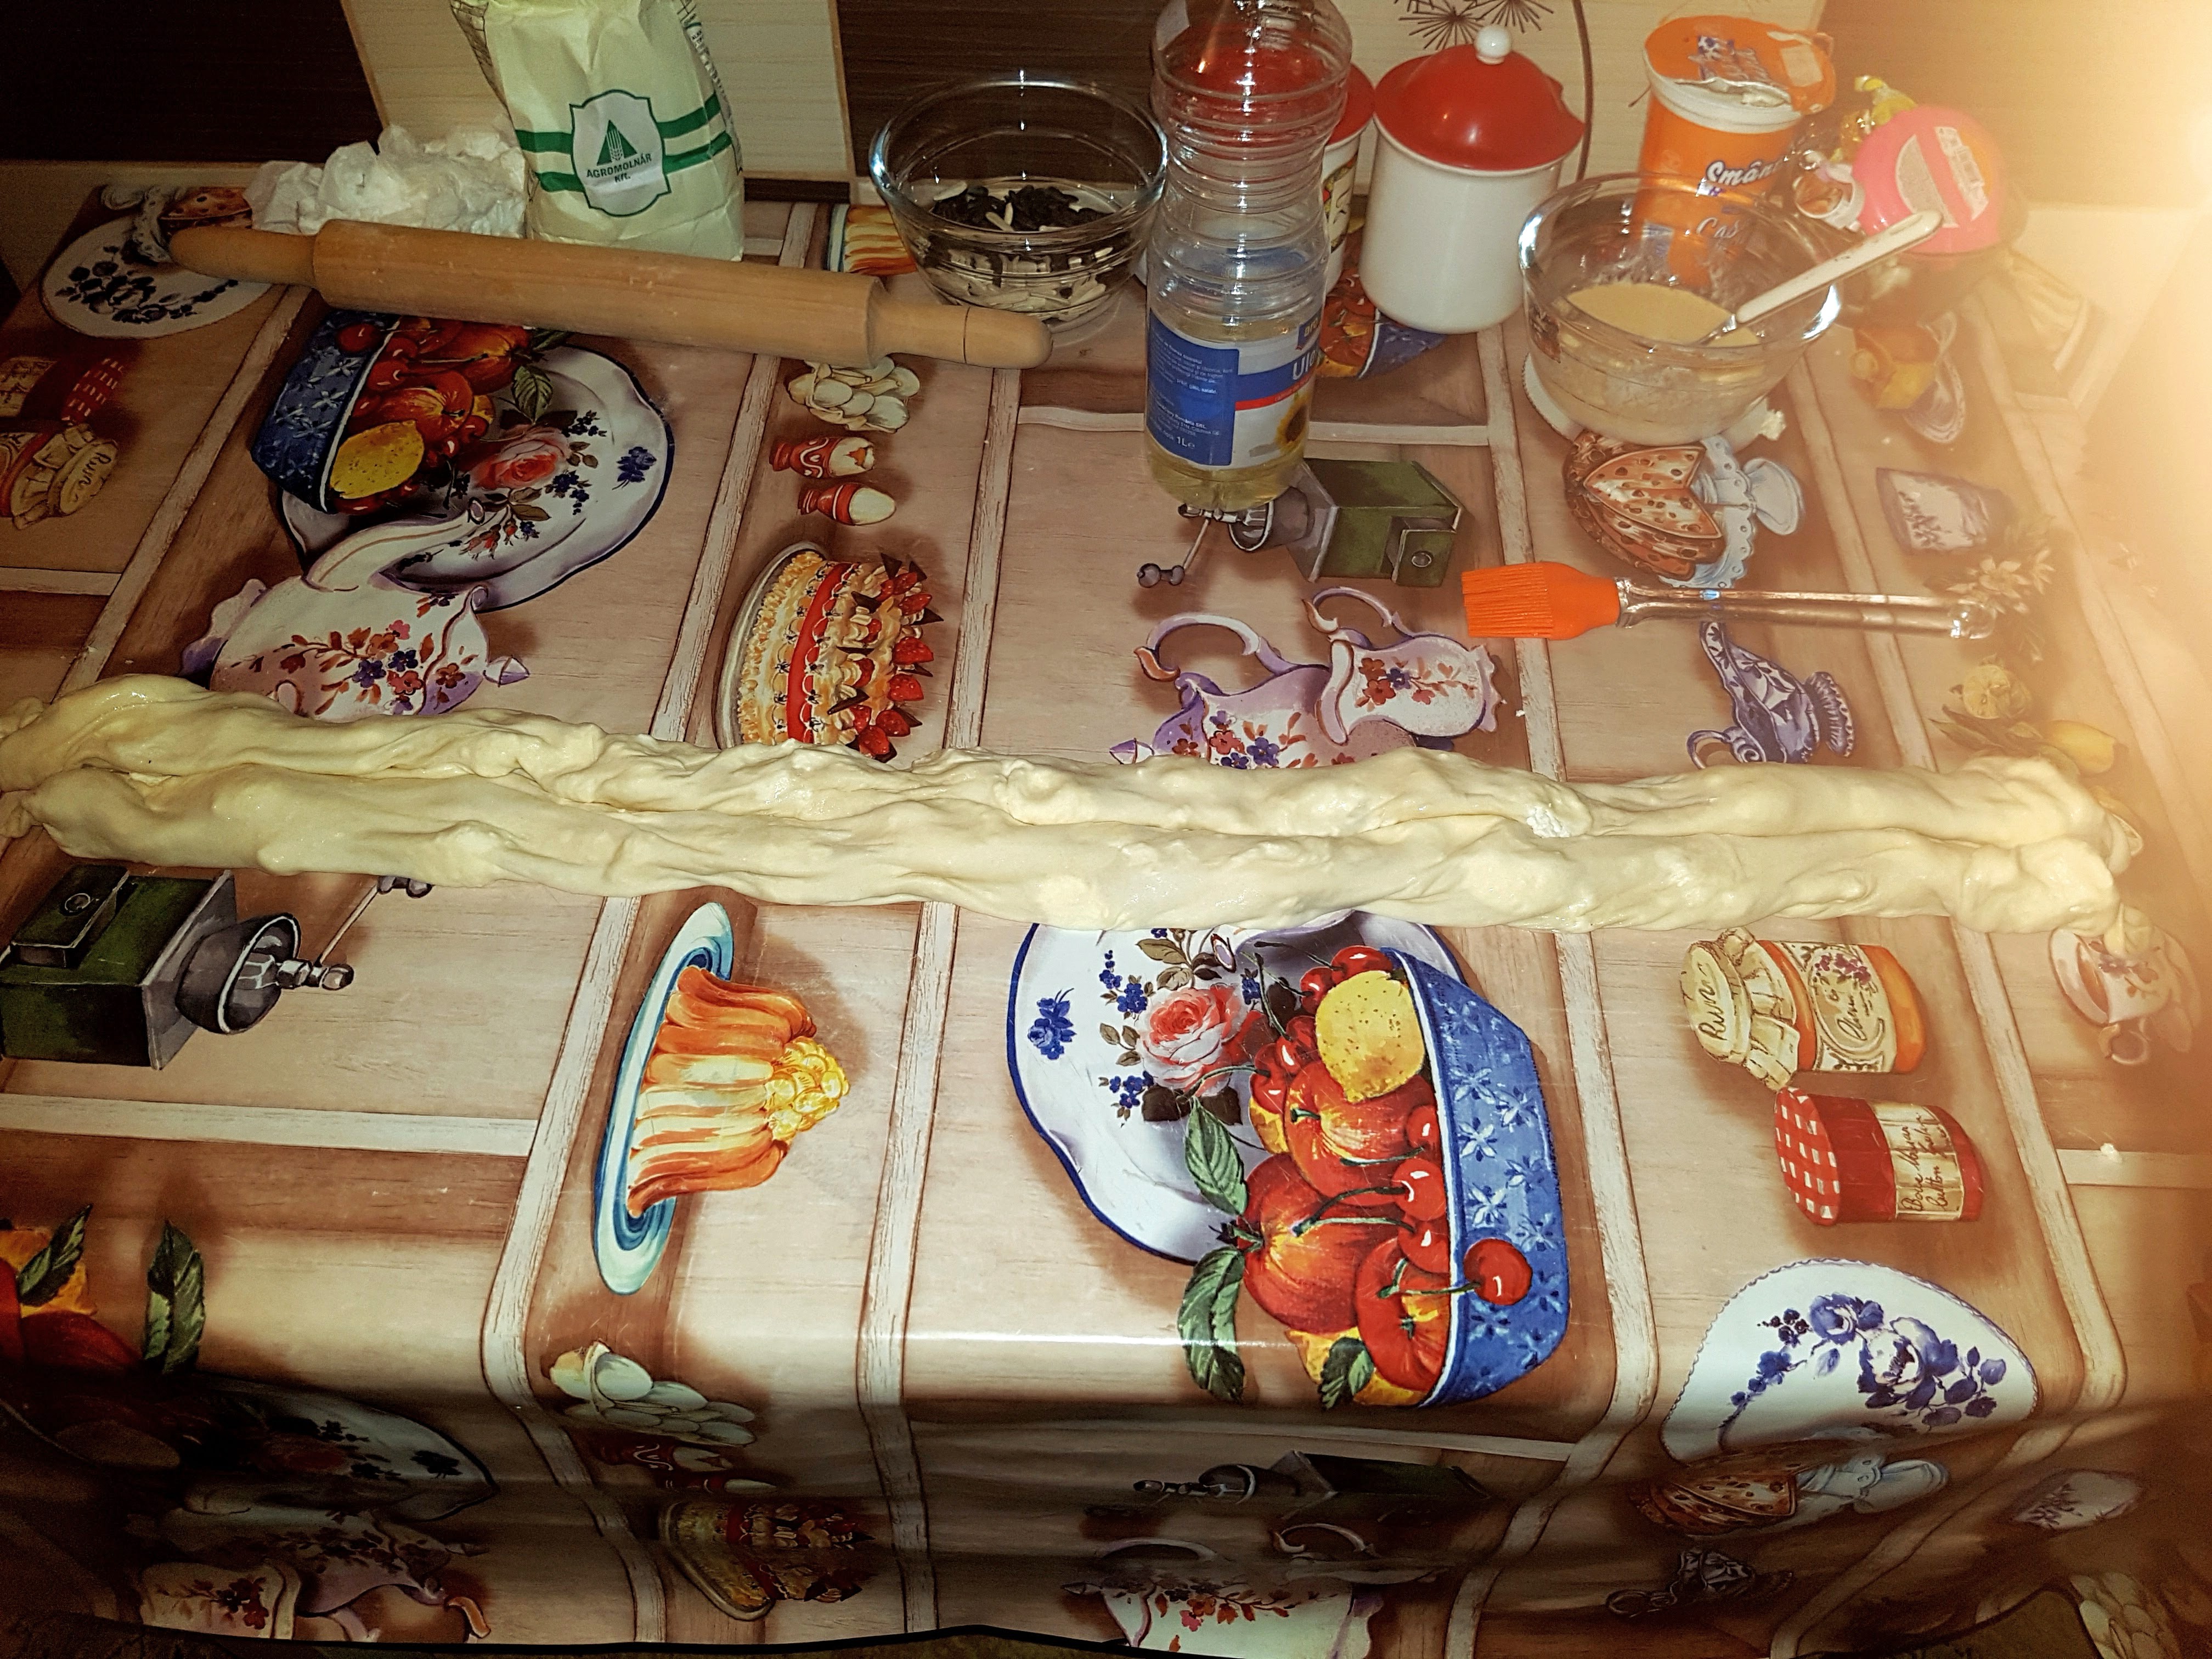
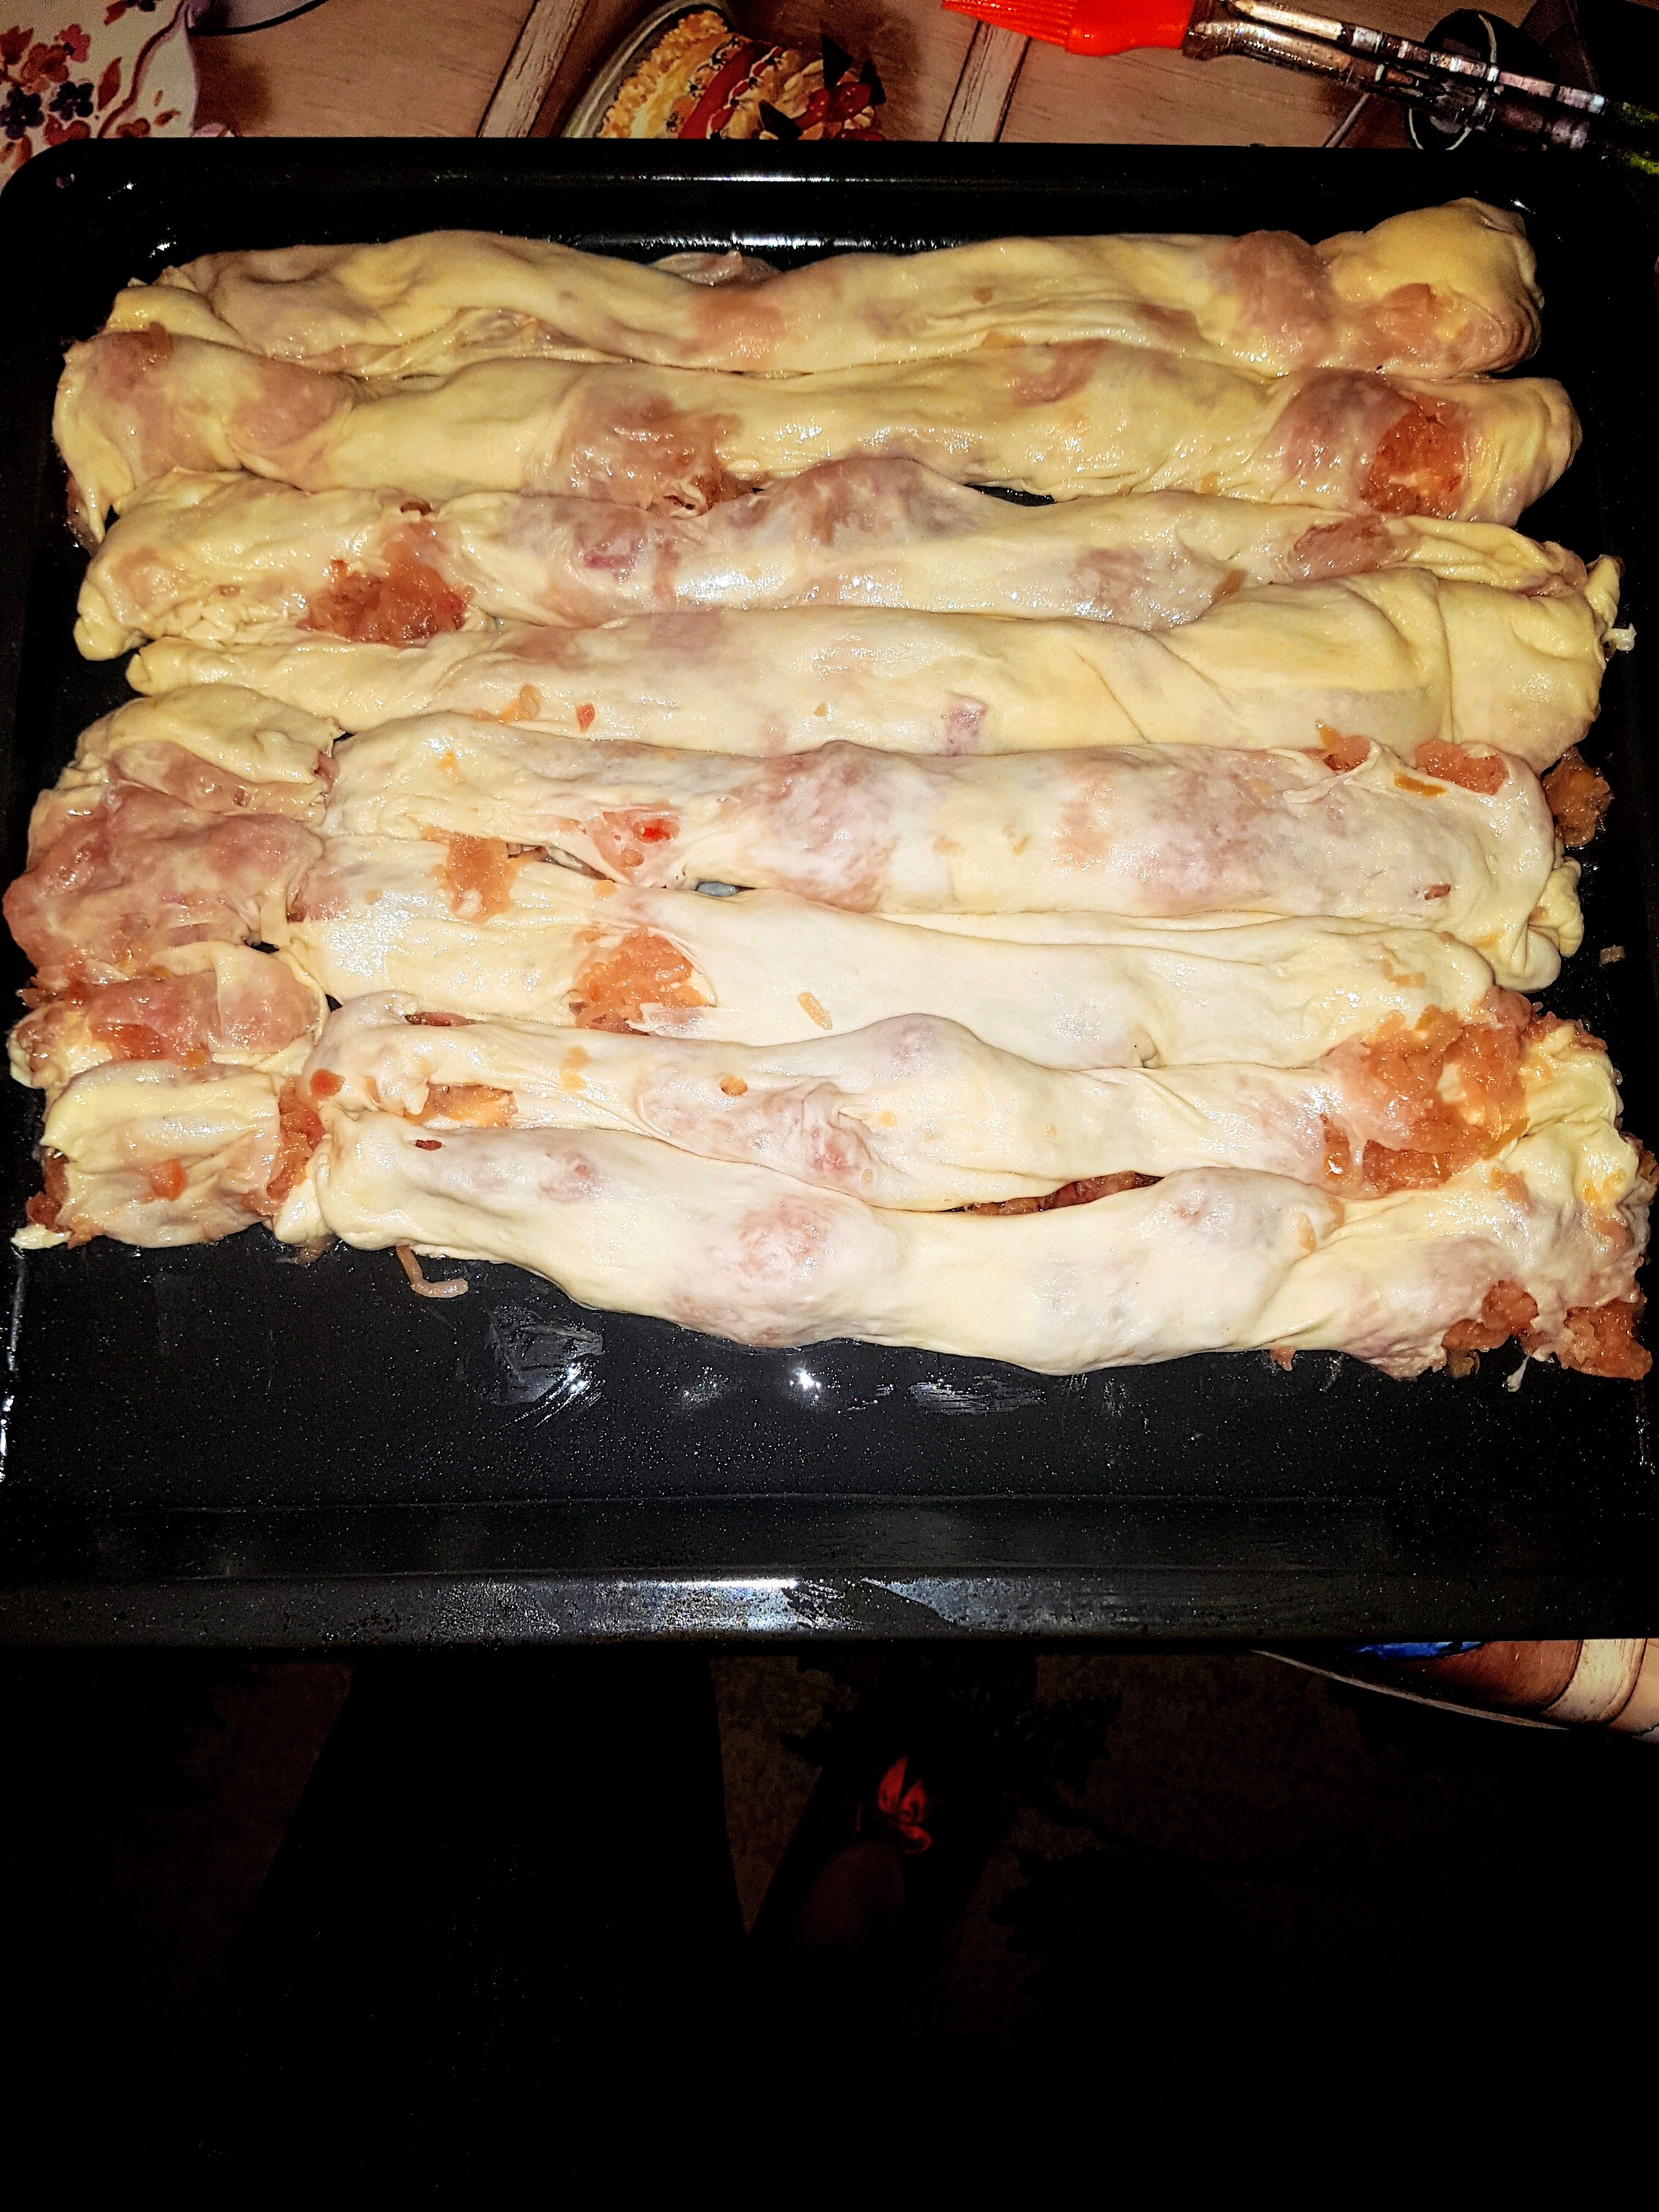
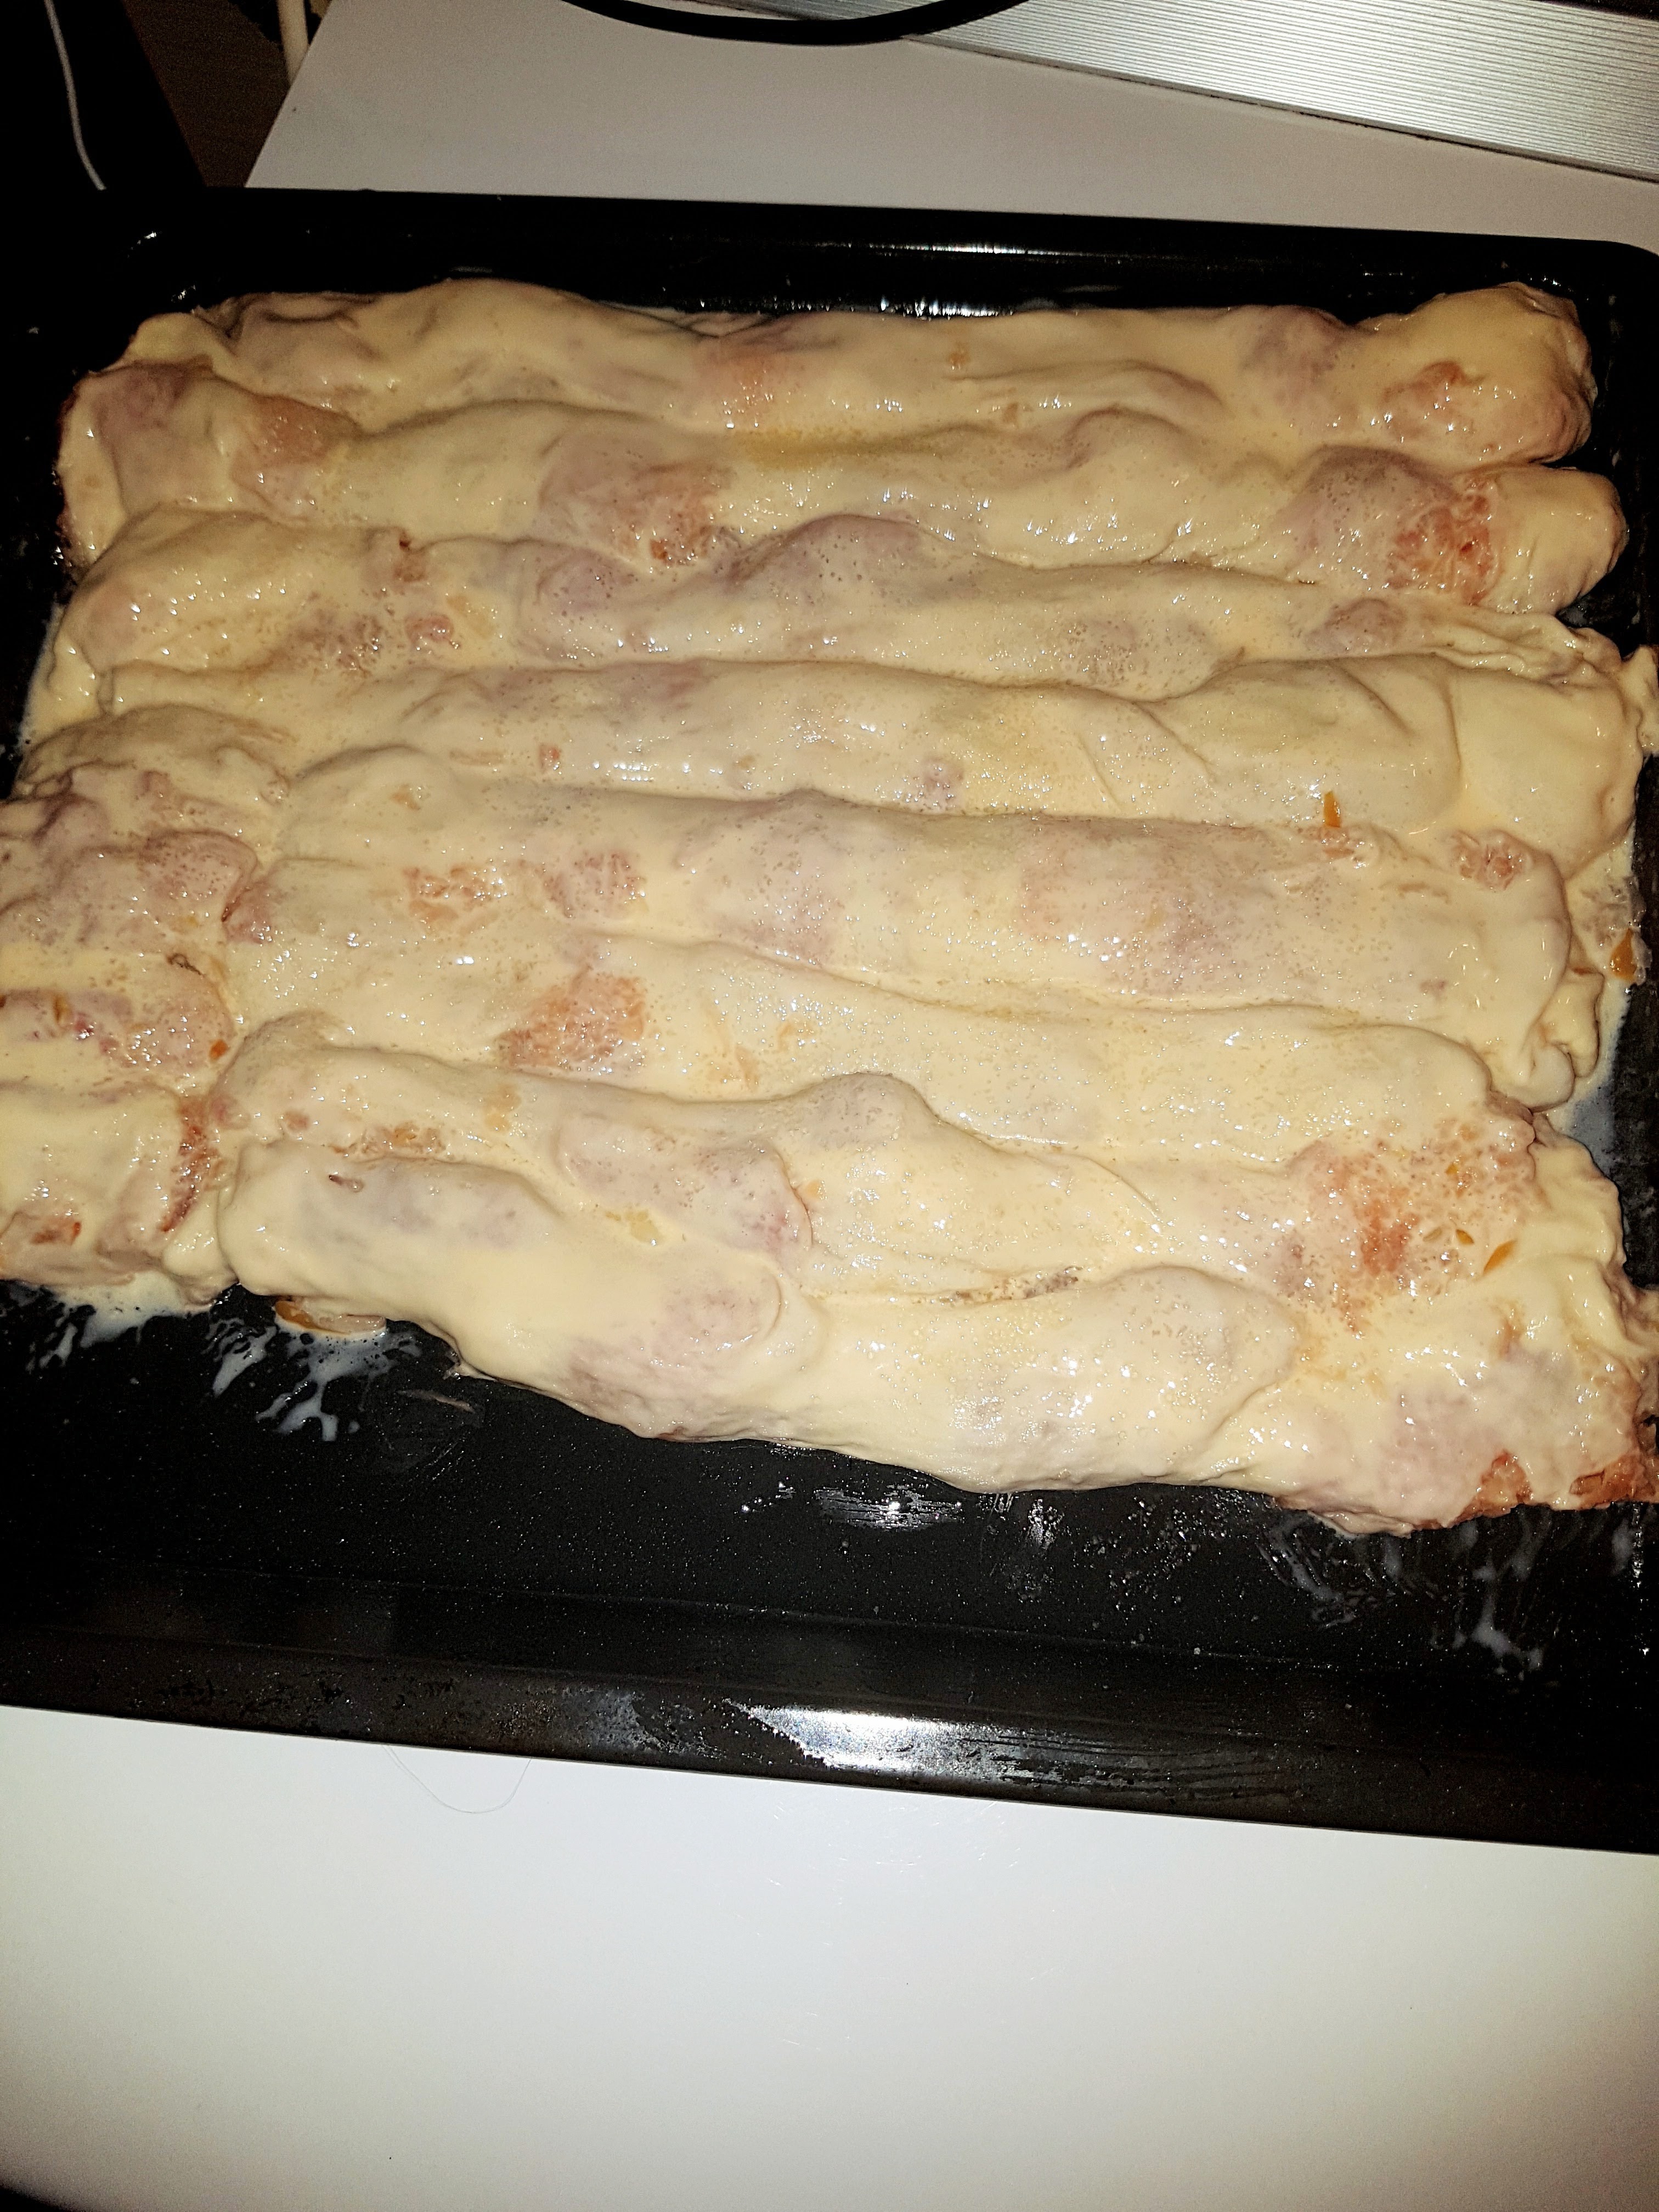
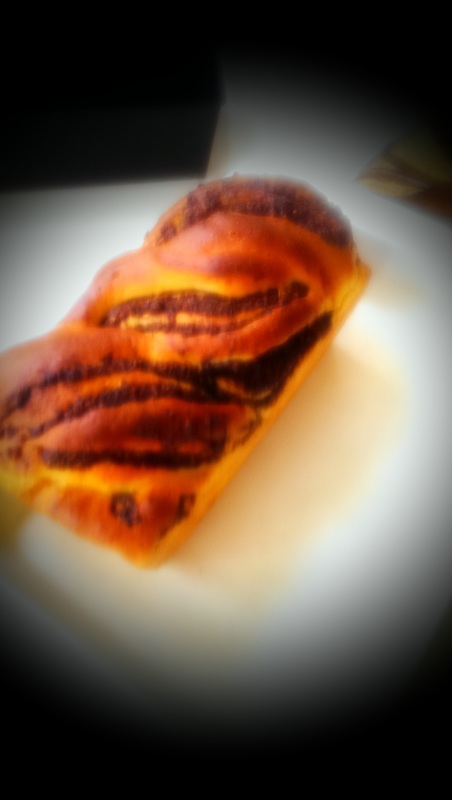
Pasul 3. Umplutura Am macinat nuca la robotul de bucatarie; desi reteta ne instruieste sa fie pana la stadiul de pasta, eu nu am facut-o chiar praf, pentru ca ne place textura ei si nu am vrut sa se piarda. Am amestecat nuca cu 2 oua, cacao, zaharul pudra (200g), 50 ml vinars si un praf de sare. ----------------------------------------------------------------------------------------------------- Step 3. The filling I grinded the walnuts using the food processor; although the recipe tells us to make it into a paste, I didn't quite do it, since we enjoy its texture and did not want to miss it. I mixed the grinded walnuts with the 2 eggs, cocoa, icing sugar, the 50ml Cognac and a dash of salt.  Pasul 4. Siropul Zaharul ramas (600g) si apa (200ml) s-au fiert impreuna pana cand tot zaharul s-a topit, fara a amesteca. Dupa ce s-a racit, am adaugat 200ml vinars; am sectionat pe lung batonul de vanilie, i-am scos interiorul si l-am adaugat in sirop, impreuna cu pastaia. ----------------------------------------------------------------------------------------------------- Step 4. The syrup The leftover plain white sugar (600g) and water (200ml) were boiled together until all sugar melted, without mixing it. After it was cooled down, I added 200 ml Cognac; I cut the Vanilla pod on the long side, removed its content and added the latter and the leftover empty pod in the syrup.  Pasul 5. Modelarea Dupa cele 3 ore, am scos pe rand sferele de coca de la frigider; am intins foi dreptunghiulare pe verticala de cca. 30x40 cm, cu ajutorul unui strat fin de faina; am scuturat excesul de faina, am intors foaia pe partea opusa si am intins jumatate din umplutura pe foaie, lasand marginea scurta de sus libera (cca. 4 cm), pentru ca umplutura sa nu iasa din foaie atunci cand va fi rulata. Desigur, am rulat foaia cat mai strans, iar marginea ramasa libera am uns-o cu putina apa pentru a facilita 'lipirea' ei. Am taiat cca. 5 cm din fiecare capat al ruloului si am mutat ruloul si bucatelele taiate pe o tava unsa cu ulei; am acoperit cu foile alimentara si am lasat rulourile si bucatile taiate de la capete in congelator, pret de 15 minute. Aceeasi procedura pentru ambele bucati de coca. Dupa ce s-au scurs cele 15 minute, am luat pe rand cate un rulou din congelator si le-am taiat pe lungime; bucatile se suprapun intr-o forma de cruce initial, apoi se impletesc si se aseaza in forma tapetata cu unt si 'asigurata' cu bucati de hartie de copt asezate strategic. Alaturi de cozonacel, in tava, am asezat si bucatile de coca, cat mai estetic. Am acoperit formele cu folie alimentara si le-am abandonat in frigider peste noapte. ----------------------------------------------------------------------------------------------------- Step 5. Shaping After the 3 hours passed, I removed each dough sphere one at a time; I spread them in rectangular vertical sheets of about 30x40 cm, using as little flour as possible; I shaken all flour excess and turned the sheet the other side, then spread half of the filling on top, leaving the shorter upper edge empty of any filling (about 4 cm.) so as the filling won't come out when sheet witll be rolled out. Of course, I then rolled over the sheet as tight as possible and annoited the left 4 cm edge with some water in order to help it stick better. I cut out about 5 cm. of each end of the rolled sheet and placed the rolled sheet and the cut pieces on to a greased tray, then covered it all with a foil and placed it in the freezer for 15 minutes. Same goes for the 2nd sheet. After the 15 minutes have passed, I took one rolled sheet at a time out of the freezer and cut them out long; the two pieces are placed one on top of the other and then braided; afterwards, the two baking trays need to be greased with melted butter and covered with some baking paper for extra insurance, and then the two braided pieces can be placed in the trays. Together with the braided pieces you can place the cut out dough pieces as well, as pretty as you can. Then cover the baking trays with some more foil and leave that in the fridge over night.
Pasul 6. Coacerea
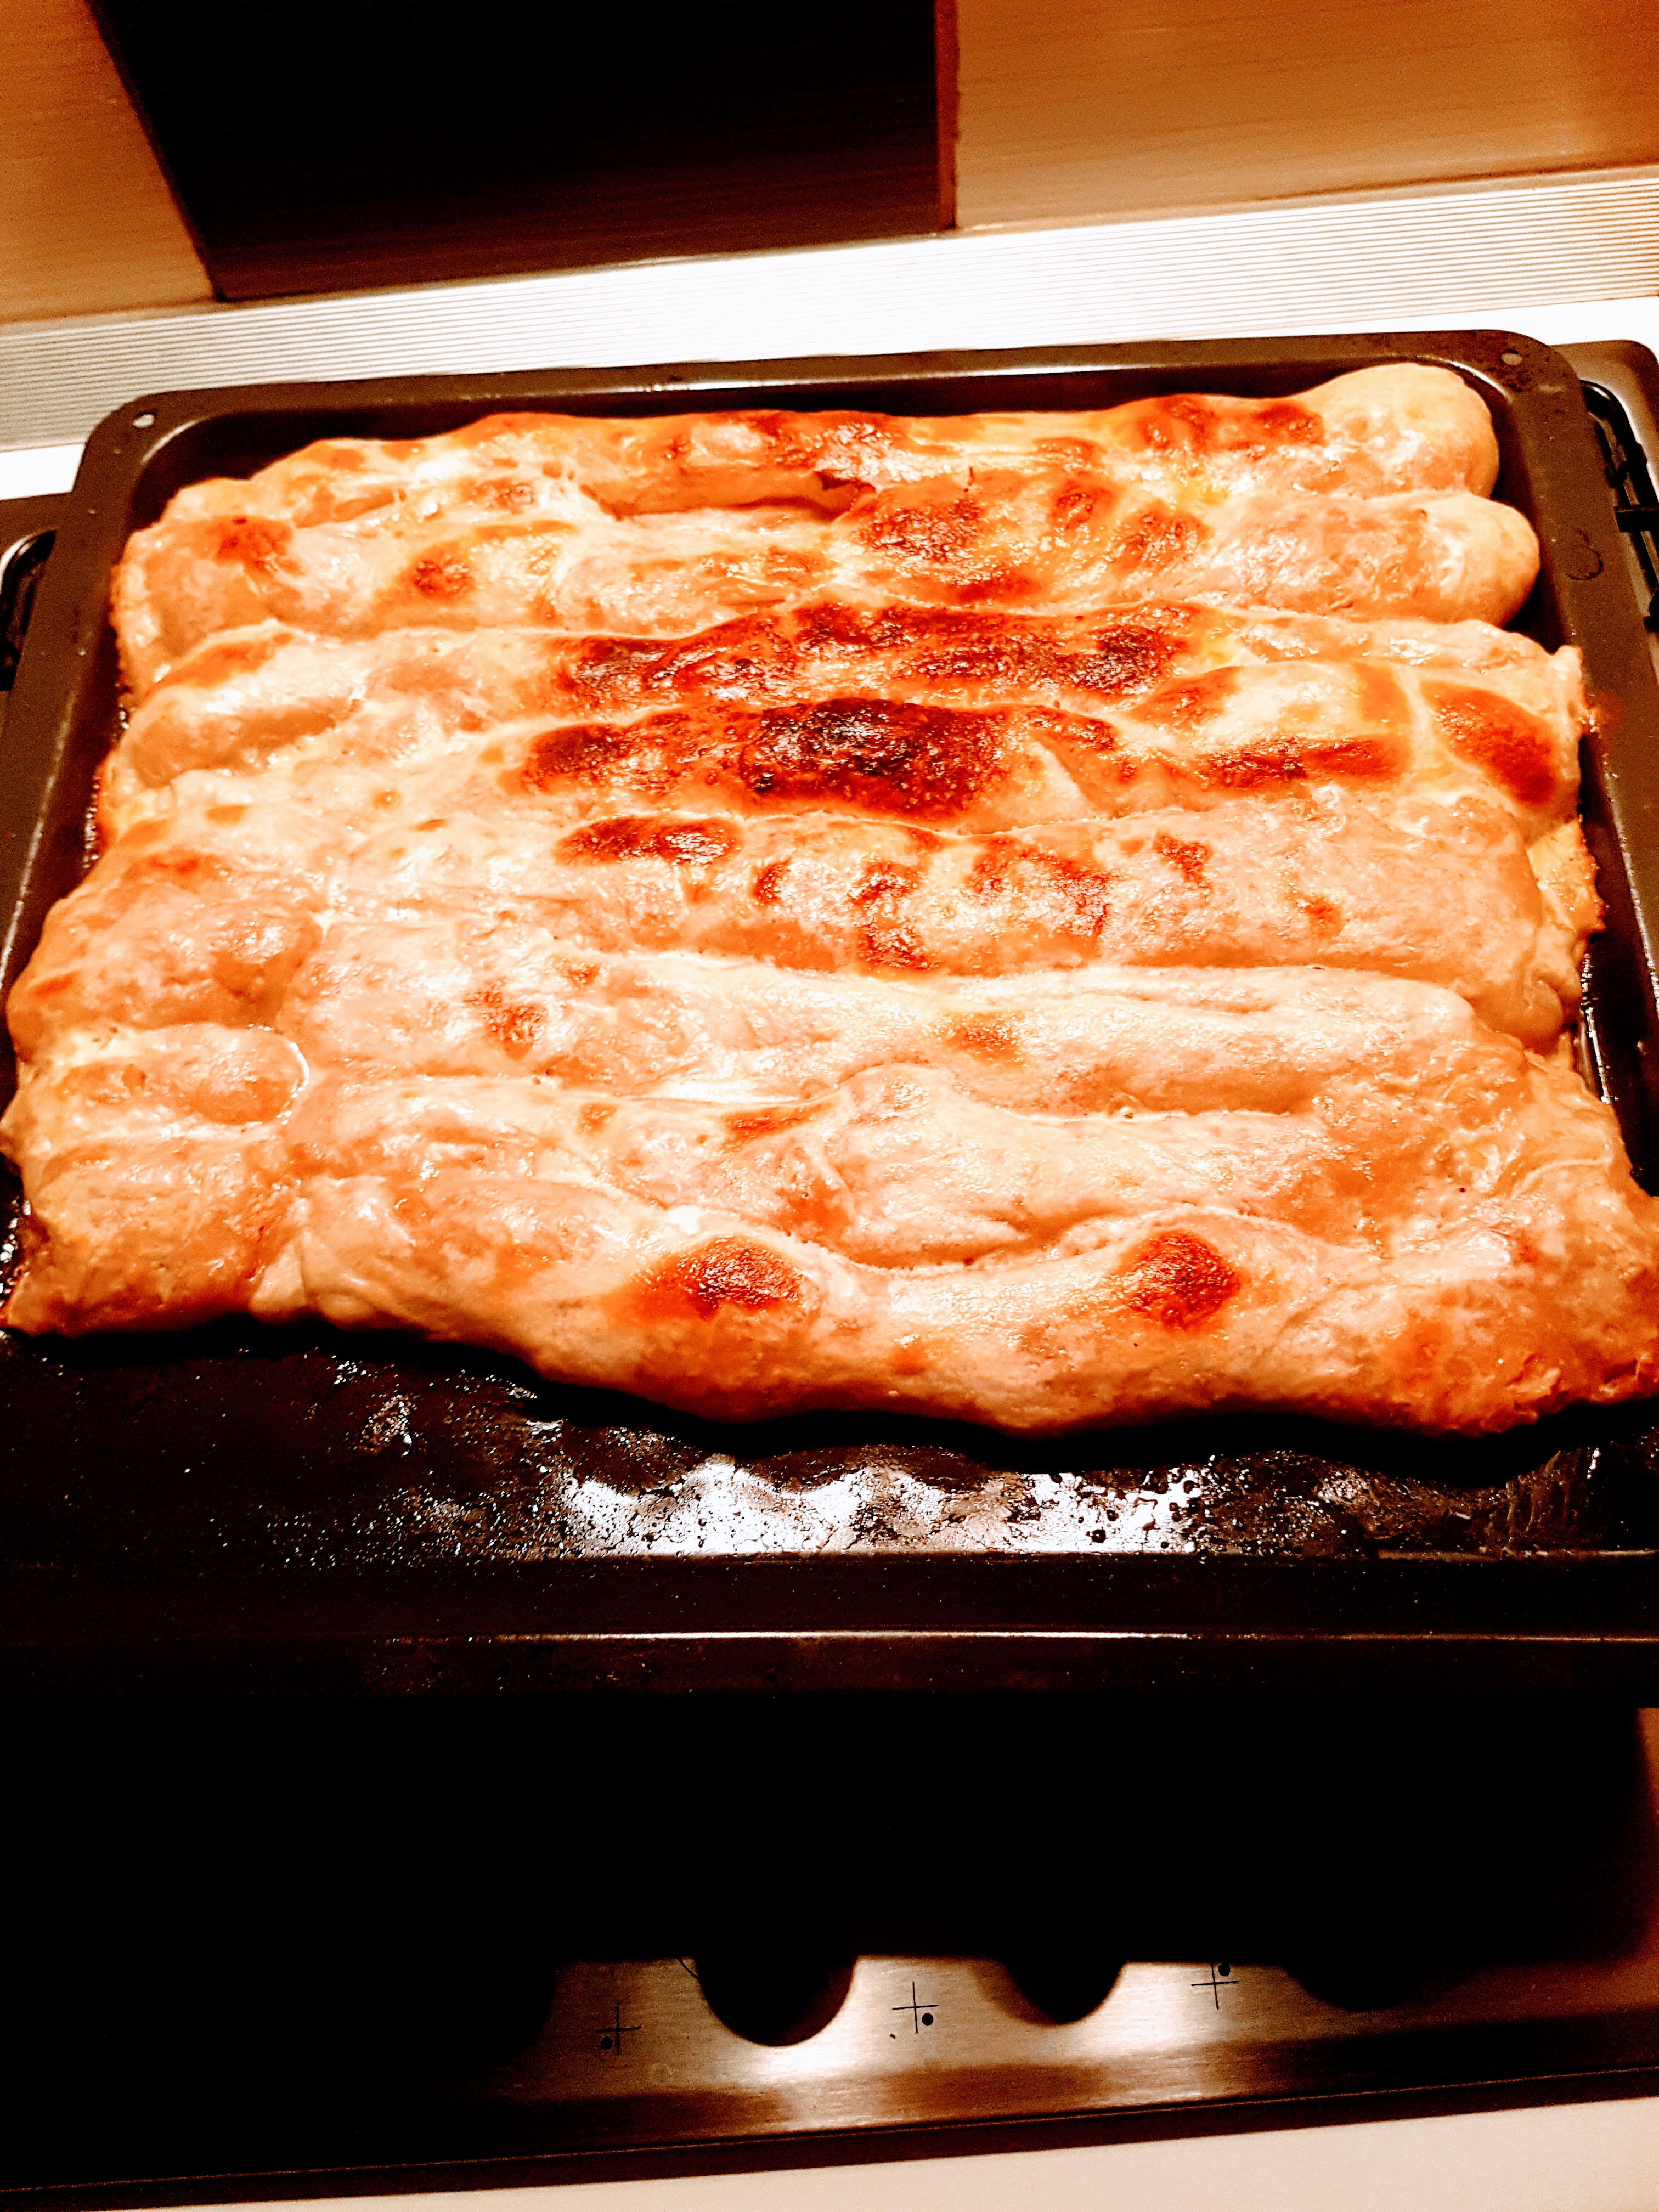
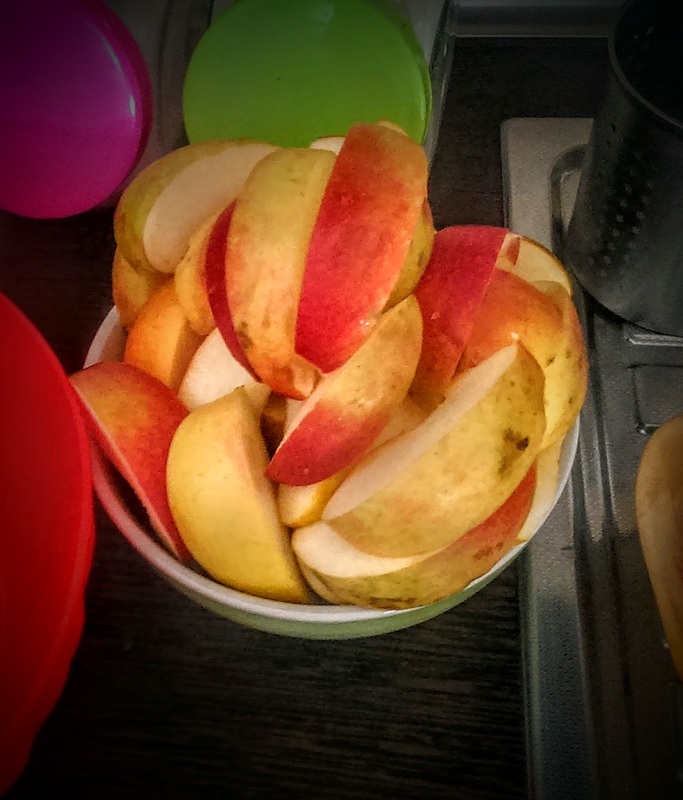
Am pus in cuptor o oala cu apa fiarta; am inchis usa, am scos formele de cozonac din frigider, am indeparta folia si le-am pus in cuptorul aburind pret de 30 de minute. Dupa acest timp, am scos formele din cuptor si oala cu apa, am incins cuptorul la treapta medie (cca. 160 grade celsius) si am copt cozonacii timp de 45 de minute, cand au fost rumeni si tare aratosi. Dupa ce i-am scos din cuptor si formele s-au racit nitel, i-am scos intr-o tava adanca si i-am lasat sa se raceasca cca. 5 minute; i-am imbaiat cu siropul (rece), folosindu-ma de o pensula de bucatarie. I-am abandonat asa vreo 10-15 minute pana cand au absorbit cat sirop au considerat de cuviinta. Ideea este sa existe o diferenta de temperatura intre lichid (siropul rece, chiar de la frigider) si coca (cozonacul scos din cuptor), pentru ca lichidul sa fie absorbit in totalitate. Excesul l-am scurs si am returnat cozonacii in forme; i-am acoperit cu folie alimentara si i-am mancat cu maaare placere dupa inca o zi. Unii carcotasi au declarat ca prefera mai multa coca si mai putina umplutura, insa eu ma numar printre cei care apreciaza cu adevarat umplutura bogata la un cozonac. Si reteta asta ne onoreaza pe noi, cei din a doua categorie. ----------------------------------------------------------------------------------------------------- Step 6. Baking I placed a pot of boiled water in the oven; i closed the door and removed the baking trays from the refrigerator, removed the foil and placed them in the steamed oven for about 30 minutes. Afterwards, I removed the baking trays and pot form the oven and turn on the heat at about 160 Celsius degrees (medium heat) and baked for cca. 45 minutes, when nice and brown. After removing from the oven and when I could touch the baking trays, I placed the two baked in one deep tray and leaved them to cool outside their baking tray for about 5 minutes; then, I gave them a bath using a kitchen brush and the syrup I made and cooled in the fridge. I abandoned them for cca. 10-15 minutes for until they got all the liquid they liked. The point here is that you need to have a temperature difference between the liquid (the cold syrup, in this case) and the dough (the hot baked sponge cake), so that the liquid can be fully absorbed. I drained the excess syrup and returned the sponge cakes in the baking trays; I then covered them with (some more) foil and ate them the next day. Some grumpies argued that they prefer a sponge cake with less filling, but I am the kind that truly apreciates a rich filling. And this recipe honours us, folks. ------------------------------------------------------------------------------ TRY SEXUAL I'LL TRY ANY RECIPE (AT LEAST) ONCE. SUMAR: Ce am folosit pentru 1 tarta (min. 8 portii): 6 oua 6 linguri de faina 6 linguri de ulei 6 linguri de zahar alb 6 linguri de zahar brun Demerara unt (cca. 50 g.) 1 pliculet praf de copt (5 g.) 1 pliculet zahar vanilinat 4 mere mari un strop de otet de mere 1 tava antiaderenta care sa poata fi folosita pe aragaz si ulterior in cuptor (eu am una rotunda din tuci, cu 5-10 cm. inaltime si cca. 25 cm. diametru; in orice caz, ar trebui sa fie una antiaderenta, pentru ca tarta sa poata fi rasturnata 'in siguranta') Ce-am gresit: Am servit-o exact asa; desi e foarte buna, gustul poate fi foarte usor imbunatatit cu ceva 'adaugiri' Ce fac mai bun sau mai bine data viitoare: Servesc cu o cupa de inghetata de vanilie sau ceva sos pe baza de coniac. De unde am reteta: Are 145 de ani vechime, am invatat sa o fac prima data pe la 14 ani. Asta poate fi un indiciu pentru cat de simplu e. Jenant de simpla ----------------------------------------------------------------------------------------------------- SUMMARY What I used for 1 tart (min. 8 servings): 6 eggs 6 tbsp. of flour 6 tbsp. of vegetable oil 6 tbsp. of white plain sugar 6 tbsp. of brown Demerara sugar some butter (about 50 gr.) 5 gr. baking powder some Vanilla sugar 4 large apples one splash of apple vinegar 1 tray that can be used on an open flame on the stove and afterwards in the oven (I have a round one with approx. 5-10 cm. height and 25 cm. diameter) What I did wrong: Served it just plain; it's very good, but the taste can easily be improved with some 'side effects' What I need to do better or tastier the next time: Maybe serve with some Vanilla gelato or some kind of a cogniac-based dressing How I came across this recipe: Have it since pretty much forever and first made it when I was about 14 years old; this should give you guys a clue of how simple this is made. Embarrassingly easy.  Am purces, deci si am taiat merele; nu le-am curatat, pentru ca ideal e sa-si pastreze forma. Le-am taiat bucati de minim un deget grosime, din acelasi motiv. ------------------------------------------------------------------------------ So I went right ahead and chopped up my apples; I did not peel them, since I want their shape to be preserved throughout the cooking. I chopped finger thick bits, for the same reason.
Am separat albusurile de galbenusuri; pe primele le-am batut spuma cu mixerul, iar pe celelalte le-am impreunat cu zaharul si zaharul vanilinat si le-am mixat pana cand zaharul s-a topit. Nimic mai clasic, nimic mai simplu. ------------------------------------------------------------------------------ I separated the egg yolks from the egg whites; the egg whites were then mixed until foamy and the egg yolks got mixed with the sugar and vanilla sugar for until all sugar was melted. There you have it, simple and classic.
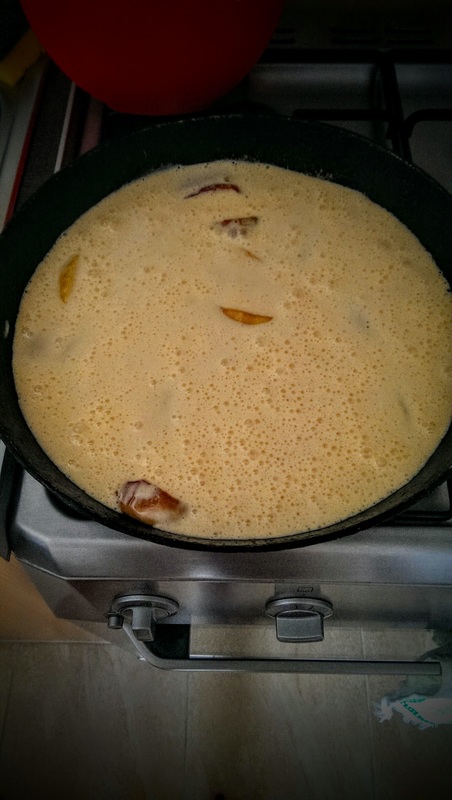
In compozitia cu galbenusuri, am adaugat uleiul si apoi faina si praful de copt. Am amestecat si, dupa ce compozitia a devenit omogena, am incorporat albusurile, fara a amesteca prea 'temeinic', pentru a nu distruge bulele de aer din compozitie - datorita lor, tarta va fi 'pufoasa'. ------------------------------------------------------------------------------ In my egg yolks mix, I added the vegetable oil, then the flour and baking powder. I mixed it all by hand and, after my mixture got smooth, I started adding my egg white foam, without over-mixim them all together, since over mixing destroys all air bubbles that will eventually make the tart nice and airy.
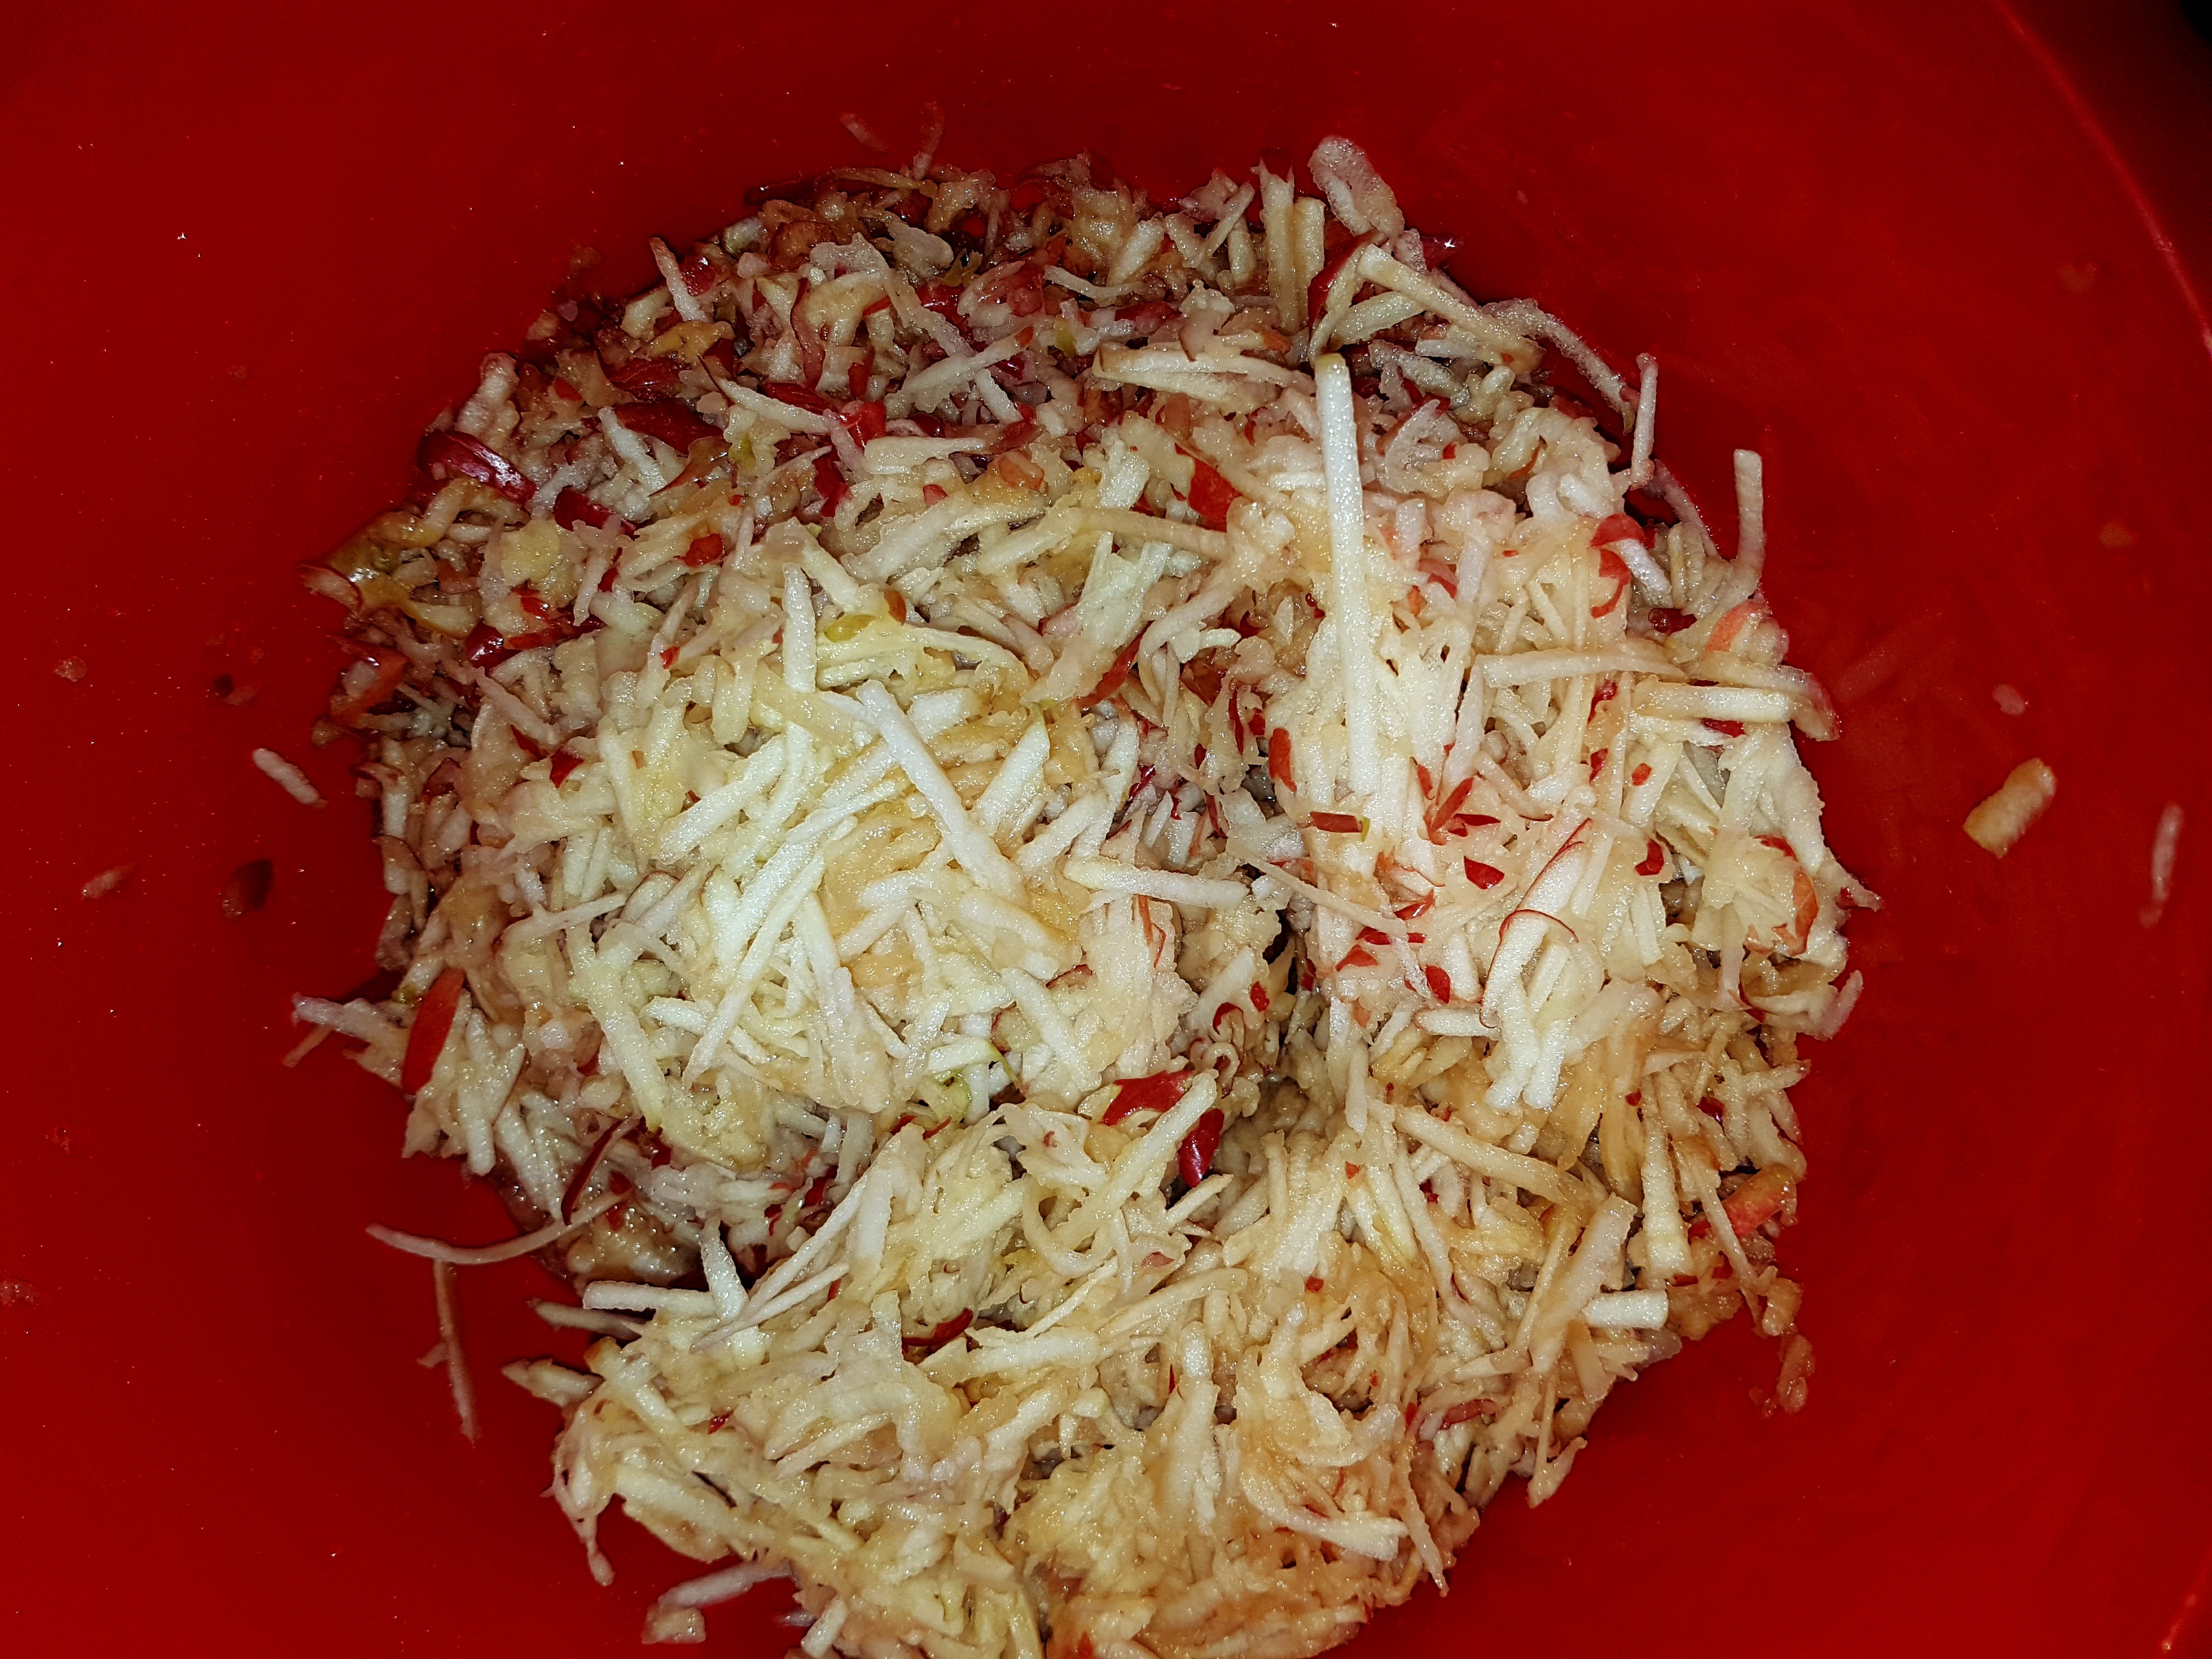
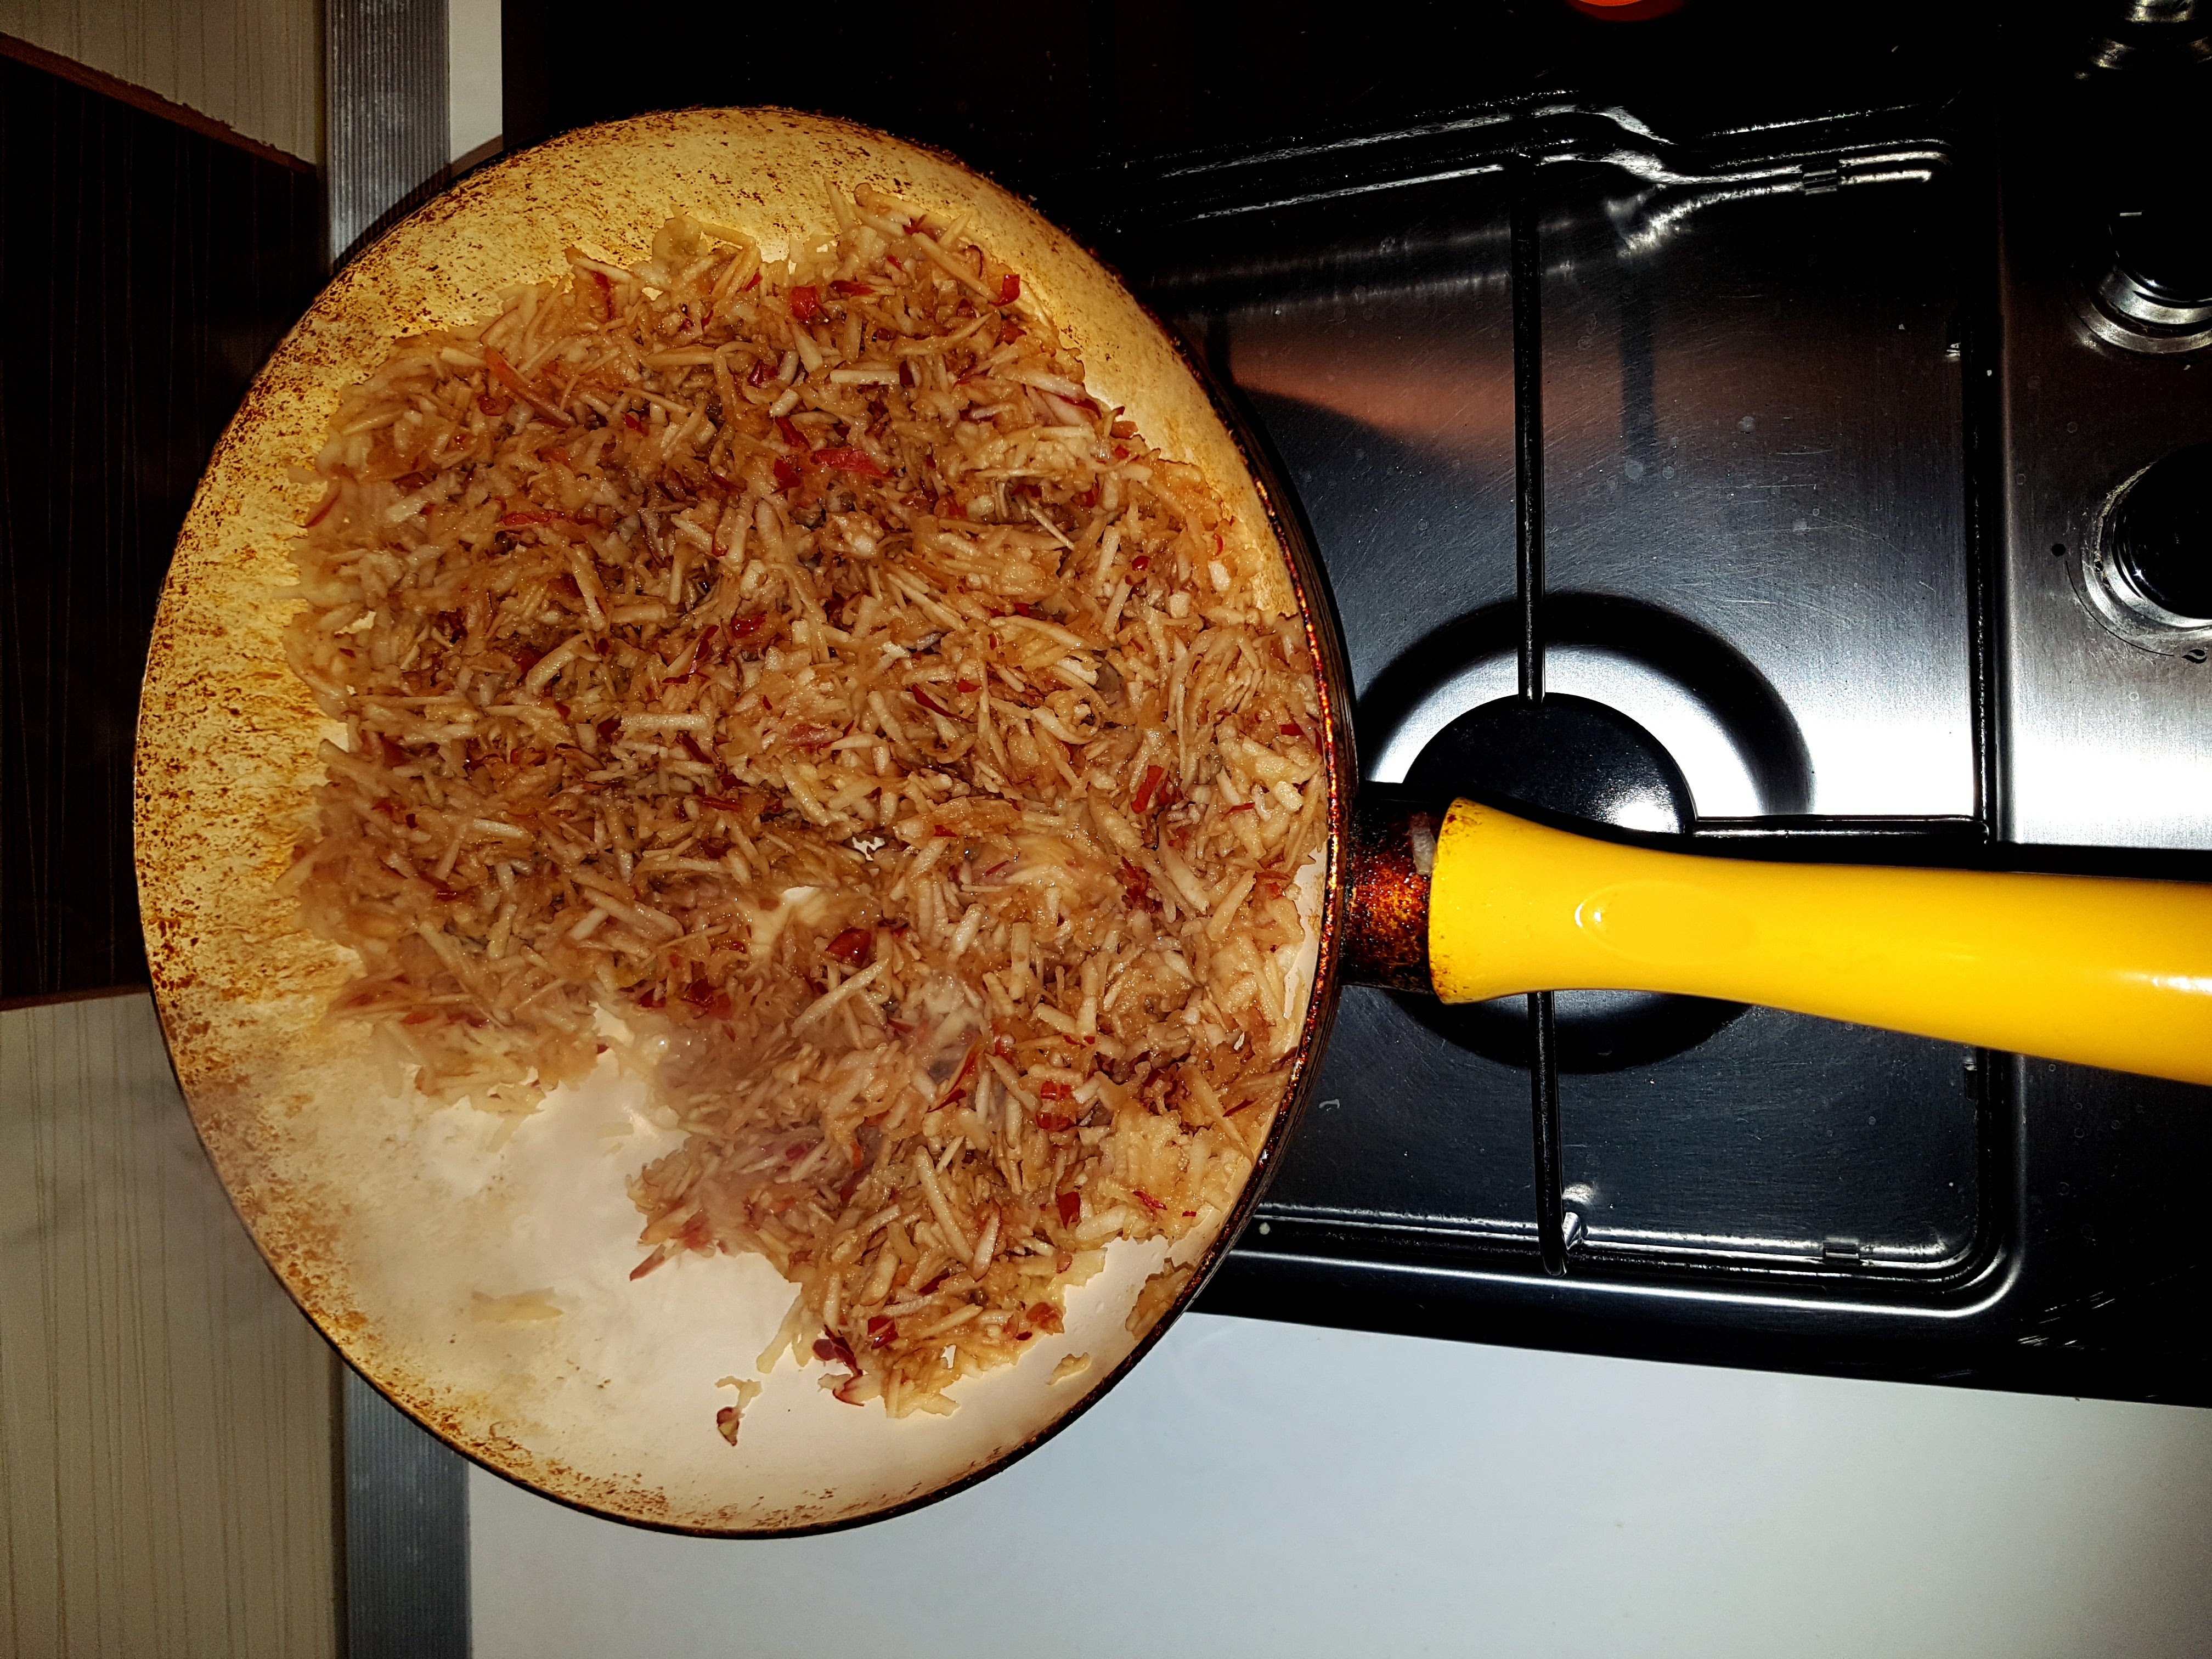
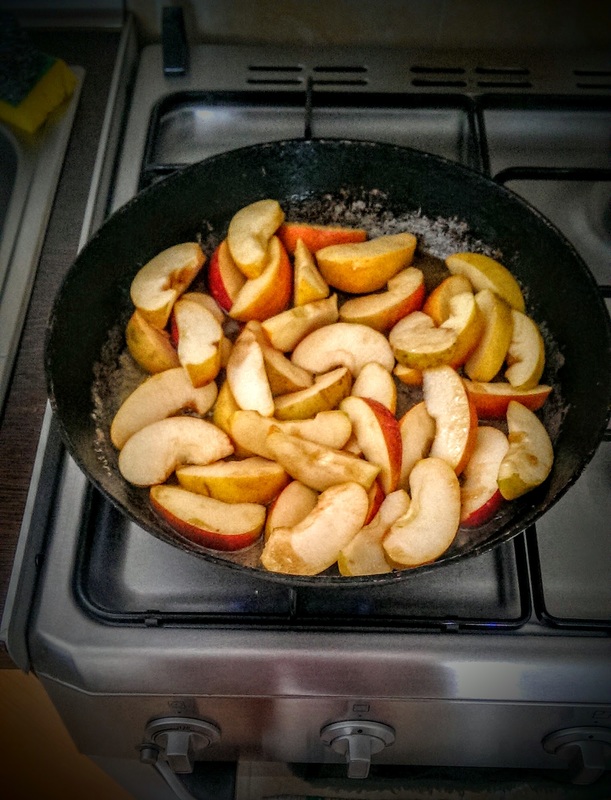
Odata compozitia pregatita, asezam tava pe aragaz, adaugam untul si zaharul brun si le lasam sa se caramelizeze usor, la foc mediu. Adaugam apoi merele si stropim cu putin otet de mere, pentru ca merele sa isi pastreze culoarea. Le caramelizam pana cand devin usor aurii si putin moi. Cand au fost gata, am aranjat feliile de mere, astfel incat sa acopere fundul tavii iar la final am adaugat deasupra compozitia de tarta si am introdus totul la cuptorul incins pentru cca. 15 min la foc mic. SFAT: Atunci cand coacem o compozitie cu praf de copt ca agent de crestere, ideal este sa incingem cuptorul la cea mai mare temperatura inca din timpul pregatirilor, iar cand tava este gata de dat la cuptor, temperatura sa fie coborata la nivelul mic. Un 'soc termic' de acest tip va face compozitia sa se ridice frumos. Desigur, trebuie sa rezistam tentatie de a deschide usa cuptorului, pentru cele mai bune rezultate. P.S.: De asta exista geamul cuptorului. ------------------------------------------------------------------------------ Once your mixture is ready, we need to set our baking tray on the stove, at medium heat; then add butter and brown sugar and let them slightly caramelize. Then add the apples slices and a splash of apple viengar, so that they keep their nice colours. Caramelize the apple slices for until they're slightly golden and soften just a tiny bit. When they're ready, arrange your apple slices so that they cover the entire bottom of the tray and, at the end, just pour your mixture right on top of the apple slices. Pop this in to the pre-heated oven for about 15 minutes at low heat. ADVICE: Whenever baking a mixture based on baking soda, ideally, we should set the oven at highest temperature and let it get really heated while still making all needed preparation for baking. When the tray is ready to go into the oven, lower the temperature to lowest level. A thermic shock of this kind will make your batter rise nicely. And sure, you absolutely need to resist all temptation to open up your oven door while baking, for achieving the very best results. P.S.: That's why there's a window on your oven.
Dupa ce am scos-o din cuptor, o lasam sa se raceasca putin, cat sa putem atinge marginile tavii, iar apoi o rasturnam pe un platou generos. Sau direct pe un blat de bucatarie, daca sunteti la fel de indecise/indecisi ca mine, si nu va puteti hotari ce platou sa va alegeti. ------------------------------------------------------------------------------ After it's out of the oven, we need to let it cool just a tiny bit, so that we can touch the edges of the tray, and then we need to switch it up on a nice platter or just a plain chopping board, if you're anything like me and cannot decide on which platter to buy if it saved your life.  Asta a iesit, vreo 30 min mai tarziu. Stanjenitor de simplu.
------------------------------------------------------------------------------ This is what came out of it, some 30 min. later. Embarrasingly easy. ------------------------------------------------------------------------------ TRY SEXUAL I'LL TRY ANY RECIPE (AT LEAST) ONCE. |
Author"I'm a TRYsexual. I'll try anything once!" (Sam Jones, SATC) Archives
February 2017
Categories
All
|


 RSS Feed
